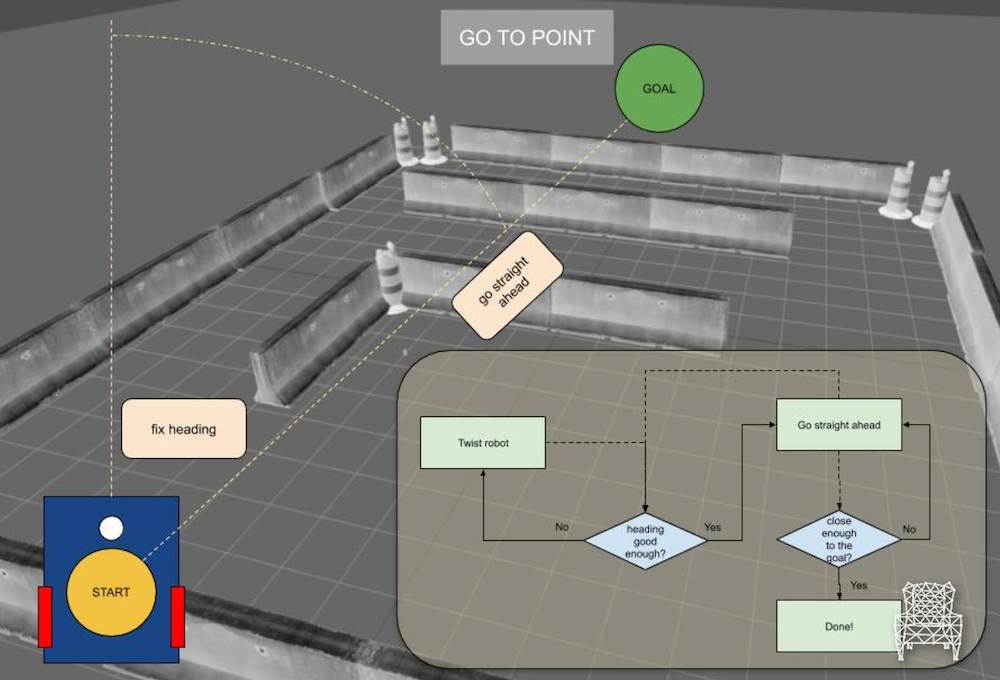
In this video, we’re going to compare our Mecanum Wheels to the simpler Diff Drive robot by using the standard “go to point” motion planning algorithm and an improved one
You will learn
Understand better the broad range of possibilities of mecanum wheels
Hey ROS developers! In this post, we start working on our own robotic manipulator. Based on the YouTube video series, we’ll show in this format the steps to achieve the final result of the series!
In this post number #1, I’m gonna show how to create the basic Unified Robot Description Format – URDF (the first two links) and visualize it in RViz!
Step 1 – Creating a package
I have here a fresh new ROSJect (which will be shared at the end of the post). Let’s start creating a package that will contain our robot description.
In a shell, execute the following command:
catkin_create_pkg mrm_description urdf
Now, we create a new folder, ~/simulation_ws/src/mrm_description/urdf, where we are gonna place the file mrm.xacro
XACRO files are “XML macros”, used to simplify URDF description.
Step 2 – Describing the robot
In order to create our robot, we must divide it into links and joints. This is what we are gonna do in our file.
Structure
The mandatory structure begins like:
<?xml version="1.0" ?>

<robot name="mrm" xlmns:xacro="http://www.ros.org/wiki/xacro">

  ...
  ... here goes the robot description
  ...

</robot>
First link
Let’s describe the first link, the base of the robot, it goes like this:
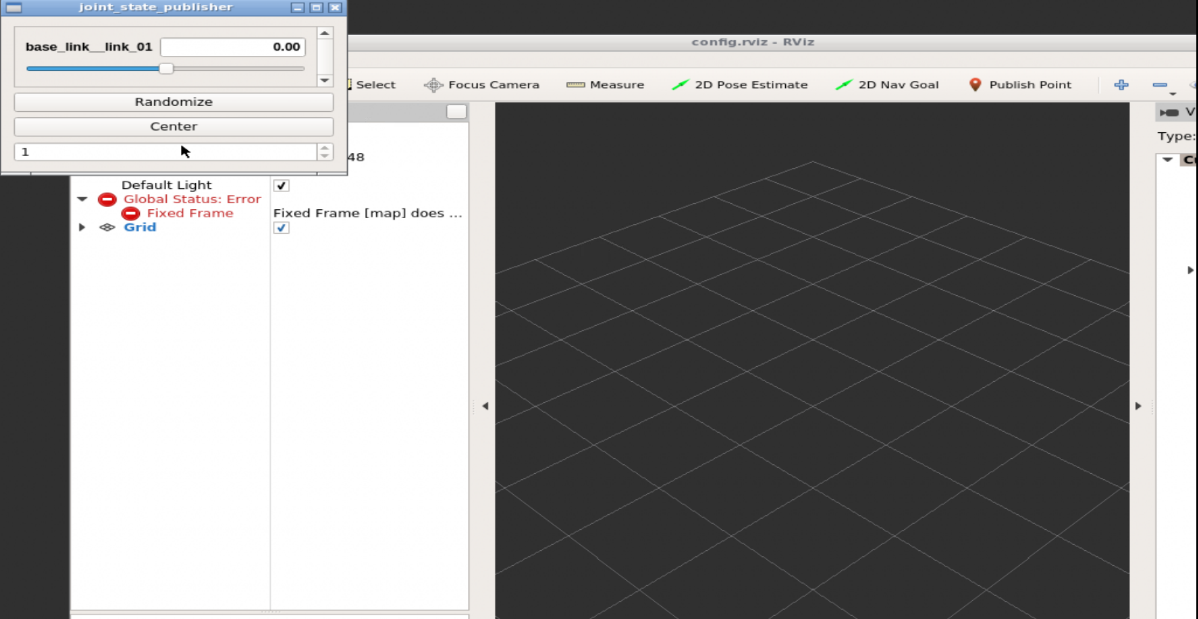
You can try launching it again to make sure the configurations we’ve just set will be loaded!
You can also play with the second window, the joint_state_publisher, in order to see the only movable joint changing position. Just drag the bar to left or right.
Related courses
URDF for Robot Modeling
ROS Manipulation
ROS for Industrial Robots
Conclusion
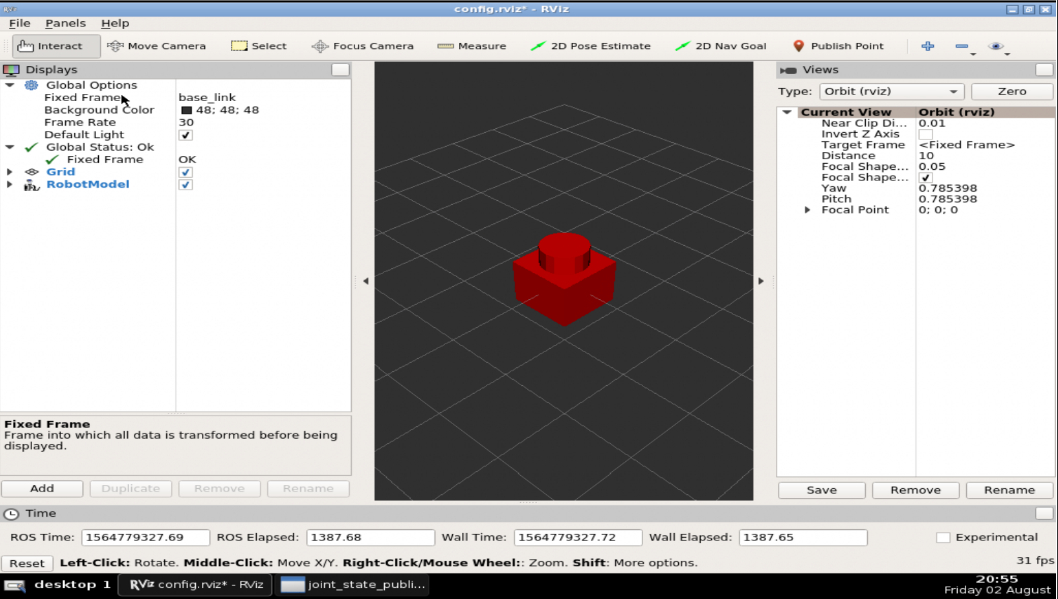
We have created the visual part of the robot!
In the next post, we’ll finish the other parts (link and joints) using XACROs, to make it simpler!
If you lost any part of the tutorial, you can get a copy of the ROSject I’ve done clicking here!
The ROSject contains the code of the following git: WhyDoINeedThis
Start the provided ROSject
The first thing you need to do is to copy the ROSject aforementioned. Click on the link to get an automatic copy.
Launch the ROSject
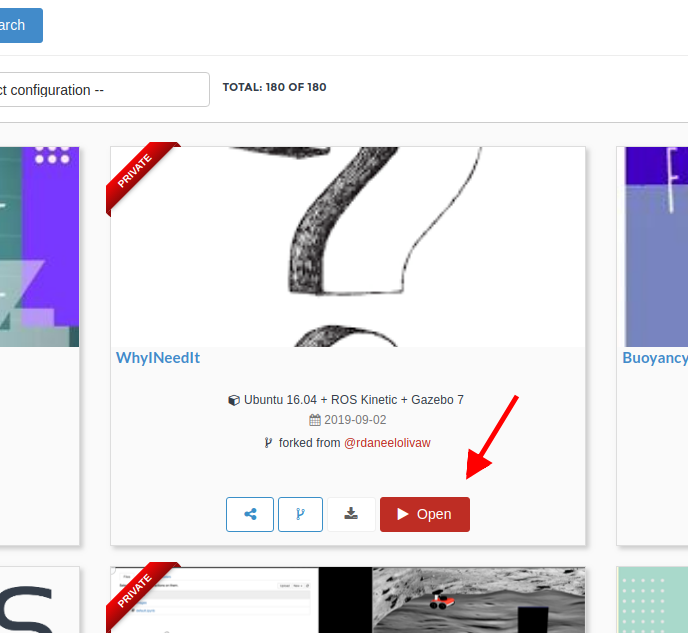
To launch the copied ROSject, go to your ROSDS account and click on the Open button of the copied rosject (see image below). Remember that the rosject you have to open is called WhyINeedIt.
why_python_Classes_rosject
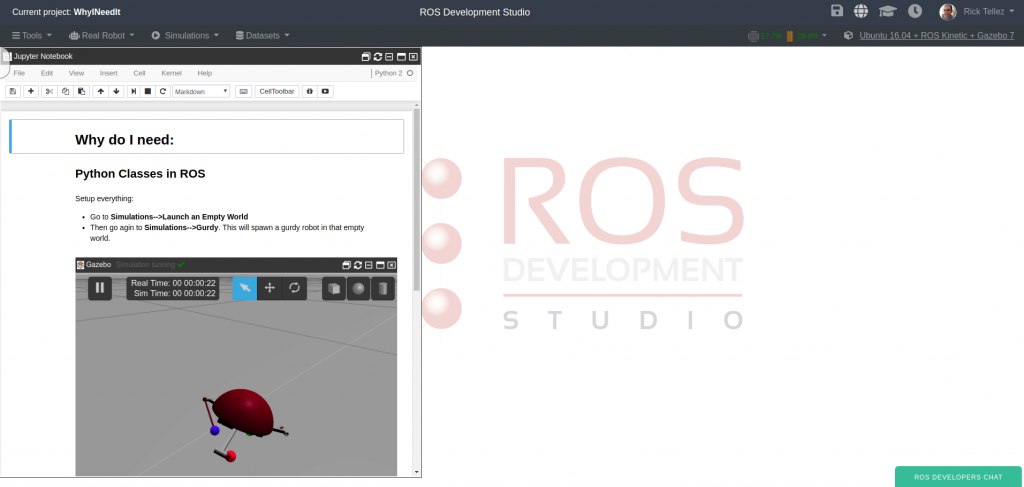
Once the rosject is open, you must see a screen like this:
python_rosject_open
At this point, you have succeeded in launching the ROSject.
Launch the simulation
Let’s launch a simulation because we want a python class that detects when the robot is upside down. For that, let’s do the following:
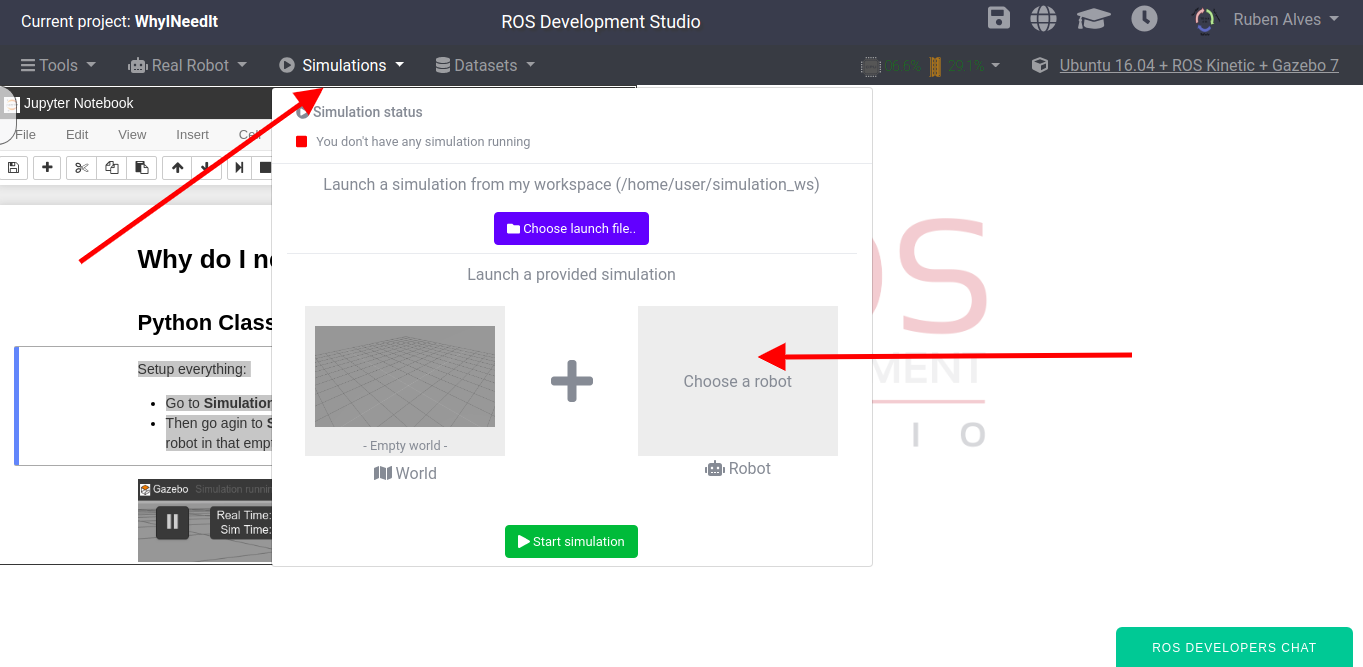
Go to Simulations, then with the default empty world on the left, let’s click Choose a robot on the right side, as shown in the image below:
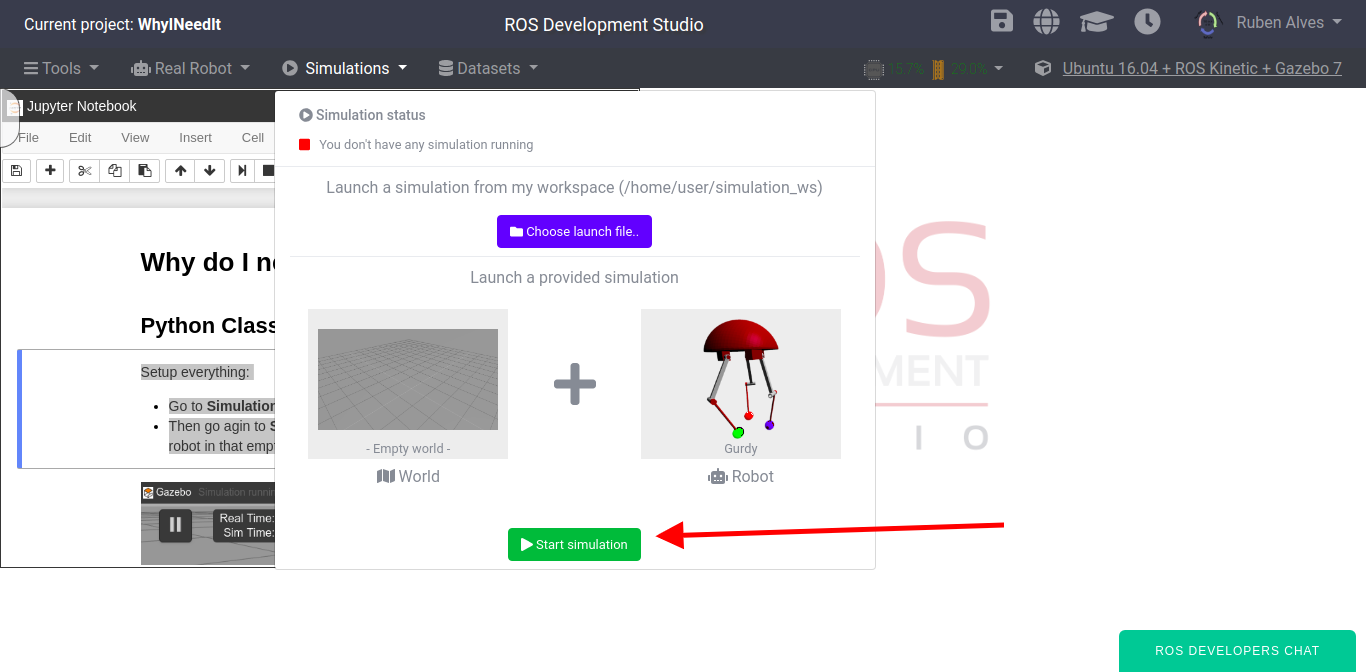
After that, you can type “gurdy” or try to find the Gurdy robot by using the scroll bar. Once the robot is selected, you just click Start Simulation.
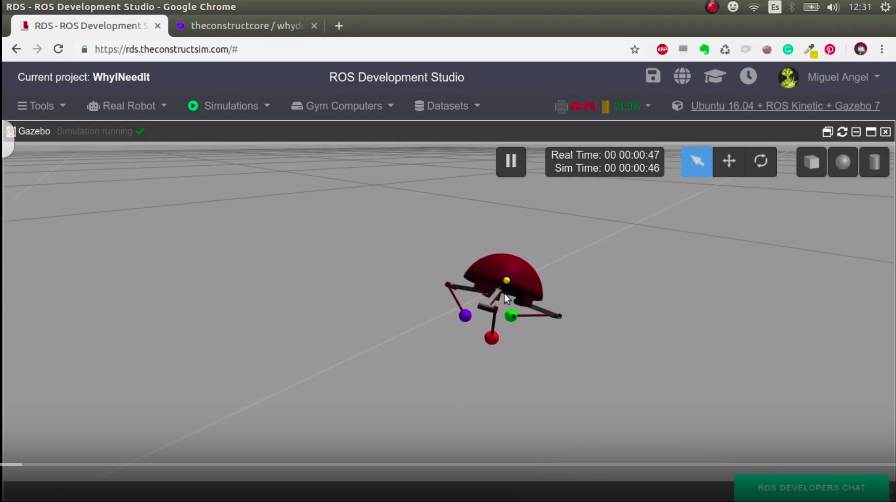
You now should see the simulation of the Gurdy robot as in the image below:
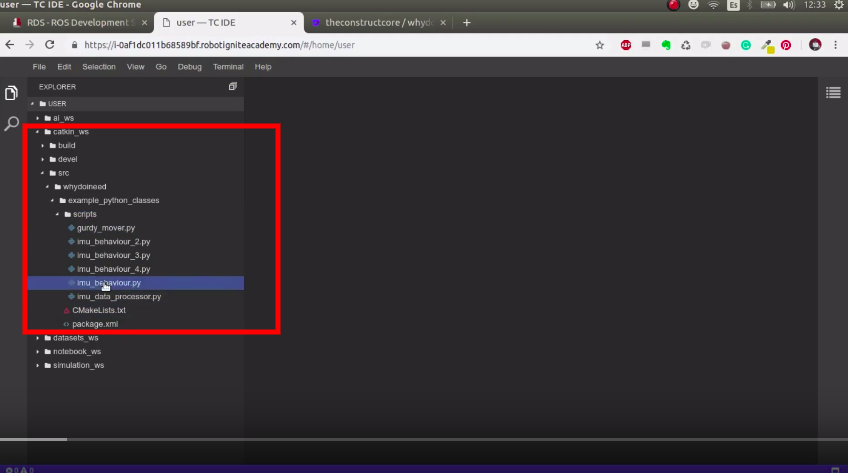
Finding the python code
The code used in this post can be found at ~/catkin_ws/src/. You can see the content with:
cd ~/catkin_ws/src/

ls
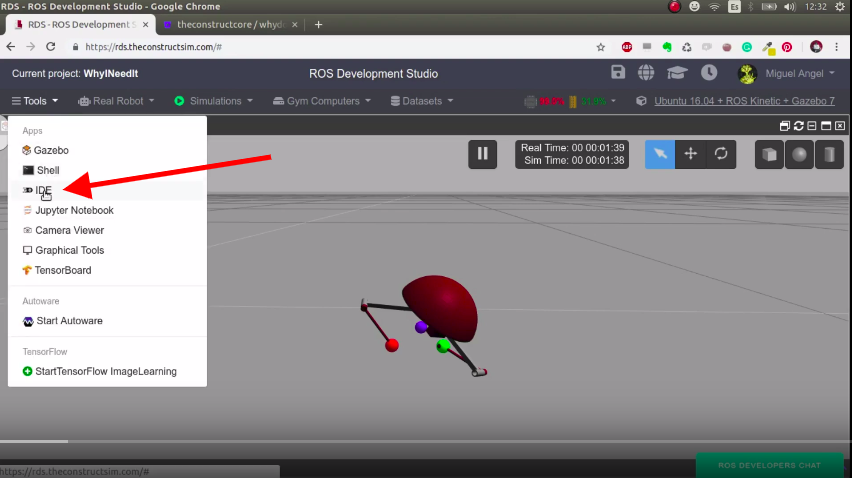
You can also find the code through the Code Editor. For that, let’s click Tools -> IDE as can be seen on the image below:
Once the IDE is open, we can find all the code that will be used to control the robot inside the catkin_ws folder (catkin workspace).
Detecting when the robot is upside down
In order to detect when the robot is upside down, we have to use the imu topic, which publishes the robot orientation. We can find the topic with the command rostopic list | grep imu :
user:~$ rostopic list | grep imu
/gurdy/imu/data
We see that the topic is named /gurdy/imu/data. We can see what is being published in this topic with rostopic echo -n1 /gurdy/imu/data , as exemplified below:
In the output above, we are more interested in the orientation, because is what tells us whether the robot is upside down or not.
In order to detect when the robot is upside down, we execute the imu_behaviour.py found on the catkin_ws with the command below:
rosrun example_python_classes imu_behaviour.py
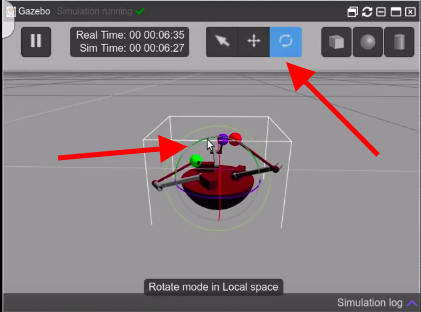
By manually turning the robot upside down, we can see in the output of this script that it correctly detects when that happens. In order to move the robot upside down, on gzweb (the simulation interface), you click on the “Rotate Mode“, then you rotate one of the arcs. In the example below, we rotate the green arc.
Gurdy upside down on ROSDS
Moving the robot to the right orientation automatically
When we detect that the robot is upside down, we have to move its legs, so that the robot can move back to the right position. The ROS topics we have to write to are 6 and can be found with rostopic list | grep command .
We have the script called imu_behaviour_2.py which automatically detects when the robot is upside down and publish on the topics listed above to have the robot back to normal position. The content of the file is the following:
The magic happens on the function get_imu_data shown above. Based on the position of the robot it decides which movement is going to be executed. We can execute the script with the command below:
rosrun example_python_classes imu_behaviour_2.py
With the command above running, if we now flip the robot around, it will automatically recover its position.
Optimizing the code
Although the imu_behaviour_2.py does the job it is proposed, everything is in a single file and publishers are created every time the execute_movement_gurdy function is called by the get_imu_data one. In addition to that, if we are working on a big project, it is better to have some people working on detecting when the robot is upside down, other people detecting on flipping the robot, so on and so forth.
To make this possible, it is better to have different python files, each one with its different class. We do that by creating the
GurdyBehaviour class on imu_behaviour_3.py, GurdyImuDataProcessor on imu_data_processor.py and
gurdyJointMover on gurdy_mover.py. With this structure, we could have different people working in each of the classes, having the Single Responsibility Principle.
With the classes split into different files, our code is easier to maintain. Please have a look at the different files to better understand the code and how to interacts with the robot.
You can test each script at a time. The more “optimized” version of our script is found on imu_behaviour_4.py which can be executed with:
rosrun example_python_classes imu_behaviour_4.py
So, that is the post of today. We hope you guys liked it. If so, please share this post with your friends.
Video with the explanation of this post
Remember that we also have a live version of this post, which can be found on the video below:
If you liked the video and the post, please leave your thoughts on the comments section of the video. You can also subscribe to our channel on YouTube and press the bell for a new video every day.
Did you like this video? Do you have questions about what is explained? Whatever the case, please leave a comment on the comments section below, so we can interact and learn from each other.
If you want to learn about other ROS topics, please let us know on the comments area and we will do a video about it 🙂
In the post, you will learn how to create a C++ subscriber to a custom msg array published with Python publisher. This answers the following question on the ROS Answers forum: https://answers.ros.org/question/324325/how-to-use-c-subscribe-to-a-custom-msg-array-published-by-python/.
Use the ROS Development Studio (ROSDS), an online platform for developing for ROS within a PC browser. Easy-peasy. I’m using this option for this post.
Once you log in, click on the New ROSject button to create a project that will host your code. Then Click on Open ROSject to launch the development/simulation environment.
To open a “terminal” on ROSDS, pick the Shellapp from the Tools menu.
You can find the IDE app on the Tools menu.
You have ROS installed on a local PC. Okay, skip to Step 2.
Next step!
Step 1: Create the custom messages
Err, not so fast! We need to create a package first. So, open a terminate, browse to your catkin workspace source directory and create the package and some of the files we will need for the custom messages. Note that when creating the package, we added both rospy and roscpp because we will be working with C++ and Python source codes.
cd ~/catkin_ws/src
catkin_create_pkg cpp_python roscpp rospy
cd cpp_python
mkdir -p msg
touch InfoData.msg
touch InfoDataArray.msg
Now open the IDE and locate the open both message files in the msg subdirectory of the package. In InfoData.msg, paste in the following:
int32 num
string color
string name
Put this in InfoDataArray.msg:
InfoData[] infos
Add the following lines to your CMakeLists.txt and package.xml in order to recognize the custom messages:
CMakeLists.txt:
1. Find the existing add_message_files directive, uncomment it, and change it to the following:
# make sure you run this from the root of your catkin workspace (e.g catkin_ws)
catkin_make
Source the workspace:
# make sure you run this from the root of your catkin workspace (e.g catkin_ws)
source devel/setup.bash
Step 2: Create the Python publisher node
Create a python file in the src folder and make it executable
roscd cpp_python
cd src
touch infodata_publisher.py
chmod +x infodata_publisher.py
Using the IDE, paste in the following code
#! /usr/bin/env python

import rospy # import the ros Python api
from cpp_python.msg import InfoData, InfoDataArray # import the custom messages

rospy.init_node('infodata_publisher_node') # create a node to run the publisher
pub = rospy.Publisher('/infodata', InfoDataArray, queue_size=1) # create the publisher
rate = rospy.Rate(1) # create a rate (per second) for publishing
infodata = InfoData() # create the infodata message
infodata_array = InfoDataArray() # create the infodata array
# set the variables of the info data message
infodata.num = 5
infodata.color = 'red'
infodata.name = 'data1'

# push several infodata messages into the info data array
for x in range(10):
    infodata_array.infos.append(infodata)

# continously publish the infodata array at the rate specified
# until someone stops the node
while not rospy.is_shutdown():
  pub.publish(infodata_array.infos)
  rate.sleep()
Step 3: Create the C++ subscriber node
Create a C++ file in the src folder
roscd cpp_python
cd src
touch infodata_subscriber.cpp
Locate the file in the IDE and paste in the following code:
// Import the infodata messaages
#include <cpp_python/InfoData.h>
#include <cpp_python/InfoDataArray.h>
#include <ros/ros.h> // import the ros C++ api

// the function that takes the message from the subscriber and does
// something with it
void infodataCallback(const cpp_python::InfoDataArray::ConstPtr &msg) {
  ROS_INFO("%d", msg->infos[0].num);
  ROS_INFO("%s", msg->infos[0].color.c_str());
  ROS_INFO("%s", msg->infos[0].name.c_str());
}

int main(int argc, char **argv) {
  // create a node for running the subscriber
  ros::init(argc, argv, "infodata_subscriber_node");
  ros::NodeHandle nh;

  // create the subscriber
  ros::Subscriber sub = nh.subscribe("/infodata", 1000, infodataCallback);

  // Run the subscriber until someone stops the program with Ctrl + C
  ros::spin();

  return 0;
}
Add the following lines to CMakeLists.txt, under the Build section, so the C++ can be compiled:
# make sure you run this from the root of your catkin workspace (e.g catkin_ws)
catkin_make
Step 4: Run the Python publisher node
# make sure you run this from the root of your catkin workspace (e.g catkin_ws)
source devel/setup.bash
nohup roscore &
rosrun cpp_python infodata_publisher.py
Nothing is happening? Nah, wait until we launch the subscriber! So, then, let’s do it!
So that was it! That’s how to create a C++ subscriber for a Python publisher node.
Extra: Video of this post
We made a video showing how we solved this challenge. If you prefer “sights and sounds” to “black and white”, here you go:
Feedback
Did you like this post? Do you have any questions about the explanations? Whatever the case, please leave a comment on the comments section below, so we can interact and learn from each other.
If you want to learn about other ROS or ROS2 topics, please let us know in the comments area and we will do a video or post about it.
Edited by Bayode Aderinola
Want to play with the complete code right away? You can get a copy of the ROSject at the link below (requires an account on ROSDS).
Open the Motor.action file in IDE and write the following content to it.
# This is an action definition file, which has three parts: the goal
# the result, and the feedback.
# Part 1: the goal.
#
# The angle in degree the robot to turn, sent by client main
float64 angle
---
# Part 2: the result, sent by action server unpon completion
#
# How much time used
duration time_elapsed
# How many updates thrown in total
uint32 updates_n
---
# Part 3: the feedback,to be sent periodically by server
#
# The amount of time elapsed from the start
duration time_elapsed
The contents of Motor.action defines variables of three categories. The categories are separated by — lines. The first category of variables are related to GOAL, second is related to RESULT and third are related to the FEEDBACK. Here we have the following variable in different categories: angle for GOAL, time_elapsed, updates_n for RESULT and time_elapsed for FEEDBACK.
Now we have to add the directive to compile action file in CMakeLists.txt file. This file is inside our package directory i.e. ~/catkin_ws/src/turtlebot3_console_controller. Open the CMakeLists.txt file in IDE
Add the following code block
add_action_files(
FILES
Motor.action
)
Also, add this code block
generate_messages(
DEPENDENCIES
actionlib_msgs
)
Let’s compile the project. Run following commands in the SHELL
$ cd ~/catkin_ws
$ catkin_make
To test if the action file works we will create a script name node.py inside a new directory within the package. Use the following commands in SHELL
$ cd ~/catkin_ws/src/turtlebot3_console_controller
$ mkdir src
$ touch node.py
To create the directory and file we can use IDE tool as well. Let’s add the following code to the node.py file
from turtlebot3_console_controller.msg import MotorGoal, MotorResult, MotorFeedback

print("OK, it worked!!!")
Let’s run the above script. Enter the following commands in the SHELL
$ cd ~/catkin_ws/src/turtlebot3_console_controller/src
$ ./node.py
After running the above command you should see the reply OK, it worked!!! in the next line.
And that’s it. We have created a basic action message and verified it works.
![[Robot Modeling] Comparing Mecanum Wheels with Diff Drive robots – Ep.4](https://www.theconstruct.ai/wp-content/uploads/2019/08/MECANUM-WHEELS-vs.-DIFF-DRIVE-ROBOTS-.png)


![[ROS Q&A] 191 – How to load a pre-built map into ROS for the Navigation Stack](https://www.theconstruct.ai/wp-content/uploads/2019/06/ROS-QA-191-How-to-load-a-pre-built-map-into-ROS-for-the-Navigation-Stack.jpg)
![[ROS Q&A] 190 – How to subscribe with a C++ subscriber to a custom msg array published with a Python publisher](https://www.theconstruct.ai/wp-content/uploads/2019/05/How-to-subscribe-with-C-to-a-custom-msg-array-published-with-Python.jpg)
![[ROS Q&A] 189 – How to create a custom action message](https://www.theconstruct.ai/wp-content/uploads/2019/05/custom-action-message-for-ROS-Actions.jpg)