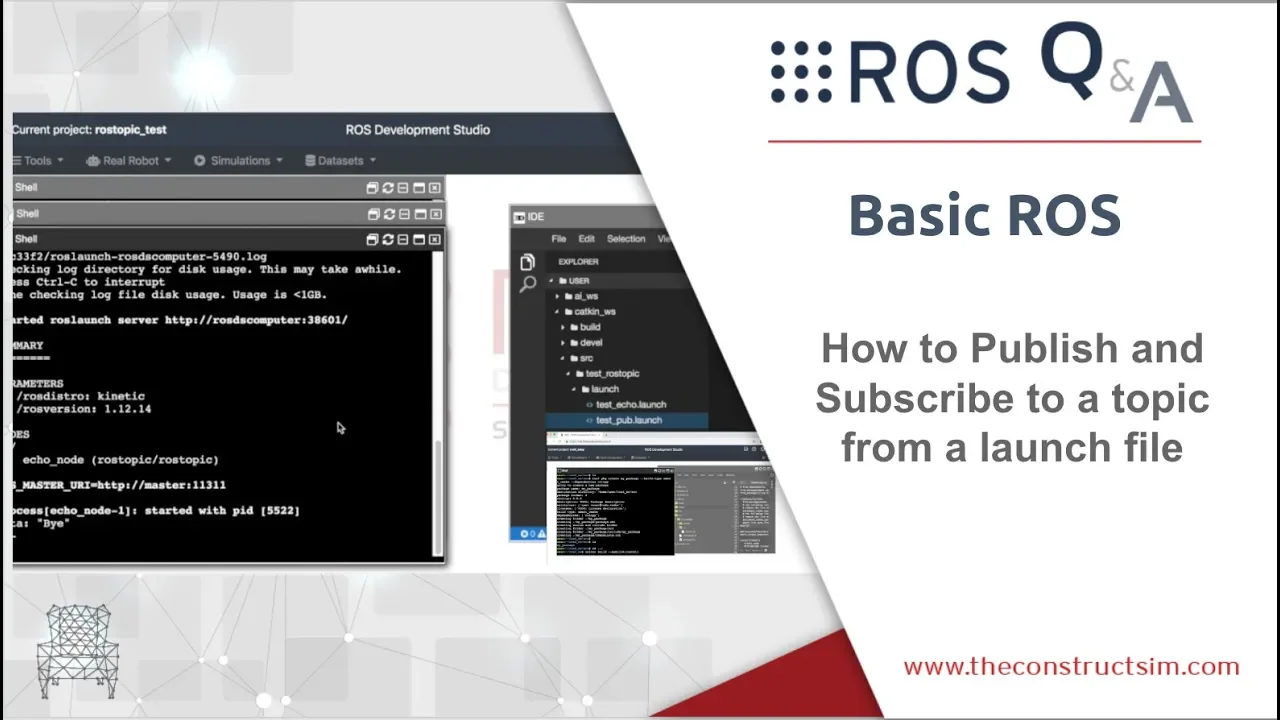
In this post, you will learn how to publish and subscribe to a topic from a launch file. This post is a response to this question posted on Gazebo Answers.
Step 1: Fire up a system with ROS installation
“Hey, do you mean I have to install ROS first?” Absolutely not! Just log in to The Construct to get access to virtual machines pre-installed with ROS.
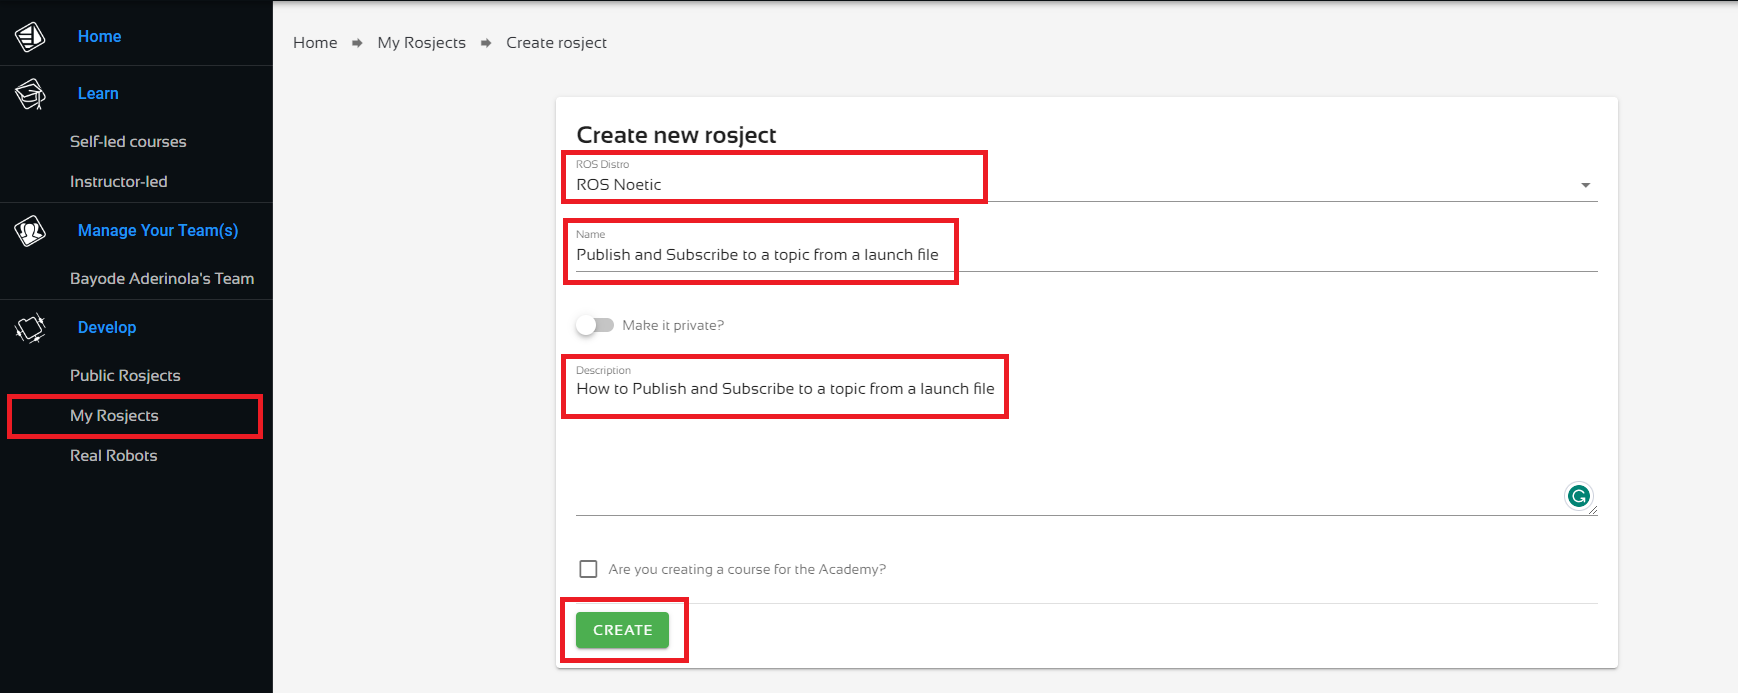
Once logged in, click on My Rosjects, then Create a New Rosject, supply the information as shown in the image below, and click Create. Then RUN the rosject.
Create a new Rosject
You might also want to try this on a local PC if you have ROS installed. However, please note that we don’t support local PCs and you will have to fix any errors you run into on your own. The rest of the instruction assumes that you are working on The Construct; please adapt them to your local PC and ROS installation.
PS: we are using ROS Noetic. You should be able to replicate the same on any ROS 1 distro.
Step 2: Create a package to demonstrate how to publish and subscribe to a topic from a launch file
Open a web shell
Open a web shell and run the following commands to create the package.
cd catkin_ws/src
source /opt/ros/noetic/setup.bash
catkin_create_pkg test_rostopic
Next, we create the launch directory and the launch files.
cd test_rostopic
mkdir launch
cd launch
touch test_pub.launch
touch test_echo.launch
Nice done! Now head over to the Code Editor to make changes to the launch files. Check the image below for how to open the Code Editor.
Open the Code Editor
Locate the launch folder in the code editor: catkin_ws > src > test_rostopic > launch and open the two launch files.
Paste the following lines into the test_pub.launch file. This is equivalent to rostopic pub /test_topic std_msgs/String "data: 'Hello there!'"
cd ~/catkin_ws
catkin_make
source devel/setup.bash
Success! We’ll test it in the next step.
PS: if your code did not compile correctly, please go over the instructions and ensure you have created the files in the exact locations specified.
Step 3: Test the package to demonstrate how to publish and subscribe to a topic from a launch file
Start the test_pub.launch file in the current terminal.
roslaunch test_rostopic test_pub.launch
When done, open another terminal and run the test_echo.launch file.
roslaunch test_rostopic test_echo.launch
Now you should see something similar to the following on the terminal where test_echo.launch is running:
process[rostopic_echo_node-1]: started with pid [xxxx]
data: "Hello there!"
---
Sweet! So we are able to publish with one launch file and echo what we publish in another launch file. And…we are done here, congrats!
Take home: try combining both into a single launch file. After trying, check the solution in this gist.
Step 4: Check your learning
Do you understand how to publish and subscribe to a topic from a launch file? If you don’t know it yet, please go over the post again, more carefully this time.
(Extra) Step 5: Watch the video to understand how to publish and subscribe to a topic from a launch file
Here you go:
Feedback
Did you like this post? Do you have any questions about how to publish and subscribe to a topic from a launch file? Please leave a comment in the comments section below, so we can interact and learn from each other.
If you want to learn about other ROS topics, please let us know in the comments area and we will do a video or post about it.
“Hey, do you mean I have to install ROS first?” Absolutely not! Just log in to The Construct to get access to virtual machines pre-installed with ROS.
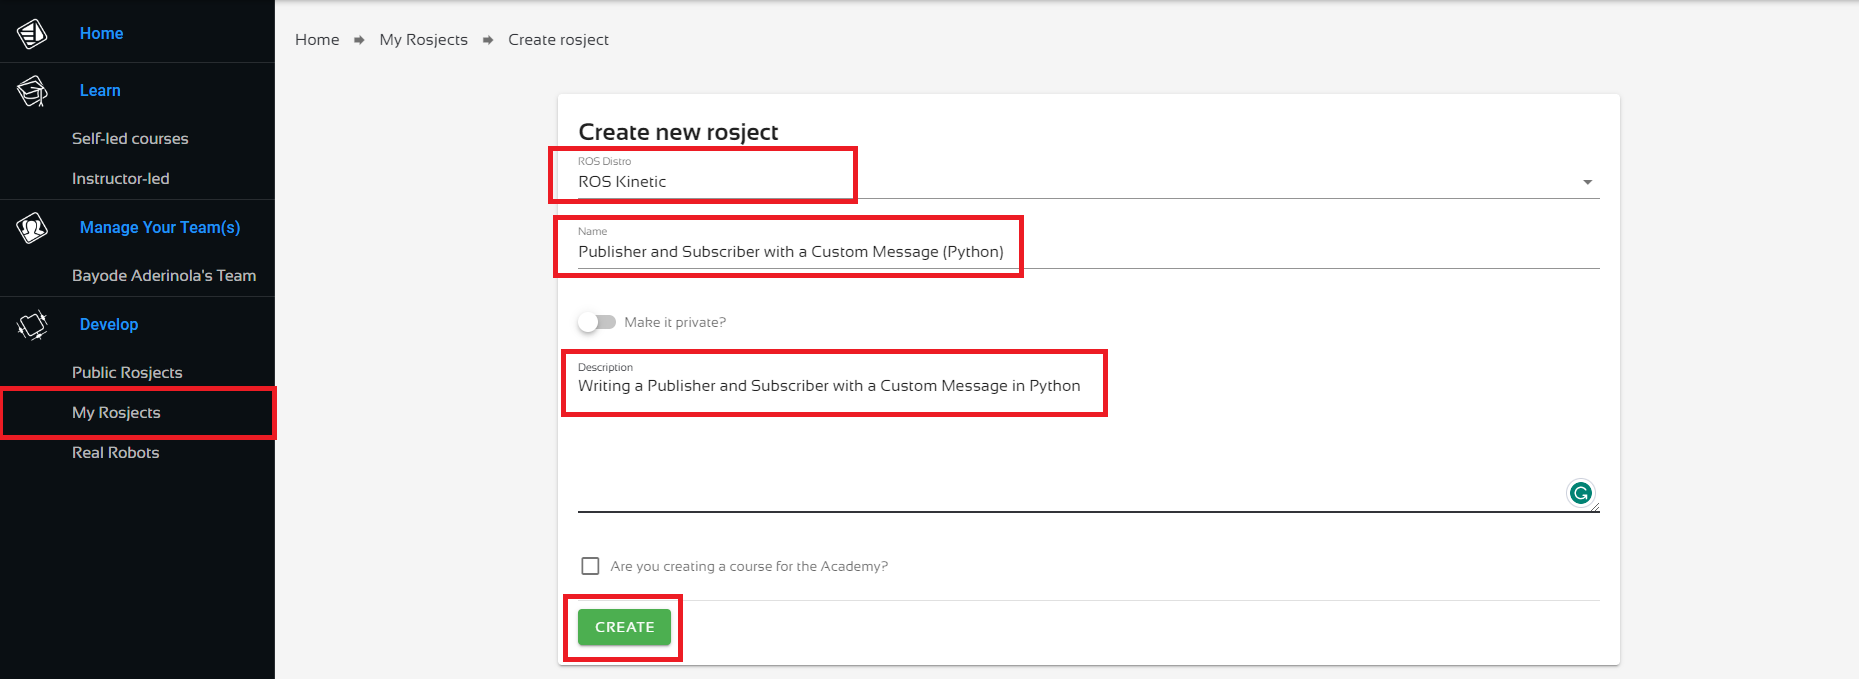
Once logged in, click on My Rosjects, then Create a New Rosject, supply the information as shown in the image below, and click Create. Then RUN the rosject.
Create a new Rosject
You might also want to try this on a local PC if you have ROS installed. However, please note that we don’t support local PCs and you will have to fix any errors you run into on your own. The rest of the instruction assumes that you are working on The Construct; please adapt them to your local PC and ROS installation.
PS:
We are using ROS Kinetic here because that’s what the user on ROS Answers used.
We could put the publisher and the subscriber in a single package, but we’ll create two packages as the user did.
We could put the custom message in any of the two packages, but we’ll put it in the subscriber, just like the user.
Step 2: Create the first package that contains the subscriber and the custom message
Open a web shell
Create the package and custom message
Open a web shell and run the following commands to create the package. When creating a custom message, you need extra dependencies message_generation and message_runtime, in addition to the main ROS API, rospy (for Python) in this case, and the types needed for the message, in this case std_msgs.
cd catkin_ws/src
source /opt/ros/kinetic/setup.bash
catkin_create_pkg quadrotor_receive rospy std_msgs message_generation message_runtime
Next, we create the message file, Person.msg. Run the following command in the same terminal you just used.
cd quadrotor_receive
mkdir msg
cd msg
touch Person.msg
Nice done! Now head over to the Code Editor to make changes to the Person.msg file. Check the image below for how to open the Code Editor.
Open the Code Editor
Locate the file in the code editor: catkin_ws > src > quadrotor_receive > msg > Person.msg and paste in the following code.
string name
int32 age
Edit package files
Replace CMakeLists.txt with the one below (where the following changes have been made).
Removed message_runtime from the find_package function.
Uncommented the add_message_files function, and added Person.msg below FILES.
Uncommented the generate_messages function, and left it intact.
Uncommented the line CATKIN_DEPENDS in the catkin_package function.
Removed all commented lines to keep the file short and sweet.
cmake_minimum_required(VERSION 3.0.2)
project(quadrotor_receive)

## Find catkin macros and libraries
## if COMPONENTS list like find_package(catkin REQUIRED COMPONENTS xyz)
## is used, also find other catkin packages
find_package(catkin REQUIRED COMPONENTS
  message_runtime
  rospy
  std_msgs
)

## Generate messages in the 'msg' folder
add_message_files(
  FILES
  Person.msg
  # Message2.msg
)

## Generate added messages and services with any dependencies listed here
generate_messages(
  DEPENDENCIES
  std_msgs
)

###################################
## catkin specific configuration ##
###################################
## The catkin_package macro generates cmake config files for your package
## Declare things to be passed to dependent projects
## INCLUDE_DIRS: uncomment this if your package contains header files
## LIBRARIES: libraries you create in this project that dependent projects also need
## CATKIN_DEPENDS: catkin_packages dependent projects also need
## DEPENDS: system dependencies of this project that dependent projects also need
catkin_package(
#  INCLUDE_DIRS include
#  LIBRARIES quadrotor_receive
CATKIN_DEPENDS message_generation message_runtime rospy std_msgs
#  DEPENDS system_lib
)

###########
## Build ##
###########

## Specify additional locations of header files
## Your package locations should be listed before other locations
include_directories(
# include
  ${catkin_INCLUDE_DIRS}
)
Next, add a single line to package.xml so that it looks like the one below. Can you identify the line that was added?
<?xml version="1.0"?>
<package format="2">
  <name>quadrotor_receive</name>
  <version>0.0.0</version>
  <description>The quadrotor_receive package</description>

  <!-- One maintainer tag required, multiple allowed, one person per tag -->
  <!-- Example:  -->
  <!-- <maintainer email="jane.doe@example.com">Jane Doe</maintainer> -->
  <maintainer email="user@todo.todo">user</maintainer>


  <!-- One license tag required, multiple allowed, one license per tag -->
  <!-- Commonly used license strings: -->
  <!--   BSD, MIT, Boost Software License, GPLv2, GPLv3, LGPLv2.1, LGPLv3 -->
  <license>TODO</license>

  <!--   <doc_depend>doxygen</doc_depend> -->
  <buildtool_depend>catkin</buildtool_depend>
  <build_depend>message_generation</build_depend>
  <build_depend>rospy</build_depend>
  <build_depend>std_msgs</build_depend>
  <build_export_depend>rospy</build_export_depend>
  <build_export_depend>std_msgs</build_export_depend>
  <build_export_depend>message_generation</build_export_depend>
  <exec_depend>message_runtime</exec_depend>
  <exec_depend>rospy</exec_depend>
  <exec_depend>std_msgs</exec_depend>


  <!-- The export tag contains other, unspecified, tags -->
  <export>
    <!-- Other tools can request additional information be placed here -->

  </export>
</package>
Finally, let’s create the receiver Python node, just as the ROS Answers user created it. Run the following in the same terminal as before. Notice that we’re making the Python script executable.
cd ~/catkin_ws/src/quadrotor_receive/src
touch custom_listener.py
chmod +x custom_listener.py
Open custom_listener.py in the IDE and paste in the following code.
#!/usr/bin/env python

import rospy
from quadrotor_receive.msg import Person

def callback(data):
    rospy.loginfo("%s is age: %d" % (data.name, data.age))

def listener():

    rospy.init_node('custom_listener', anonymous=True)
    rospy.Subscriber("custom_chatter", Person , callback)

    # spin() simply keeps python from exiting until this node is stopped
    rospy.spin()

if __name__=='__main__':
    listener()
So much for all the hard work – let’s see if it works. Time to compile the code. In the same web shell, run the following commands:
Compile and test
cd ~/catkin_ws
catkin_make
source devel/setup.bash
Success! We have successfully created a package with a custom message. Let’s see if we can find the message. You should get an output similar to the one below.
user:~/catkin_ws$ rosmsg show quadrotor_receive/Person
string name
int32 age
Let’s also test receiver node at this point. Though there’s nothing to receive yet, it should not throw any error. First, we need to start roscore.
roscore
Then try to run your subscriber in another terminal. Leave it running!
rosrun quadrotor_receive custom_listener.py
PS: if your code did not compile correctly, please go over the instructions and ensure you have created the files in the exact locations specified.
Step 3: Create the second package that contains the publisher
Create a new folder package. This should be easy-peasy, as most of the work has been done in the previous step. Do the following in a new terminal.
cd ~/catkin_ws/src/
catkin_create_pkg transmit_thrust rospy
Next, create the custom_talker.py node.
cd transmit_thrust/src
touch custom_talker.py
chmod +x custom_talker.py
Open up custom_talker.py in the IDE and paste in the following.
#!/usr/bin/env python
import rospy
from quadrotor_receive.msg import Person

def talker():
    pub = rospy.Publisher('custom_chatter', Person)
    rospy.init_node('custom_talker', anonymous=True)
    r = rospy.Rate(10) #10hz
    msg = Person()
    msg.name = "ROS User"
    msg.age = 4

    while not rospy.is_shutdown():
        rospy.loginfo(msg)
        pub.publish(msg)
        r.sleep()

if __name__ == '__main__':
    try:
        talker()
    except rospy.ROSInterruptException: pass
Please note that:
We are importing the custom message from the quadrotor_receive package.
We are creating a publisher for the same topic we created a subscriber for in the quadrotor_receive package.
Nothing more is needed. Let’s compile our new package.
cd ~/catkin_ws
catkin_make
source devel/setup.bash
That done, let’s start the custom talker node.
rosrun transmit_thrust custom_talker.py
You should see some output similar to these on the terminal.
And…on the terminal where you have the listener tunning, you should see something similar to:
[INFO] [1680728823.956347]: ROS User is age: 4
[INFO] [1680728824.056833]: ROS User is age: 4
And we are done here!
Step 4: Check your learning
Do you understand how to write a ROS publisher and subscriber with a custom message? If you don’t know it yet, please go over the post again, more carefully this time.
(Extra) Step 5: Watch the video to understand how to write a ROS publisher and subscriber with a custom message
Here you go:
Feedback
Did you like this post? Do you have any questions about how to write a ROS publisher and subscriber with a custom message? Please leave a comment in the comments section below, so we can interact and learn from each other.
If you want to learn about other ROS topics, please let us know in the comments area and we will do a video or post about it.
ROS2 parameters are great for configurable nodes that you can adapt to your robot configuration simply by changing a configuration file or a launch file. However, if we just implemented the basics you will have to re-run your node each time you change a parameter. You can’t change the parameter on-the-fly and have it updated in the robot. But by adding a callback function that updates the variables in our code, it is possible to do a live parameter update while a program is running, removing the need for a tedious node restart. Learn how to do it in this post.
ROS Inside!
ROS Inside
Before anything else, if you want to use the logo above on your own robot or computer, feel free to download it and attach it to your robot. It is really free. Find it in the link below:
In order to follow this tutorial, we need to have ROS2 installed in our system, and ideally a ros2_ws (ROS2 Workspace). To make your life easier, we have already prepared a rosject with a simulation for that: https://app.theconstructsim.com/l/53e75e28/.
You can download the rosject on your own computer if you want to work locally, but just by copying the rosject (clicking the link), you will have a setup already prepared for you.
After the rosject has been successfully copied to your own area, you should see a Run button. Just click that button to launch the rosject (below you have a rosject example).
Learn how to enable live parameter updates (C++) – Run rosject (example of the RUN button)
After pressing the Run button, you should have the rosject loaded. Now, let’s head to the next section to get some real practice.
Starting the simulation
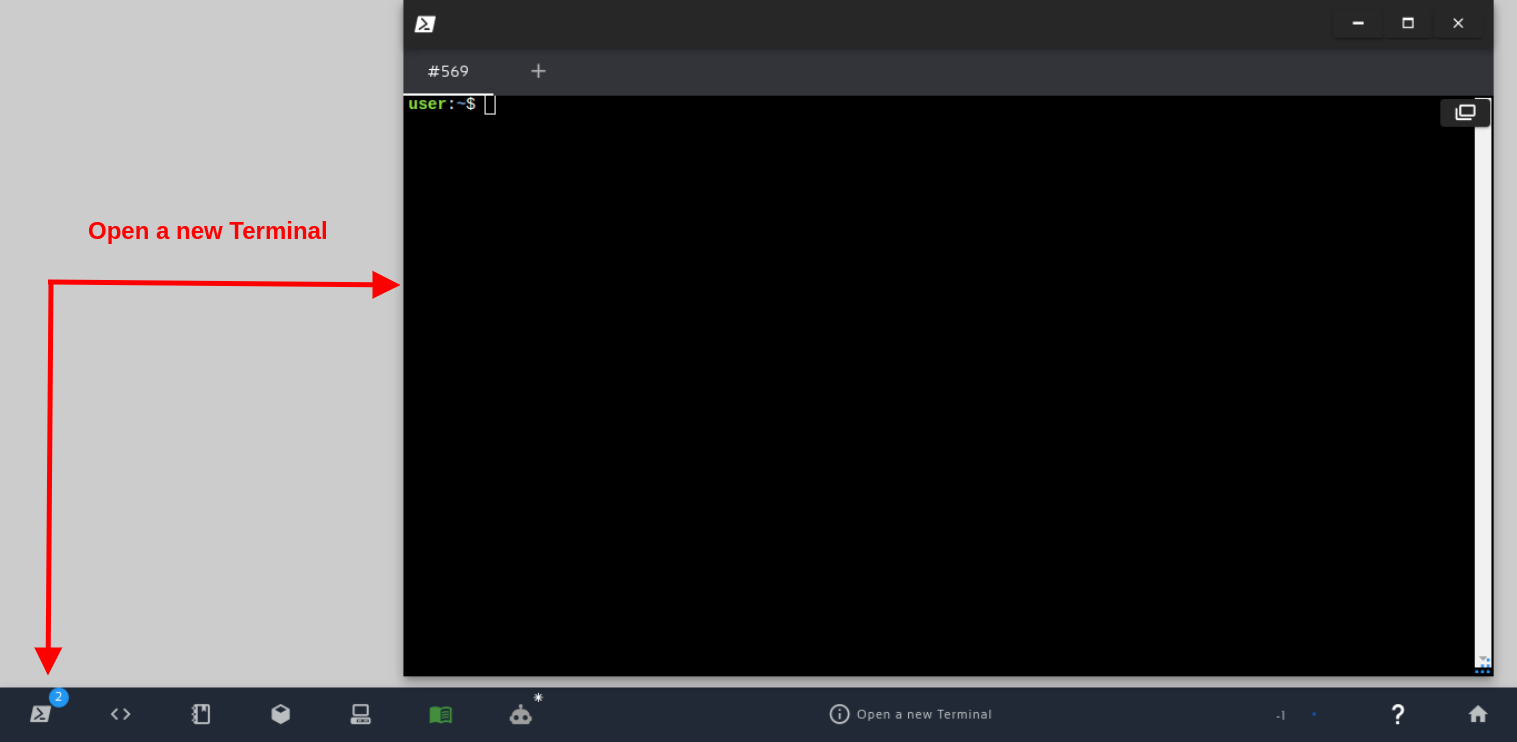
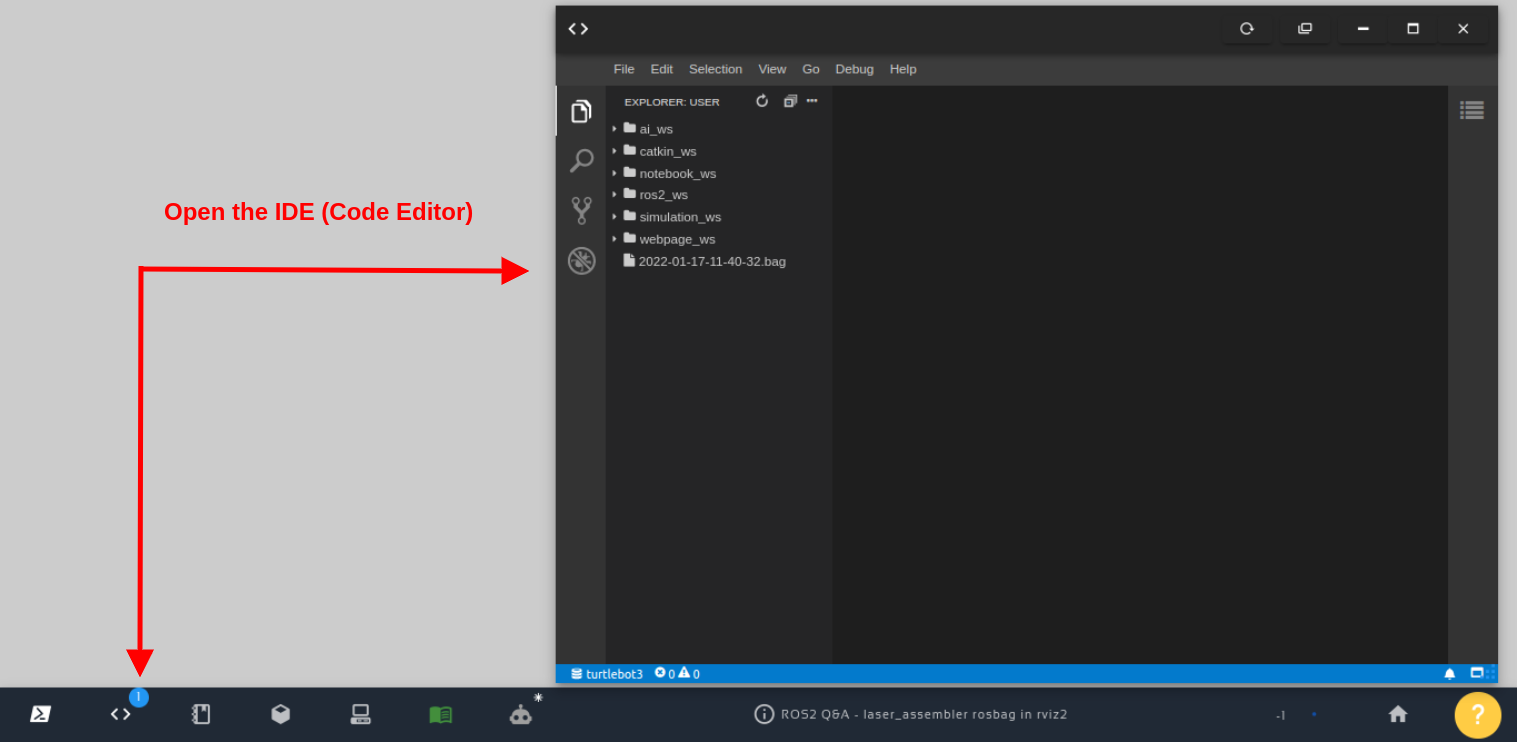
After having opened the rosject, let’s start a simulation. For that, let’s open a terminal by clicking the Open a new terminal button.
Open a new Terminal
Once inside the terminal, let’s run the commands below:
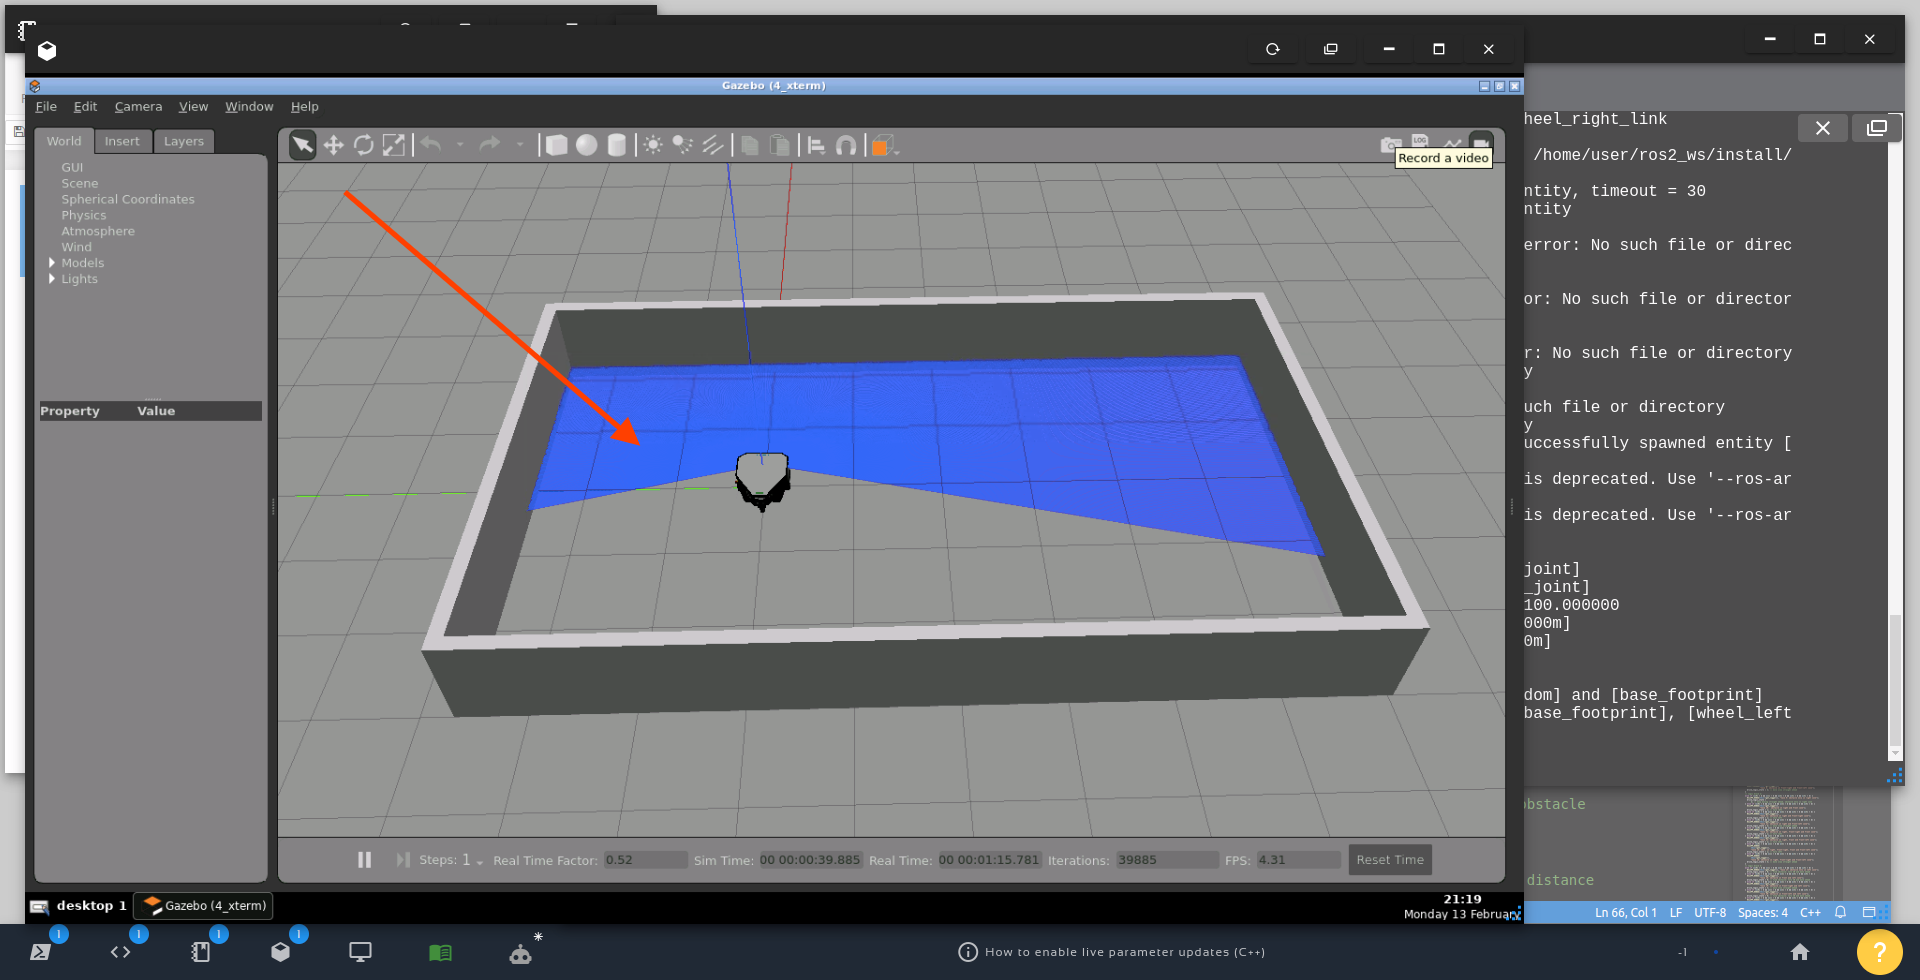
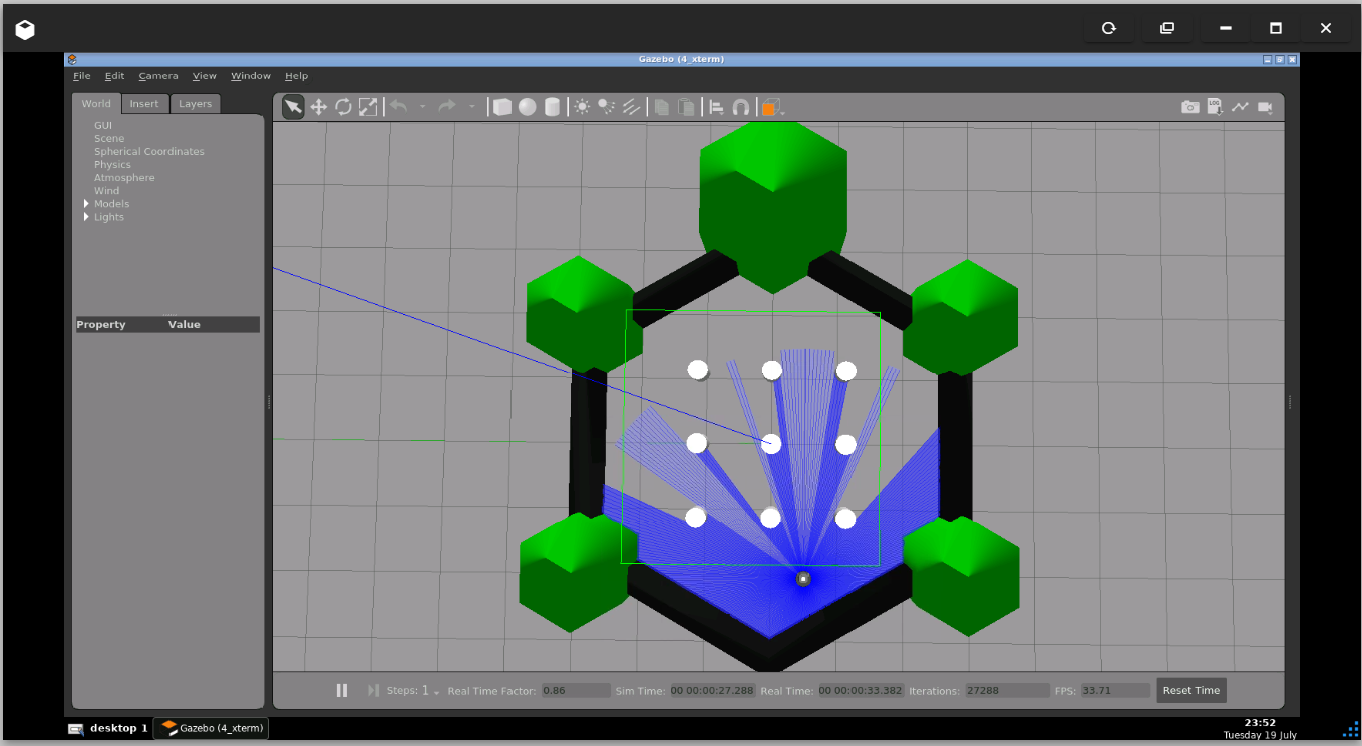
If everything went well, you should have a simulation loaded and opened automatically in a few seconds. The simulation will open from a top view, but you can use the mouse to move the simulation to a different perspective.
How to enable live parameter updates (C++)
Understanding the problem
Below is an example node in which we have only implemented the barebone basics of parameters in ROS2.
Let’s see it in action and see how it behaves, especially when we update its parameter values.
In a second terminal, let’s run the node for Obstacle Avoidance.
source ~/ros2_ws/install/setup.bash

ros2 run rule_based_obstacle_avoidance obstacle_avoidance
If you watch the simulation for a while, you will see that when the robot detects the wall, it rotates and moves forward until it detects another wall, and repeats the process.
The node name is obstacle_avoidance_node (you can check it in a third terminal by running: ros2 node list)
Now, let’s list the parameters of the node in a third terminal:
Now, still in the third terminal, let’s check the value of the safety_distance parameter:
ros2 param get /obstacle_avoidance_node safety_distance
The output we should have got should be the following:
Double value is: 1.5
Now, let’s set the parameter to a new value:
ros2 param set /obstacle_avoidance_node safety_distance 1.0
The expected output is:
Set parameter successful
Ok, so far so good. But with the new value, we expect the robot to get closer to the wall before turning around because now the safe distance was set from 1.5 meters to 1.0. The problem is that the robot is not considering the new value that we just set.
We can follow the same idea to try to make the robot move faster. Let’s check the current velocity of the robot:
ros2 param get /obstacle_avoidance_node linear_x_velocity
The output we should have got should be the following:
Double value is: 0.2
If we increase the speed:
ros2 param set /obstacle_avoidance_node linear_x_velocity 0.5
The expected output is:
Set parameter successful
The parameter was reported as successfully set, yet the robot does not move faster, because it still uses the value loaded when the node started.
In the current code, parameter values are fixed. As such, every time a parameter value changes, the parameter value in the code stays the same even though you may have expected it to update based on the latest value set.
In order to solve this, we must add a parameter callback function to your code so that the variable in the code gets the freshest data.
Before moving to the next section, please kill the simulation and all nodes running by pressing Ctrl+C on all terminals.
Solution: Add a parameter callback method
Alright, have you closed all programs by pressing CTRL+C on all terminals?
If you check around line 45 on that file, you will find the “private:” section, where we define the private variables of our class, something like the following:
Now, above that “private:” section, around line 38, let’s add the following code to instantiate a ParameterEventHandler, providing the current ROS node to use to create the required subscriptions:
Below the param_subscriber_ we have to set a callback method, in this case, a lambda function:
// Set a callback for this node's parameter, "linear_x_velocity"
    auto callback_linear_x = [this](const rclcpp::Parameter &p) {
      RCLCPP_INFO(this->get_logger(),
                  "callback_linear_x: Received an update to parameter \"%s\" "
                  "of type %s: \"%f\"",
                  p.get_name().c_str(), p.get_type_name().c_str(),
                  p.as_double());
      linear_x_velocity_ = p.as_double();
    };
Then we set “callback_linear_x” as the callback to invoke whenever linear_x_velocity is updated. We store the handle that is returned by “add_parameter_callback“; otherwise, the callback will not be properly registered.
Now that our package has been rebuilt and sourced, let’s launch the simulation again:
ros2 launch neo_simulation2 simulation.launch.py
The simulation should have been opened just like before, but now we will see the parameters affecting the simulation in “real-time”.
Before changing the parameters, let’s also launch the Obstacle Avoidance node, just like before, using the second terminal:
ros2 run rule_based_obstacle_avoidance obstacle_avoidance
You should see the robot approaching the wall, and turning around when getting close to it.
Changing the x velocity using ROS 2 Parameters
Ok, now that the robot is moving, let’s retrieve again the current value of the linear x velocity using the third terminal:
ros2 param get /obstacle_avoidance_node linear_x_velocity
Just like before, the expected output is:
Double value is: 0.2
Now let’s change that value:
ros2 param set /obstacle_avoidance_node linear_x_velocity 1.0
We expect a successful output:
Set parameter successful
If you look at the simulation now, you should see that when the robot is moving forward (not turning around), it moves really faster. So, as we can see, we are now able to make ROS2 Parameters be reflected “instantly”.
This opens up really many different possibilities.
We hope this post was really helpful to you. If you want a live version of this post with more details, please check the video in the next section.
Youtube video
So this is the post for today. Remember that we have the live version of this post on YouTube. If you liked the content, please consider subscribing to our youtube channel. We are publishing new content ~every day.
Keep pushing your ROS Learning.
Related Courses & Training
If you want to learn more about ROS and ROS2, we recommend the following courses:
I would like to dedicate this episode to the people that use other robotics frameworks different from ROS… and succeed. You know, ROS already provides you with a fully working robotics framework as well as many software for main robotics tasks. If you go outside ROS, the robotics world is cold, difficult, and hostile. If a company is able to succeed in such conditions, then that indicates strength and mastery. Good for you! If your company is in such a situation, then this episode is dedicated to you.
Today we are going to learn about such an amazing company that has succeeded worldwide without using ROS. We will learn how they did it, why they don’t use ROS and what do they use instead. We will also learn about their process to get robotics engineers in their team, so this episode can be very interesting for you if you are looking for a job!
But before going into the meat, let me tell you that in case you still believe ROS is a good path for you, you can learn ROS2 with The Construct. We provide self-led training based on robot simulations and remote real robots. You follow our lessons using your web browser and practice from minute one with the simulated robots. Also, as you advance the lesson, you will practice with real robots located in Barcelona. They are available 24/7 for you to remotely connect to them and do your practice.
Have a look at our webpage about the different subjects you can learn on ROS1 and ROS2 and start practicing with robots from minute one with The Construct.
Now let’s go to the meat of the episode. Let me introduce you Denys Kanunikov and Sam Thornton. Denys and Sam work at Mujin, a robotics company that…. well you are going to learn in a minute. For the moment, let me tell you that Denys is the lead robotics system engineer of Mujin and Sam is the Manager of Talent acquisition.
In this post, you will learn how to create ros2 XML launch files. You’ll discover how ros2 XML launch files are similar to and different from their ros1 counterparts.
Step 1: Get a Copy of the ROS package containing the code used in the post
Click here to copy the project. It would be copied to your cloud account at The Construct. That done, open the project using the Run button. This might take a few moments, please be patient.
PS: If you don’t have an account on the The Construct, you would need to create one. Once you create an account or log in, you will be able to follow the steps to read and write parameters in ros1 and ros2.
You might also want to try this on a local PC if you have ROS installed. In that case you need to read on and duplicate the source code of the package in your own local workspace. However, please note that we cannot support local PCs and you will have to fix any errors you run into on your own.
Step 2: Explore the source code using the IDE
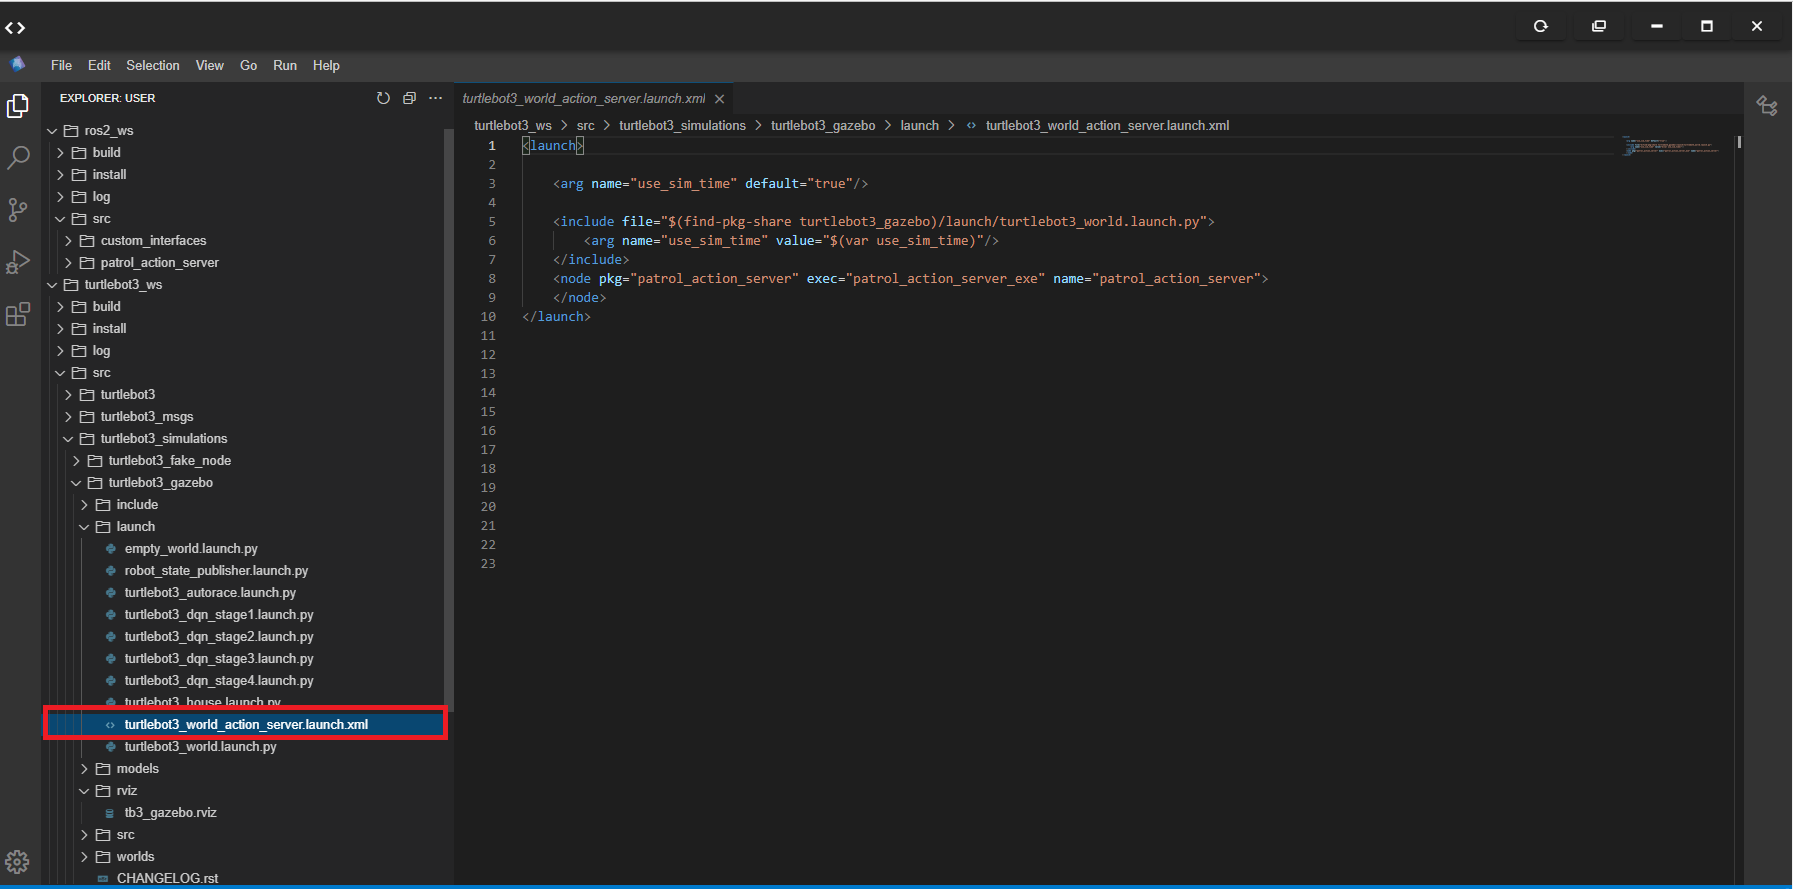
Open the IDE by clicking on the icon as shown above. You should now see something similar to the image below:
The main file we will work with in this post is the one highlighted in red in the image above:
Double-click on the file in the IDE to open and study the contents. We will discuss this file in the following steps.
Step 3: Understand how to create ros2 XML launch files
Wait first! I thought ros2 launch files are only written in Python! Yes, Python is one of the options when writing ros2 launch files; we can also use XML files, especially if we are writing simple launch files that do not need to leverage Python’s powerful API.
On line 2, we define an argument (variable) use_sim_time with a default value of true.
On line 3, we include another launch file, turtlebot3_world.launch.py for launching the TurtleBot3 world. The launch file can be found in the turtlebot3_gazebo package.
On line 4, we pass a required argument use_sim_time to the included launch file, assigning it the value of the use_sim_time defined on line 2.
On line 6, we define a node to be started by the launch file. This node can be found in the package patrol_action_server, the node executable is patrol_action_server_exe and the name of the node would appear as patrol_action_server.
In short, this launch file launches the TurtleBot3 world and starts the Patrol action server. The same launch file can be written in Python, but this XML looks simpler and easier to understand. And it does all we want it to do, and we can even include Python-based launch files!
Step 4: Understand how ros2 XML launch files are similar to/different from ros1 XML launch files
If you are familiar with ros1 launch files, you should already notice some similarities:
The same <launch> tag.
Similar <arg> tag.
Familiar <include> tag.
Similar <node> tag.
Now if we were writing the same launch file in ros1, it would be something like this (PS: we can’t include ros2 launch file in a ros1 launch file in reality):
Did you like this post? Do you have any questions about how to read and write parameters in ros1 and ros2? Whatever the case, please leave a comment on the comments section below, so we can interact and learn from each other.
If you want to learn about other ROS topics, please let us know in the comments area and we will do a video or post about it.
In this post, you will learn how to read and write parameters in ros1 and ros2, using C++ nodes. You will see the slight differences in the ros1 and ros2 nodes and parameter files.
Step 1: Get a Copy of the ROS package containing the code used in the post
Click here to copy the project. It would be copied to your cloud account at The Construct. That done, open the project using the Run button. This might take a few moments, please be patient.
PS: If you don’t have an account on the The Construct, you would need to create one. Once you create an account or log in, you will be able to follow the steps to read and write parameters in ros1 and ros2.
You might also want to try this on a local PC if you have ROS installed. In that case you need to read on and duplicate the source code of the package in your own local workspace. However, please note that we cannot support local PCs and you will have to fix any errors you run into on your own.
Step 2: Explore the source code using the IDE
Open the IDE by clicking on the icon as shown above. You should now see something similar to the image below:
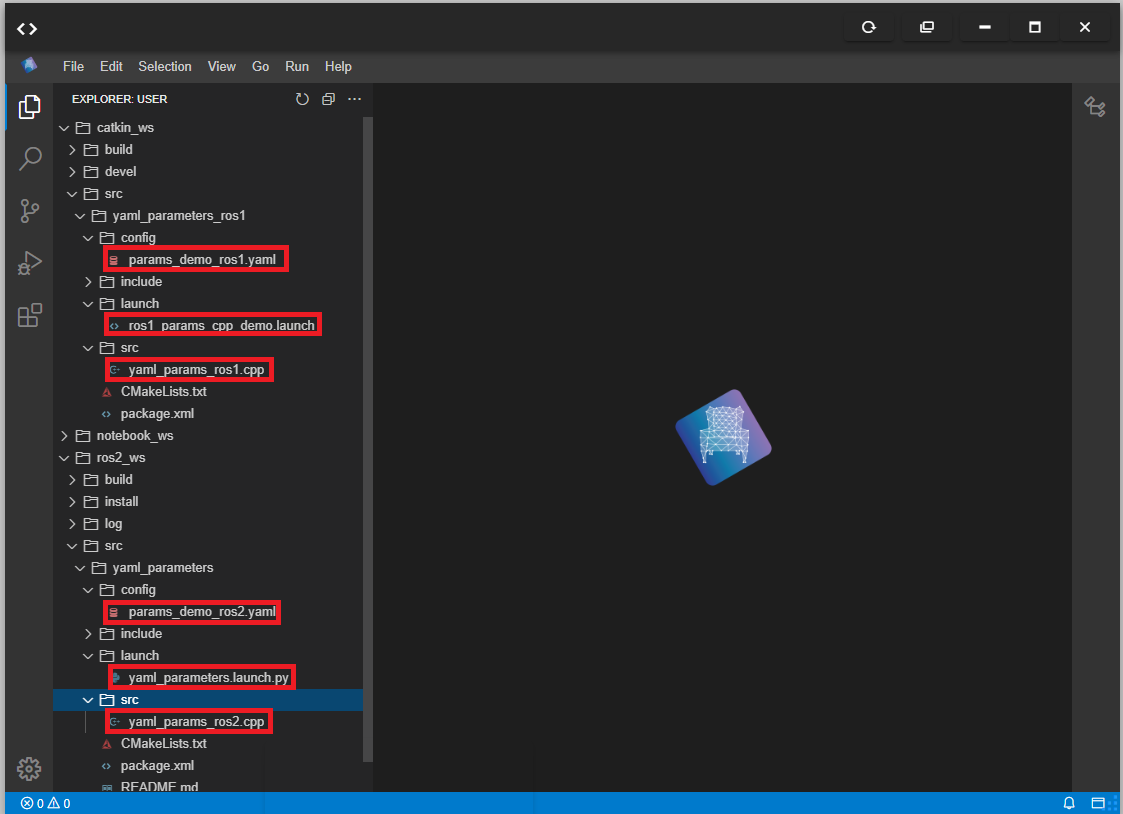
The six main files we will work with in this post are highlighted in red in the image above. These files are:
Double-click on each of the files in the IDE to open and study the contents. We will examine some of these files in the following steps.
Step 3: Understand how to read and write (load) parameters in ROS1
Now it’s time to see how to read and write parameters in ros1, working in the ros1 workspace.
Open a web shell and run the following commands:
cd ~/catkin_ws
source /opt/ros/noetic/setup.bash
source devel/setup.bash
roscore
The code block above changes to the ros1 workspace, sources it, and then starts the roscore (needed for ros1). Now let’s see a list of the current ros1 parameters available. Open another web shell and type the following:
But wait…are we getting the parameters in the YAML file (catkin_ws/src/yaml_parameters_ros1/config/params_demo_ros1.yaml) and their correct values? Let’s see what’s the in there!
Gosh, we are not getting these parameters nor their values, and you probably know why! So far we have been reading the parameters but have loaded them. Now let’s get that done: enter the launch file catkin_ws/src/yaml_parameters_ros1/launch/ros1_params_cpp_demo.launch.
Can you spot the differences between the formal and the latter outputs of these commands? Sure you can! So, well, that’s how to read and load parameter in ros1!
Step 4: Understand how to read and write (load) parameters in ROS2
Now let’s change to the ros2 workspace.
cd ~/ros2_ws
source /opt/ros/foxy/setup.bash
source install/setup.bash
In ros2 we need to have a node running before we can check for parameters, because there is no parameter server in ros2. Let’s try running the node then. The logic behind this node is contained in the ros2_ws/src/yaml_parameters/src/yaml_params_ros2.cpp file:
#include <rclcpp/rclcpp.hpp>

class MainNode : public rclcpp::Node {
public:
  MainNode() : rclcpp::Node("node", rclcpp::NodeOptions()) {

    // example: declare parameters, default value given
    declare_parameter("param0", 1);
    declare_parameter("param1", 0.1);
    declare_parameter("param2", "default");
    declare_parameter("param3.weight", 1);
    declare_parameter("param3.name", "default");
    declare_parameter("param4", false);
    // example: declare a variable when declaring a parameter
    declare_parameter("param5", std::vector<bool>(3, false));
    declare_parameter("param6", std::vector<int64_t>(4, 1));
    declare_parameter("param7", std::vector<double>(4, 0.1));
    declare_parameter("param8", std::vector<std::string>(5, "default"));

    // Get parameter values one by one
    auto p0 = get_parameter("param0").as_int();
    auto p1 = get_parameter("param1").as_double();
    auto p2 = get_parameter("param2").as_string();
    auto p3weight = get_parameter("param3.weight").as_int();
    auto p3name = get_parameter("param3.name").as_string();
    auto p4 = get_parameter("param4").as_bool();
    auto p5 = get_parameter("param5").as_bool_array();
    auto p6 = get_parameter("param6").as_integer_array();
    auto p7 = get_parameter("param7").as_double_array();
    auto p8 = get_parameter("param8").as_string_array();

    // Print parameters
    RCLCPP_INFO(get_logger(), "Integer parameter: %ld", p0);
    RCLCPP_INFO(get_logger(), "Double parameter: %f", p1);
    RCLCPP_INFO(get_logger(), "String parameter: %s", p2.c_str());
    RCLCPP_INFO(get_logger(), "Nested integer parameter: %ld", p3weight);
    RCLCPP_INFO(get_logger(), "Nested string parameter: %s", p3name.c_str());
    RCLCPP_INFO(get_logger(), "Boolean parameter: %d", p4);
    RCLCPP_INFO(get_logger(), "Boolean vector parameter [0]: %d",
                static_cast<int>(p5[0]));
    RCLCPP_INFO(get_logger(), "Integer vector parameter [0]: %d",
                static_cast<int>(p6[0]));
    RCLCPP_INFO(get_logger(), "Double vector parameter [0]: %f",
                static_cast<double>(p7[0]));
    RCLCPP_INFO(get_logger(), "String vector parameter [0]: %s", p8[0].c_str());
  }
};

int main(int argc, char **argv) {
  rclcpp::init(argc, argv);

  rclcpp::spin(std::make_shared<MainNode>());
  rclcpp::shutdown();
  return 0;
}
No, we are not :(. But not to worry, the launch file ros2_ws/src/yaml_parameters/launch/yaml_parameters.launch.py comes to the rescue! Let’s examine its content.
#!/usr/bin/env python3

import os
from launch import LaunchDescription
from launch_ros.actions import Node
from ament_index_python.packages import get_package_share_directory


def generate_launch_description():
    return LaunchDescription([
        Node(
            package='yaml_parameters',
            executable='main_node',
            name='parameter_types_example',
            parameters=[os.path.join(
                get_package_share_directory('yaml_parameters'),
                'config', 'params_demo_ros2.yaml')],
            output='screen'),
    ])
Oh my, it’s a Python! Let’s set it loose and see what happens! Stop the currently running program with Ctrl + C and run the following in its place and check that your output is similar.
The launch file simply loads the parameters in the YAML file and also runs the node we run earlier.
Well, that’s it!
Step 5: Check your learning
Do you understand how to read and write parameters in ros1 and ros2, using C++ nodes?
Did you notice the slight differences in the format of the YAML files for ros1 and ros2?
Did you notice that you the ros2 parameters are tied to specific nodes vs existing in a parameter server in ros1?
If you didn’t get any of the points above, please go over the post again, more carefully this time.
Extra Step: Watch the video to understand how to read and write parameters in ros1 and ros2
Here you go:
Feedback
Did you like this post? Do you have any questions about how to read and write parameters in ros1 and ros2? Whatever the case, please leave a comment on the comments section below, so we can interact and learn from each other.
If you want to learn about other ROS topics, please let us know in the comments area and we will do a video or post about it.