![[ROS Projects] – Build the Sentinel Robots from Matrix for Gazebo Simulator #Part2](https://www.theconstruct.ai/wp-content/uploads/2018/02/Build-the-Sentinel-Robots-from-Matrix-for-Gazebo-Simulator-Part2-screen.png)
[ROS Projects] – Build the Sentinel Robots from Matrix for Gazebo Simulator #Part2
Second part where we talk about how the xacro works in depth. Check out the first part if you haven’t seen it yet: https://www.youtube.com/watch?v=B8pipPGL7KE&t=31s
Second part where we talk about how the xacro works in depth. Check out the first part if you haven’t seen it yet: https://www.youtube.com/watch?v=B8pipPGL7KE&t=31s

OpenAI has released the Gym, a toolkit for developing and comparing reinforcement learning (RL) algorithms. That toolkit is a huge opportunity for speeding up the progress in the creation of better reinforcement algorithms, since it provides an easy way of comparing them, on the same conditions, independently of where the algorithm is executed.
The toolkit is mainly aimed at the creation of RL algorithms for a general abstract agent. Here, we are interested in applying it to the control of robots (of course!). Specifically, we are interested in ROS based robots. That is why, in this post we describe how to apply the OpenAI Gym to the control of a drone that runs with ROS
Let’s see an example of training.
In this example, we are going to train a ROS based drone to be able to go to a location of the space moving as low as possible (may be to avoid being detected), but avoiding obstacles in its way.
For developing the algorithm we are going to use the ROS Development Studio (RDS). That is an environment that allows to program with ROS and its simulations with a web browser, without having to install anything on the computer. So we have all the required packages for ROS and OpenAI Gym and Gazebo simulations already installed. You can follow the rest of the post you have two options:
What follows are the instructions for developing the training program with RDS, but as you can see, the steps are the same for your local installation.
We have prepared the training code already for you, so you don’t have to build everything from scratch. The goal of this post is to show you how this
code works, and how you would modify it for your own case (different robot, or different task).
In order to get the code, just open the RDS (http://rds.theconstructsim.com) and create a new project. You can call it openai_with_ros_example. Then open the project by clicking on the Open Project button.
Once you have the environment open, go to the Tools menu and open a Linux Shell. Inside the shell go to the catkin_ws/src directory. This is the place where ROS code must be put in the RDS in order to build, test, debug and execute it against robot simulations. Once there, clone the following git repo which contains the code to train the drone with OpenAI:
git clone https://bitbucket.org/theconstructcore/drone_training.git
Now, you should have a ROS package named drone_training inside the catkin_ws. Let’s test it right now!
First thing would be to test what you got so we can see what we are trying to understand. For this, follow the next steps:
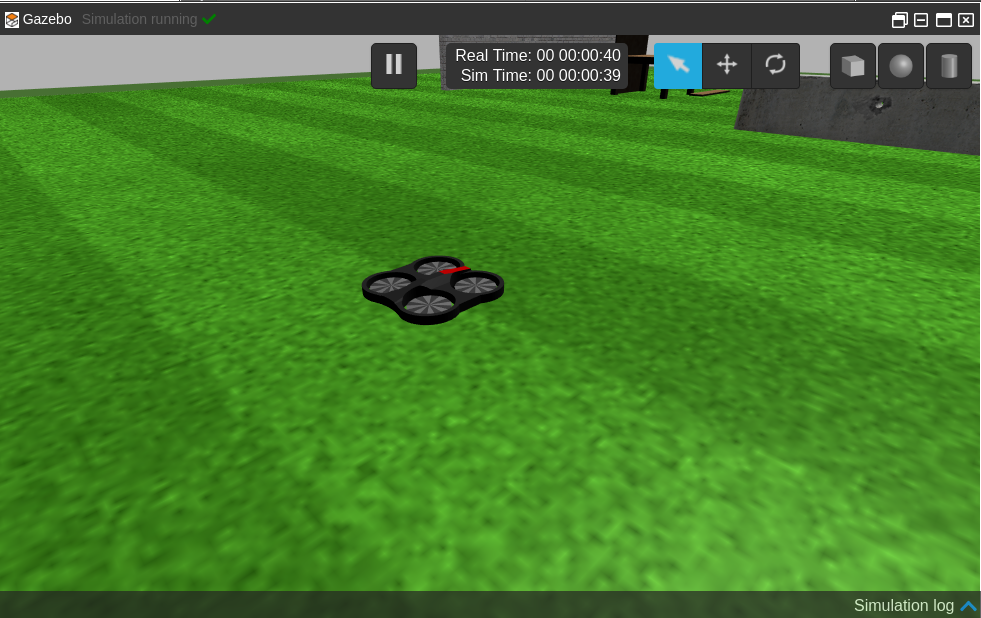
Parrot Drone with ROS simulation
> roslaunch drone_training main.launch
You should see the drone start moving doing some strange things. It actually looks like the drone is drunk! That makes perfect sense.
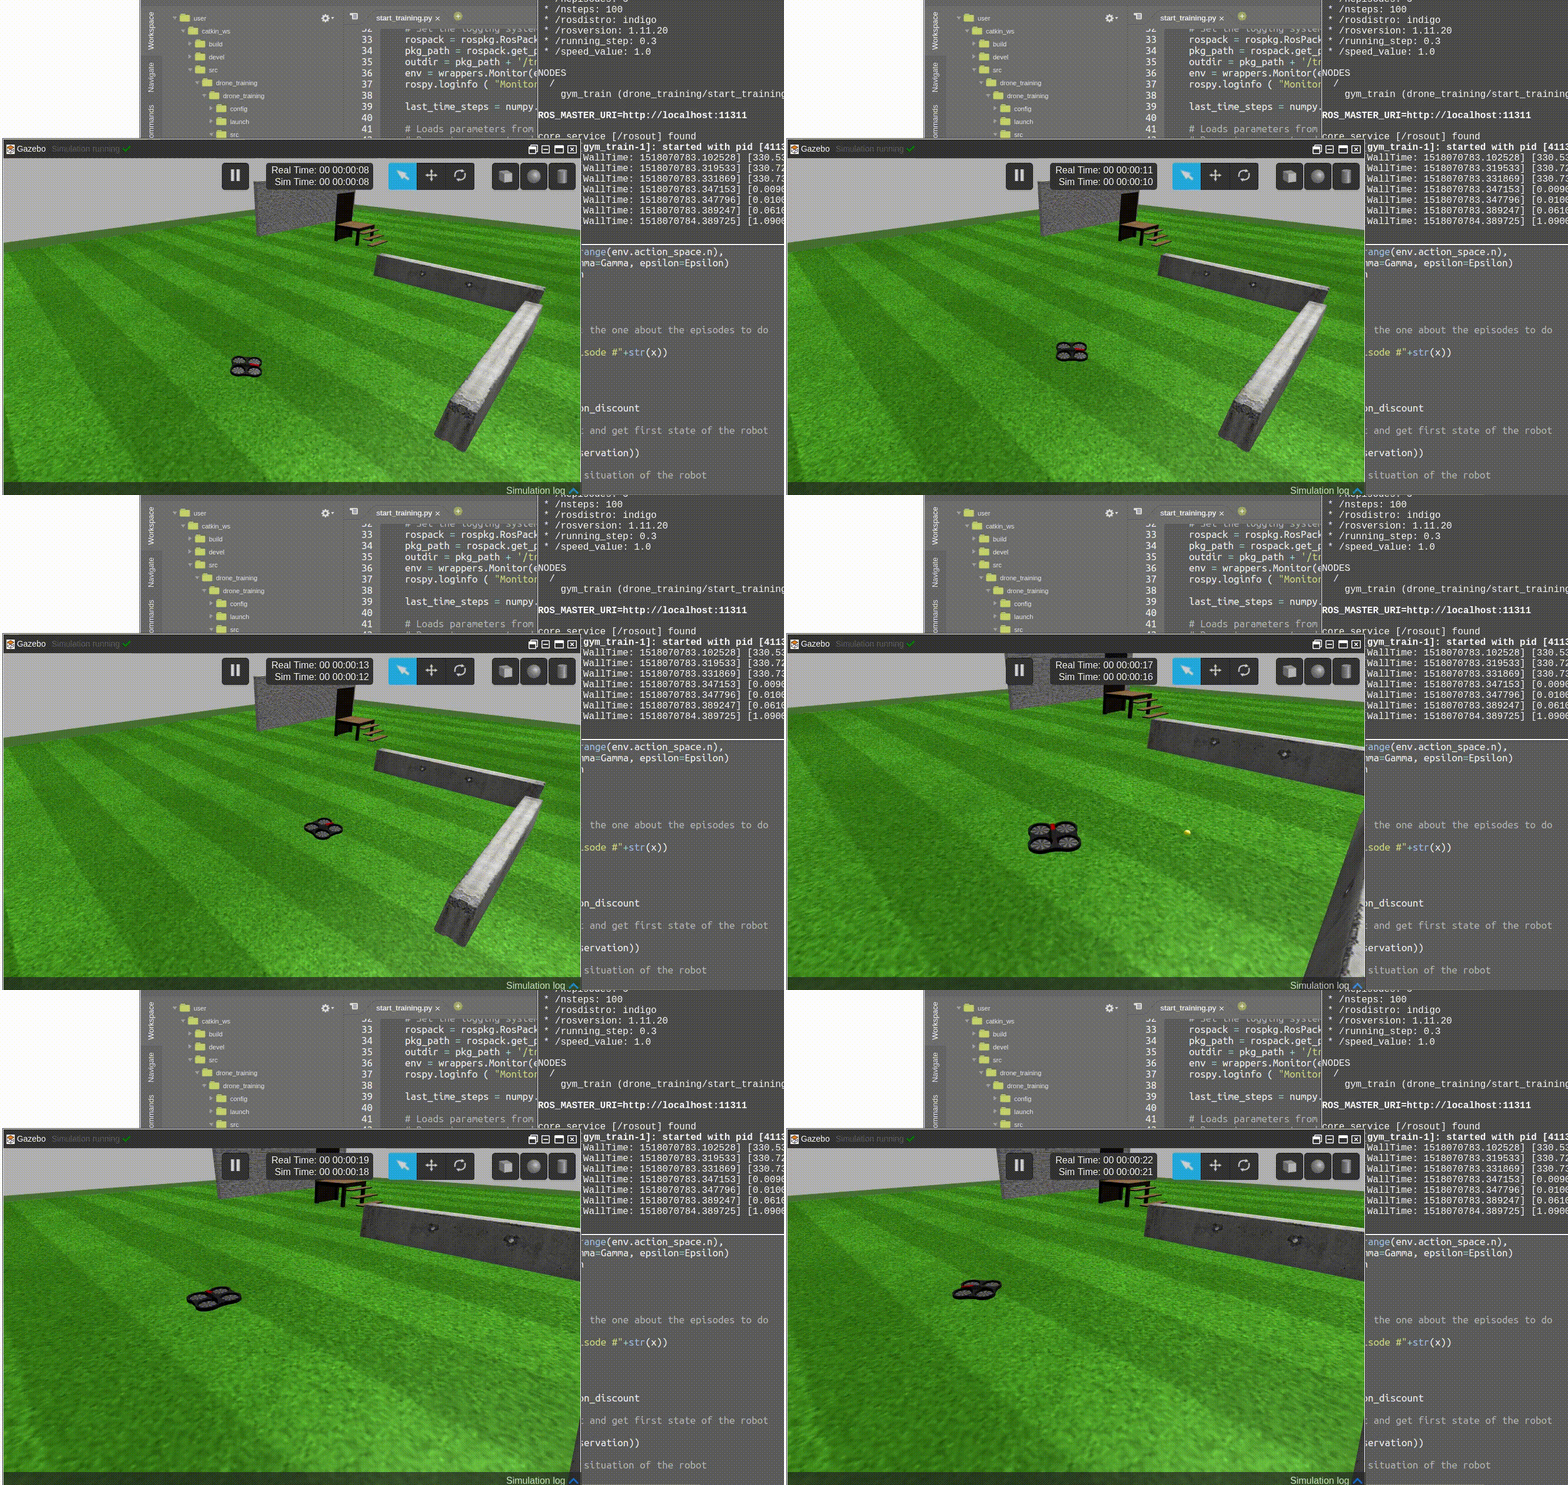
What is happening is that the robot is learning. It is exploring its space of actions and practicing what it will sense based on the actions that it takes. That is exactly how the reinforcement learning problem works. Basically, the robot is performing the classical RL loop o the figure: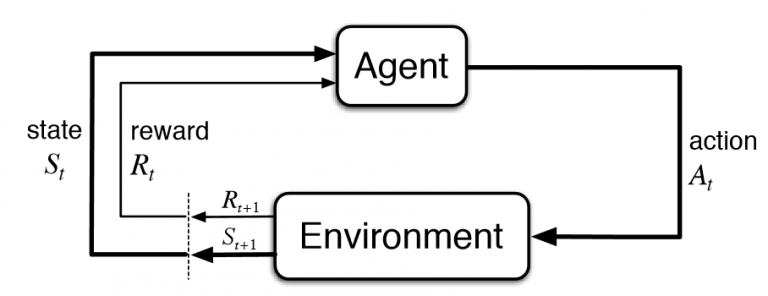
How a reinforcement learning problem works (image from StackOverflow)
The agent (the drone plus the learning algorithm), decides to take an action from the pool of available actions (for example, move forward), and executes it in the environment (the drone moves forward). The result of that action, makes the agent closer or not to its target (to fly to a given location). If the robot is closer, it gets a good reward. If it is further away, it gets a bad reward.
In any case, the agent perceives the current state of itself and the environment (where it is located now), and then feeds reward, previous state, new state and action taken to the learning algorithm (to learn the results based on its actions). Then the process repeats again for the number of steps the robot is allowed to experiment. When the number of steps is done, the final reward is obtained and the robot starts again from the initial position, now with an improved algorithm. The whole process is repeated again and again for a given number of episodes (usually high).
Now, let’s see how all that works together in the code. Let’s see its structure:
This package is just an example of how you can interface OpenAI with ROS robots. There are other ways of doing it, and in future posts we will explore them.
The package contains the following directories: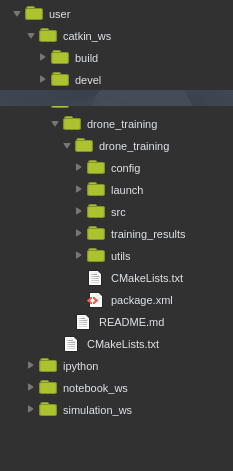
The launch file will launch the start_training.py file. That is the file that orchestrates the training. Let’s see what it does step by step:
rospy.init_node('drone_gym', anonymous=True)
Of course, first thing is to declare that code as a node of ROS.
env = gym.make('QuadcopterLiveShow-v0')
That is the main class that OpenAI provides. Every experiment of OpenAI must be defined within an environment. By organizing like that, different developers can test different algorithms always comparing against the same environment. Hence we can compare if an algorithm is better than another always on the same conditions.
The environment defines the actions available to the agent, how to compute the reward based on its actions and results, and how to obtain the state of the world of the agent.
Every environment in OpenAI must define the following things:
We are going to see how to do the code of the environment below.
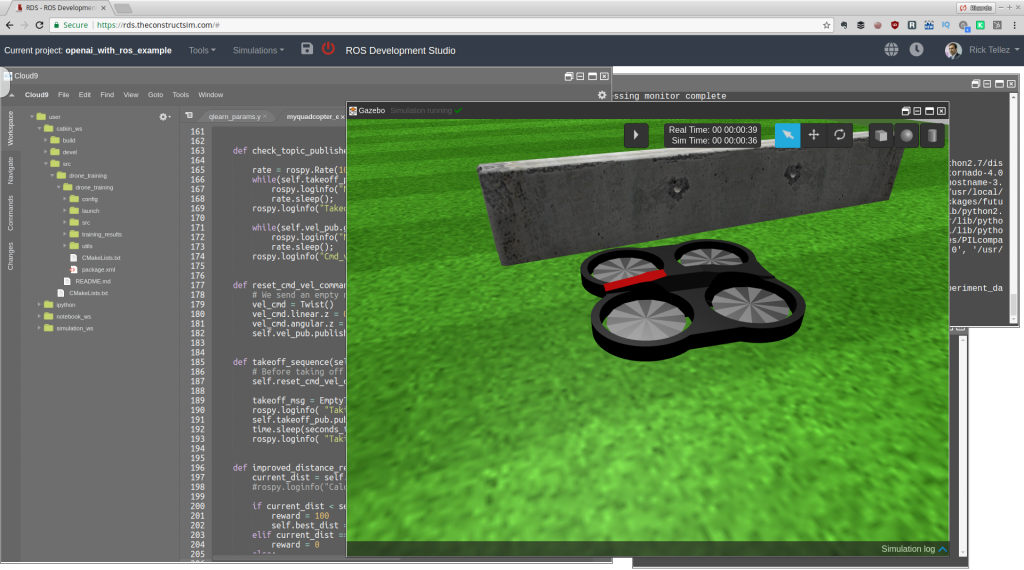
  Alpha = rospy.get_param("/alpha")
  Epsilon = rospy.get_param("/epsilon")
  Gamma = rospy.get_param("/gamma")
  epsilon_discount = rospy.get_param("/epsilon_discount")
  nepisodes = rospy.get_param("/nepisodes")
  nsteps = rospy.get_param("/nsteps")
Those are the parameters that our learning algorithm needs. That section will change based on the parameters your algorithm needs.
We create an instance of the learning algorithm we are going to use.
qlearn = qlearn.QLearn(actions=range(env.action_space.n), alpha=Alpha, gamma=Gamma, epsilon=Epsilon)
In this case we are using a Qlearning reinforcement learning algorithm. But you can use any other of the available (including deep learning) or encode your own.
That is the key part that we want to test. How good is this algorithm for solving the task at hands.
The training loop is the one that repeats the learning cycle explained above. That is where the learning code is executed. It basically consists of two main loops:
It starts with the code:
for x in range(nepisodes):
Remember that the number of episodes is a parameter from the config file. The loop basically does is to reset the environment (initialize the robot) so a new trial can start from the original position. It also gets the initial state observation required by the learning algorithm to generate the first action.
observation = env.reset()
It starts with the code:
for i in range(nsteps):
and basically what it does is:
action = qlearn.chooseAction(state)
observation, reward, done, info = env.step(action)
nextState = ''.join(map(str, observation))
qlearn.learn(state, action, reward, nextState)
And that is all. That simple. The loops will repeat based on the parameters values, and once they finish, the log files will generate in the training_results directory.
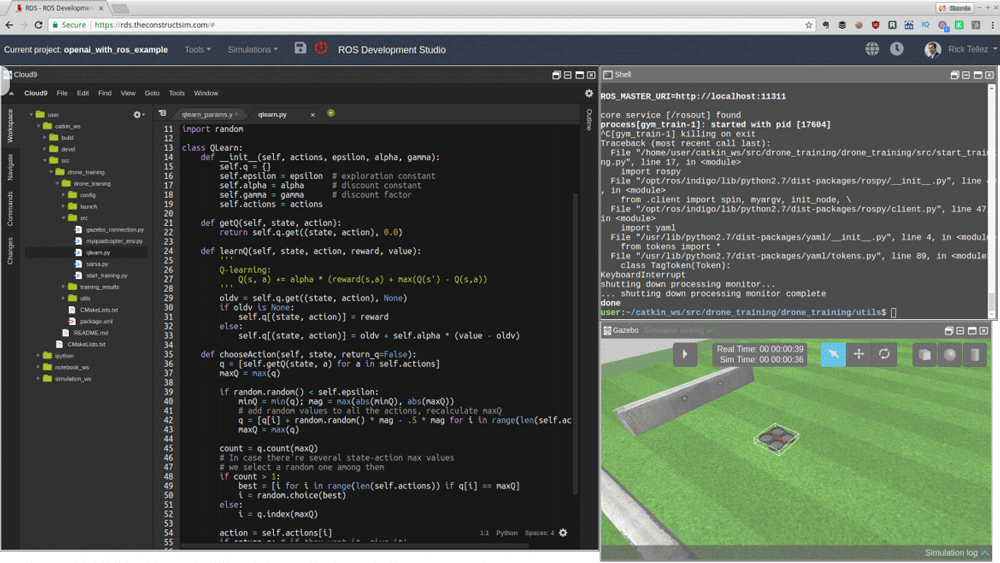
In this example, we are using the Qlearn reinforcement learning algorithm. That is a classical algorithm of reinforcement learning. You can find here a description of it.
The code for the Qlearn algorithm is provided in the qlearn.py file. It has been taken from Victor Mayoral’s git, and you can find the original code here (thanks Victor for such a good work!).
You could change this algorithm for another one that you may have developed and that is going to be the next hit in artificial intelligence. Just create the code (like the qlearn.py) with the same inputs and outputs, and then substitute the call in the start_training.py file. That is the greatness of the OpenAI framework: that you can just plug your algorithm, and do not change anything of the rest, and the whole learning system will still work. By doing this, you can compare your algorithm with the others under the exact same conditions.
Additionally, we have included in the repo another classic reinforcement learning algorithm called Sarsa (sarsa.py).
Change the learning algorithm inside the start_training.py file by the Sarsa algorithm, and watch if there is any difference in learning speed or improved behavior.
As I said, the environment defines the actions available to the agent, how to compute the reward based on its actions and results, and how to obtain the state of the world of the agent, after that actions have been performed.
OpenAI provides an standarized way of creating an environment. Basically, you must create an environment class which must inherit from gym.Env. That inheritance, entitles you to implement within that class the functions _seed, _reset and _step (explained above).
In our case, we have created a class named QuadCopterEnv. You can find the code in the myquadcopter_env.py file.
The code starts by registering the class into the pool of available environments of OpenAI. You register a new environment with the following code:
reg = register(
 id='QuadcopterLiveShow-v0',
 entry_point='myquadcopter_env:QuadCopterEnv',
 timestep_limit=100,
 )
Then the class starts initializing the topics it needs to connect to, gets the configuration parameters from the ROS param server, and connects to the Gazebo simulation.
 def __init__(self):

   self.vel_pub = rospy.Publisher('/cmd_vel', Twist, queue_size=5)
   self.takeoff_pub = rospy.Publisher('/drone/takeoff', EmptyTopicMsg, queue_size=0)

   self.speed_value = rospy.get_param("/speed_value")
   self.desired_pose = Pose()
   self.desired_pose.position.z = rospy.get_param("/desired_pose/z")
   self.desired_pose.position.x = rospy.get_param("/desired_pose/x")
   self.desired_pose.position.y = rospy.get_param("/desired_pose/y")
   self.running_step = rospy.get_param("/running_step")
   self.max_incl = rospy.get_param("/max_incl")
   self.max_altitude = rospy.get_param("/max_altitude")

   self.gazebo = GazeboConnection()

   self.action_space = spaces.Discrete(5) #Forward,Left,Right,Up,Down
   self.reward_range = (-np.inf, np.inf)

   self._seed()
Now it is time for the definition of each of the mandatory functions for an environment.
 vel_cmd = Twist()
 if action == 0: #FORWARD
 vel_cmd.linear.x = self.speed_value
 vel_cmd.angular.z = 0.0
 elif action == 1: #LEFT
 vel_cmd.linear.x = 0.05
 vel_cmd.angular.z = self.speed_value
 elif action == 2: #RIGHT
 vel_cmd.linear.x = 0.05
 vel_cmd.angular.z = -self.speed_value
 elif action == 3: #Up
 vel_cmd.linear.z = self.speed_value
 vel_cmd.angular.z = 0.0
 elif action == 4: #Down
 vel_cmd.linear.z = -self.speed_value
 vel_cmd.angular.z = 0.0
 self.gazebo.unpauseSim()
 self.vel_pub.publish(vel_cmd)
 time.sleep(self.running_step)
 data_pose, data_imu = self.take_observation()
 self.gazebo.pauseSim()
 reward,done = self.process_data(data_pose, data_imu)
 if action == 0:
   reward += 100
 elif action == 1 or action == 2:
   reward -= 50
 elif action == 3:
   reward -= 150
 else:
   reward -= 50
 state = [data_pose.position.x]
 return state, reward, done, {}
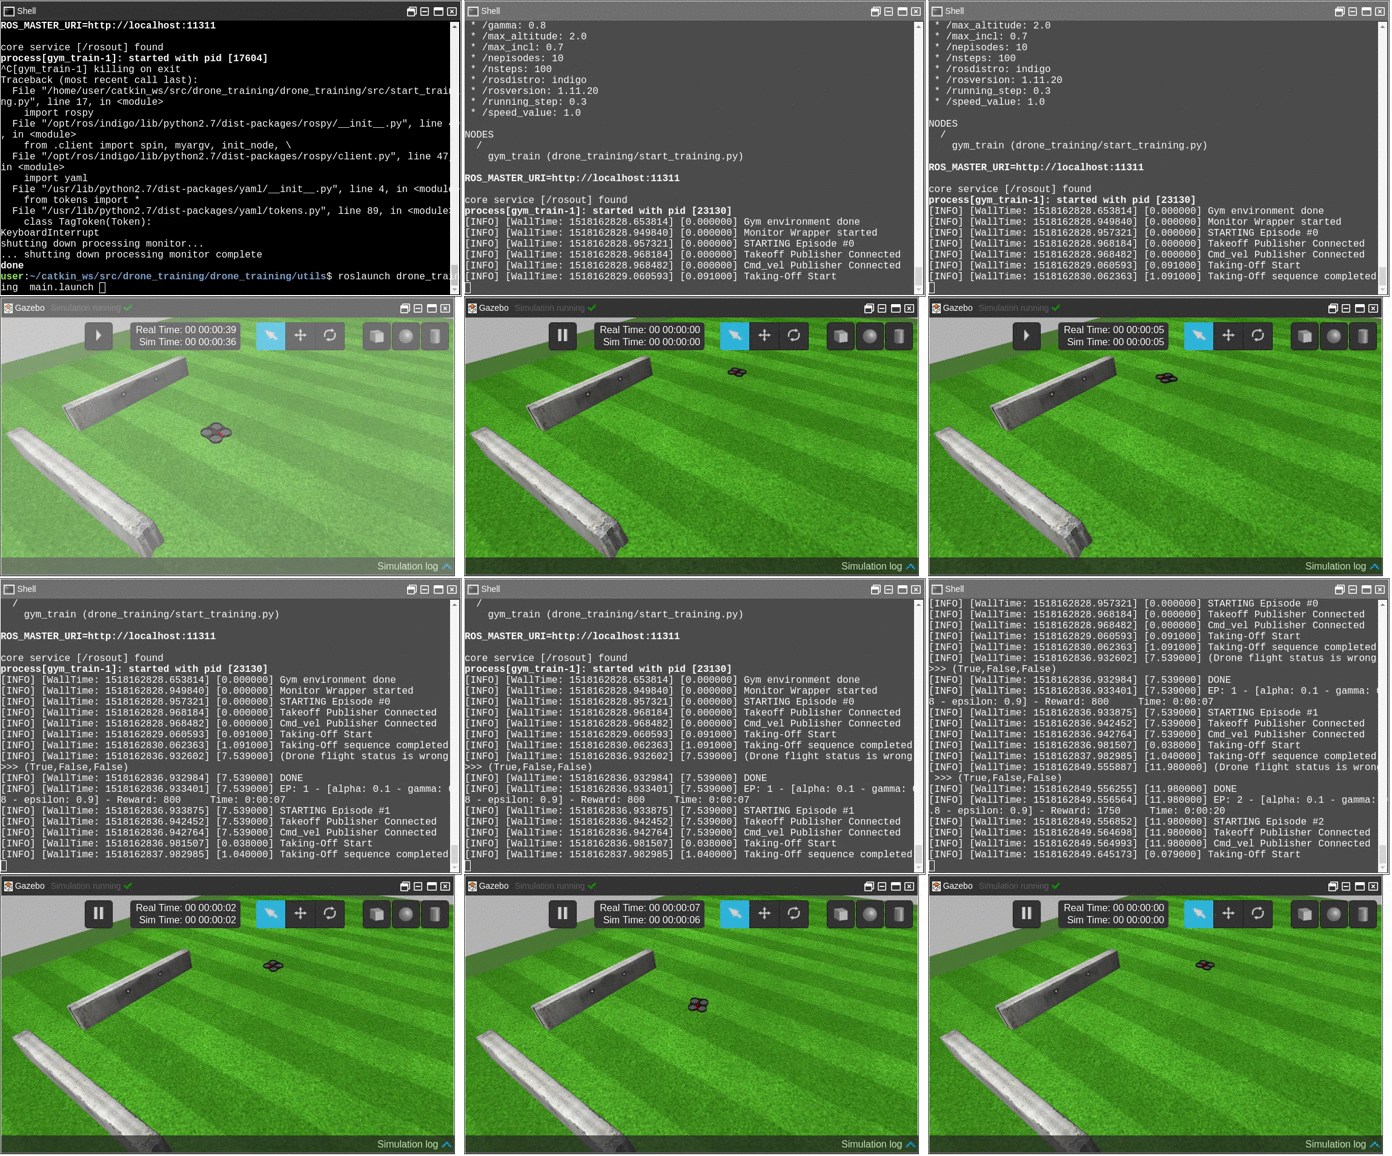
Basically, that’s it. The code above calls additional functions that you can check by looking into the QuadCopterEnv class. Those are the functions that do the dirty job of calculating the actual values, but we don’t need to review them here, because they are out of the scope of this subject.
One function that we may need to cover, though, is the function that computes the reward. Its code is the following:
def process_data(self, data_position, data_imu):
 done = False
 euler = tf.transformations.euler_from_quaternion([data_imu.orientation.x,
                                                   data_imu.orientation.y,
                                                   data_imu.orientation.z,
                                                   data_imu.orientation.w])
 roll = euler[0]
 pitch = euler[1]
 yaw = euler[2]

 pitch_bad = not(-self.max_incl < pitch < self.max_incl)
 roll_bad = not(-self.max_incl < roll < self.max_incl)
 altitude_bad = data_position.position.z > self.max_altitude

 if altitude_bad or pitch_bad or roll_bad:
   rospy.loginfo ("(Drone flight status is wrong) >>> ("+str(altitude_bad)+","+str(pitch_bad)+","+str(roll_bad)+")")
   done = True
   reward = -200
 else:
   reward = self.improved_distance_reward(data_position)

 return reward,done
That code, basically does two things:
You can find a yaml file in the config directory containing the different parameters required to configure the learning task. I have divided the parameters in two types:
Plotting results is very important because you can visually identify if your system is learning or not, and how fast. If you are able to early identify that your system is not learning properly, then you can modify the parameters (or even the conditions of the experiment), so you can retry fast.
In order to plot the results, I have provided a Python script in the utils directory that does the job. I did not create the code myself, I took it from somewhere else, but I cannot remember from where (if you are the author and want to have the credit just contact me). To launch that code just type on the utils directory:
> python plot_results.py
The script will take the results generated in the training_results directory and generate a plot with all the rewards obtained for each episode. In order to watch the plot, you must open the Graphic Tools window (Tools->Graphic Tools). You must see something like this:
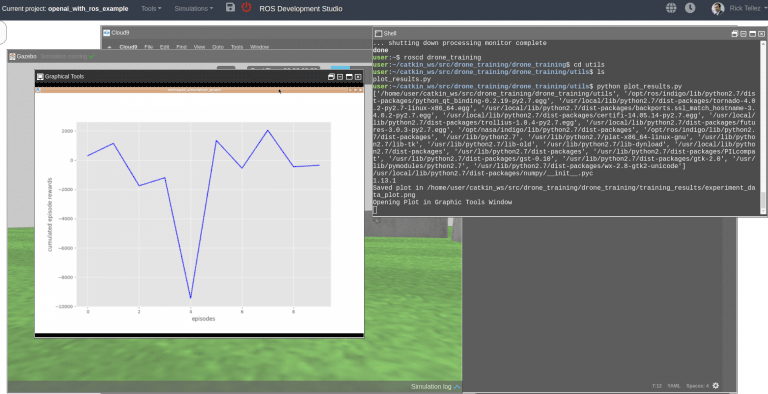
For this post, I have run the code provided to you (as the version of 8 Feb2018) for 500 episodes, and the results are not very good, as you can see in the following figure
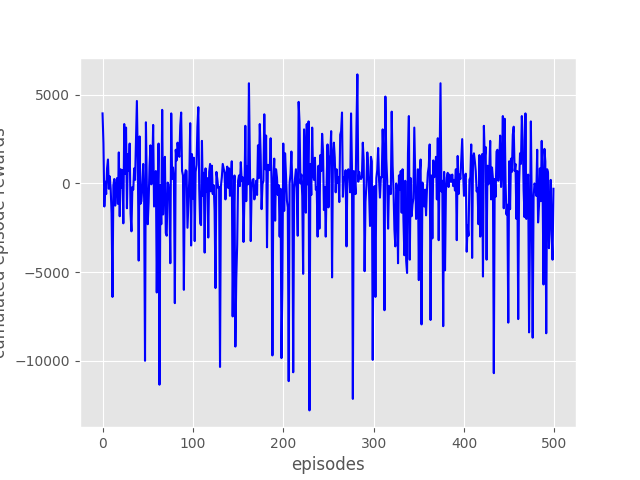
In that figure, you can see that there is no progress in the reward, episode after episode. Furthermore, the variations in the reward values look completely random. This means that the algorithm is actually not learning at all about the problem trying to solve. What can be the reasons for that? Well, I can figure out a few. The goal for the engineer is to devise ways to modify the learning situation so the learning can actually be accomplished. Some possible reasons why is not learning:
What is clear is that the structure of the training environment is correct (by structure, I mean the organization of the whole learning system). That is a good point, since it allow us to start looking for ways to improve the learning from within a learning structure that already works.
This example is massively improvable (as the plot of the results are showing ;-). Here a list of suggestions where you can improve the system to make it learn quickly and better solutions:
Apply any of those improvements, and send me your plots of the improved reward evolution, and videos showing how the drone has learnt to do the task. We will publish them in our social channels giving you credit about it.
We recently did a live class showing how all the explained above works in real time with many people attending at the same time and doing the exercises with me. It may clarify you all the content above. Have a look here:
We do a ROS Developers Live Show every Wednesday at 18:00 CET. You may want to subscribe to our Youtube channel in order to stay notified of our future Live Show.
Additionally, we have created an online course where to learn all the material above and other things about OpenAI for robotics. It is online with all the simulations integrated and requires just a web browser (you can do the exercises with ROS even from Windows!). You can find it here: OpenAI Gym for Robotics 101 (additionally, in case you like it, you can use the discount coupon 2AACEE38 for a 10% discount).
OpenAI is a very good framework for training robots to do things using the latest techniques in artificial intelligence. Also, as you have seen, it is not difficult to integrate with ROS based robots. This makes the tandem OpenAI+ROS a killer combination for robot development!
If you still have doubts, write your questions below the post and we will try to answer them all. Happy robot training!
![[ROS Projects] Exploring ROS with a 2 Wheeled Robot #Part 2 – URDF Macros](https://www.theconstruct.ai/wp-content/uploads/2018/02/Exploring-ROS-with-a-2-Wheeled-Robot-Part-2-URDF-Macros-screen.png)
In this video, we are going to explore the macros for URDF files, using XACRO files. At the end of this video, we will have the same model organized in different files, in a organized way.
References
RDS: https://rds.theconstructsim.com/
Source Code Repository: https://bitbucket.org/theconstructcore/two-wheeled-robot
![[ROS Projects] – Build the Sentinel Robots from Matrix for Gazebo Simulator (Updating)](https://www.theconstruct.ai/wp-content/uploads/2018/02/Sentinel-The-Matrix-Octopus-Build-Part1-screen.png)
Learn how to build the Sentinel Robots from the Matrix for Gazebo Simulator. Learn about advances XACRO techniques. In these first set of videos you will build a basic geometric version.
Here is the git for the code: https://bitbucket.org/theconstructcore/sentinel
Second part where we talk about how the xacro works in depth.
The third video on the series where you learn how to build the sentinel of TheMatrix film, which is an octopus like robot. Learn how to build it in Gazebo and use ROS to move it around. Next set of videos will be about adding the meshes. Remember to post your crazy robot projects in this video and I’ll pick a winner on the next videos ;). Have fun with robotics.
In this fourth video, you will learn how to add meshes to the Sentinel-Octopus Model of The Matrix Revolutions that we did in previous videos for the Gazebo simulator. We will use as always ROS Development Studio for this but also Blender for the mesh import/scaling and Thingiverse for the download.
Related Links:
Checkout the git with all the code used: https://bitbucket.org/theconstructcore/sentinel
Checkout the Creator of the 3D model here: https://www.thingiverse.com/thing:2755409
Learn how to add complete realistic tentacles and claws to your Sentinel in ROS Developement Studio for Gazebo simulator.
You can get the complete code in the git: https://bitbucket.org/theconstructcore/sentinel
We would love to see your results following this tutorial and other projects in the comments bellow.
Learn how to add textures to your stl files to make look this Sentinel as close as possible to the ones in TheMatrix. Add also emissive materials for the elements that generate light.
Git of Sentinel:https://bitbucket.org/theconstructcore/sentinel
Here is the link to the method of texture UV Mapping: https://www.youtube.com/watch?v=bP_1XfpEy80
![[ROS Projects] – Performing LSD-SLAM with a ROS based Parrot AR. Drone](https://www.theconstruct.ai/wp-content/uploads/2018/01/Performing-LSD-SLAM-with-a-ROS-based-Parrot-AR.-Drones.png)
Drones market is growing more and more each year, and so does the need of improving the way we control them. One of the most important topics here is, of course, how to navigate drones. In this series of videos we are going to have a look at how to implement in ROS one of the approaches that can allow us to perform Localization and Mapping in drones in a quite easy way: LSD-SLAM. LSD-SLAM is a direct monocular SLAM technique, developed by TUM, which allows to localize and create maps with drones with just a 3D camera. Hope you enjoy it!
You will learn step by step through 4 video tutorials:
[irp posts=”6638″ name=”ROS Q&A | How to Start Programming Drones using ROS”]
How to perform LSD-SLAM with a ROS based Parrot AR.Drone with a Gazebo simulation. In this 1st video, you’re going to
You can simply build the project in RDS without any configuration in the local machine. If you haven’t had an account yet, please register here.
Let’s clone the drone simulation under the simulation_ws, you can find shell from Tools->shell
$ cd ~/simulation_ws/src
$ git clone https://bitbucket.org/theconstructcore/tum_ardrone_sim
Now we have to compile the package before using it.
Since the package is for ROS-indigo, we have to configure something first. Please replace the following part in the file ~/simulation_ws/src/tum_ardrone_sim/tum_ardrone/src/UINode/RosThread.h
...
#define __ROSTHREAD_H

#ifndef Q_MOC_RUN

#include "cvd/thread.h"
#include "tum_ardrone/filter_state.h"
#include "std_msgs/String.h"
#include "geometry_msgs/Twist.h"
#include "ardrone_autonomy/Navdata.h"
#include "ros/ros.h"
#include "sensor_msgs/Joy.h"
#include "std_srvs/Empty.h"
#include "std_msgs/Empty.h"

#endif

class tum_ardrone_gui;
...
Then compile it! (Notice: it may take a while, go get a coffee)
$ cd ~/simulation_ws
$ rosdep install tum_ardrone
$ catkine_make
$ source devel/setup.bash
Contents and links mentioned in the video:
Definition of LSD-SLAM (Large-Scale Direct Monocular SLAM): https://vision.in.tum.de/research/vslam/lsdslam
TUM ARDrone simulation: https://bitbucket.org/theconstructcore/tum_ardrone_sim
LSD-SLAM repository: https://github.com/tum-vision/lsd_slam
RDS – ROS Development Studio: https://www.theconstruct.ai/rds-ros-development-studio/
Course mentioned in the video: Programming Drones with ROS https://wp.me/P9Rthq-20N
In this 2nd video of the series, we are going to solve some compilation errors we got in the previous video, and we are trying to launch the nodes for performing LSD SLAM.
[irp posts=”8584″ name=”How to launch two drones on a Single Gazebo Simulation”]
In this 3rd video of the series, we are successfully achieve to launch the LSD-SLAM ROS node in an Hector Quadrotor simulation.
In this 4th video of the series, we have successfully achieved to launch the LSD-SLAM ROS nodes in an Hector Quadrotor simulation, and we perform some LSD-SLAM in an small village environment.
***
Many people would like to teach a MOOC about robotics, however the preparation of it can be very long, specially if one wants to provide on the course something more than just a list of facts and concepts.
If the course is based on ROS, the teacher will have access to many concepts working off the shelf. Using ROS speeds up the creation of the MOOC since allows the teacher to demo those concepts without infinite number of preparation hours. Furthermore, it permits to embed student practice in the course itself.
In this article, we are going to show you a way to organize and speed the development of your MOOC robotics course when it is based on ROS. It doesn’t matter the robotics subject, as far as it is about programming robots for doing things. We are leaving from this tutorial MOOCs about robotics hardware.
When we talk about robotics MOOCs here, we are talking about courses that teach some theoretical subject of robotics (inverse kinematics, SLAM, visual servoing…) but that make the student practice with real robots at the same time. We believe that it is mandatory to practice with robots at the same time in order to really understand the theory. For this reason, we are going to use the ROS infrastructure as our practical framework.
While explaining the method, we are going to do an example of building a MOOC. Please do the example with me, so you can get the practice of building those courses. In case you have questions, please post them beneath on the comments of the post.
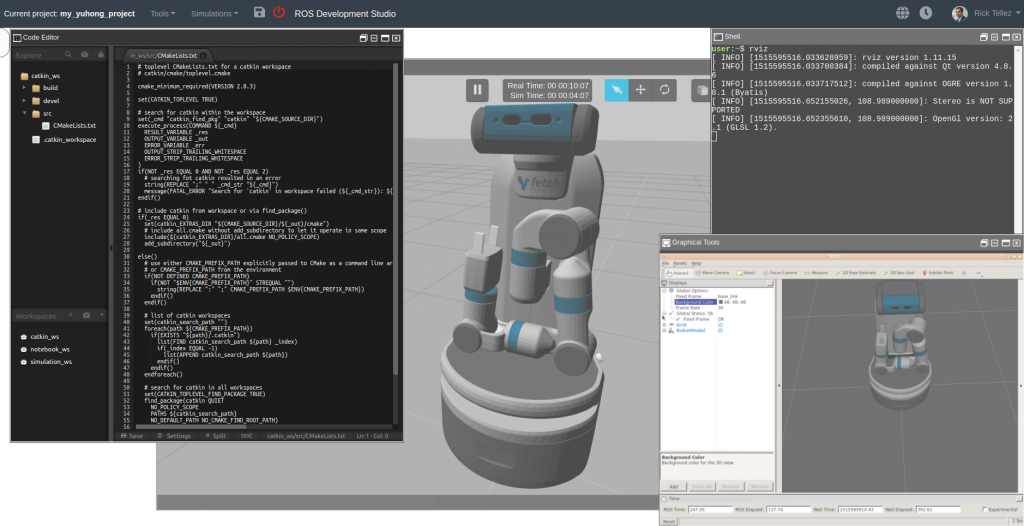
This is the list of steps we have defined to build a robotics MOOC using ROS as the base system:
The first step is about deciding which distribution structure we will have for our course. This step is required in order to do the rest of material according to the environment selected. You have to take into account that at the end, the student will have to access your MOOC someway. That access is the distribution structure.
Distribution platforms can be based on Youtube, any of the available MOOC academies, or just your files of the MOOC for download from some personal page.
In this article, we propose you to use a structure based on Jupyter notebooks, because they integrate very well with ROS for practicing. We believe that teaching about robotics must be practice based, and providing videos alone is not the proper way for teaching (even if you can include them as an additional material, more about it below).
Since we are going to use ROS and we want the student to practice, we are going to use robot simulations. Gazebo will be the simulator used here.
Now, having decided that we are going to use Jupyter notebooks+Gazebo simulations, we need to decide the way we are going to pack this and provide it to the student. You have two options for this:
Since we want to go fast and want to make easy to the students to access the material, for this course we are going to use the second option. For the online environment, we are going to use the free tier of ROS Development Studio (also known as RDS). Go now and create a free account at rds.theconstructsim.com which we are going to use for the rest of the article.
In case you would like to build a virtual machine or docker, you will have to look for installations instructions over the internet. Even if that is your case, I would ask you to follow the rest of the article now so you can learn the rest of steps which are independent of any installation option selected.
You must decide what is the subject of robotics that you want to teach. Remember here that we are talking about how to learn something with ROS based robots from the point of view of programming robots (not about robotics hardware).
As a matter of doing a full example, for the rest of the article, we are going to teach how to make robots autonomously navigate.
Also, you should decide in which programming language you are going to teach the course. We do heavily recommend you do the course in Python language (unless your subject requires explicitly the use of C++) . We do not recommend to use C++ for teaching robotics concepts because your students will have a lot of compilation problems that will slow down the learning of the robotics subject (which is what really matters here).
We decide to do the example of this article in Python.
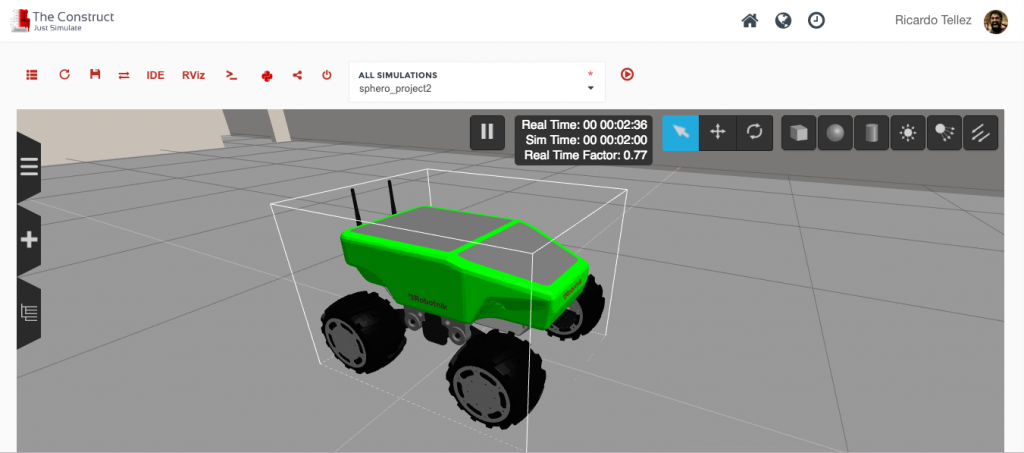
We must list the units for each of the subjects to teach and the exercises that we will use in each unit. Additionally we must provide a project that the students must complete during the whole course.
In our case we are going to include the following units:
We are going to create an RDS project for each one of the units. Let’s start with the first unit now:
Next step would be to decide which robots are we going to use for each of the units. It is convenient to provide different robots to the students to practice with. What we recommend is to use one type of robot per each unit, if possible. This is interesting for the student because he will have as many different points of view as possible of the same concepts.
As indicated, we will use simulations of the robots for demonstration and practice. The selected robots will have to be prepared for the concepts to teach. For example, if you are giving a course about manipulators, you will need to use simulations of robots that have arms and grippers.
For our example of robot navigation, we are going to use wheeled robots that have odometry and laser data. We decided the following robot assignment for each unit:
Since our course is based on ROS, we are going to use Gazebo simulations for our courses. In order to get the simulations, you could build them yourself, but actually, unless you are doing a very strange subject, you can find many Gazebo simulations of robots on the Internet, ready to be used.
For instance, you can download all The Construct simulations from our public repo, which contains many simulations of different types of robots. The simulations of the repo are guaranteed to work with ROS Indigo and Gazebo 7 (as for January 2018). Our public repo is available here:
https://bitbucket.org/account/user/theconstructcore/projects/PS
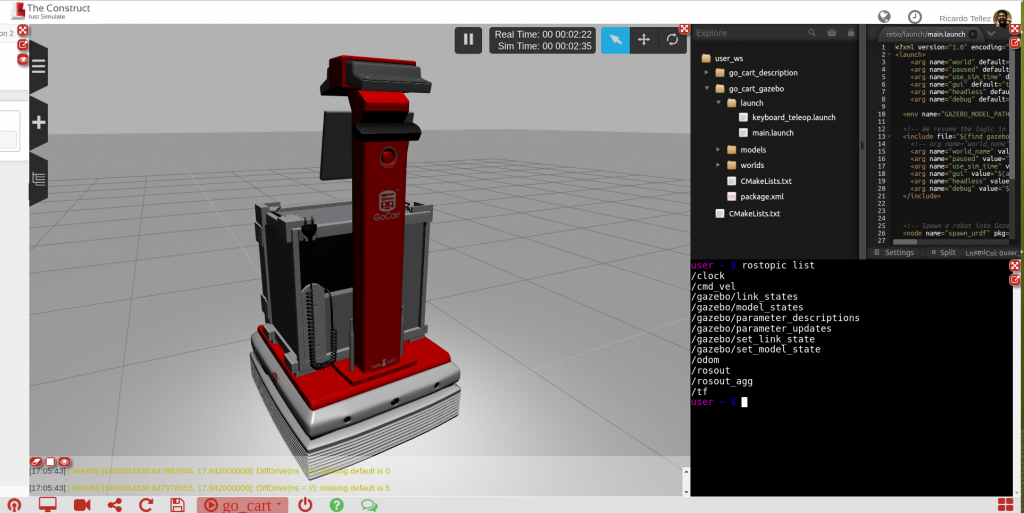
Now let’s start populating our course with the simulation for the Unit 1 (Turtlebot 3)
For that, let’s open the first unit we created previously on RDS. Then, let’s assign to this Unit 1 the simulation that we are going to use for it. In this case, it is going to be the Turtlebot 3 from Robotis. For the Turtlebot 3 we are going to download the simulation from the official documentation page of Robotis. The steps are the following:
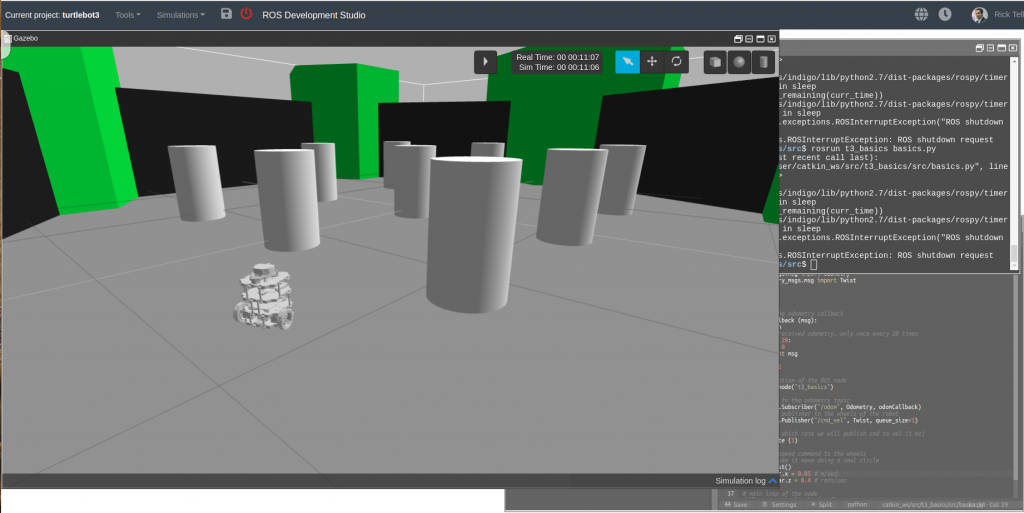
NOTE: In case you have problems with the instructions to install the simulation, please watch the following video that shows step by step how to do it.
Let’s create the notebook that will contain the explanatory text of the unit. That is the text that teaches the student about the unit subject. For the notebook we use the Jupyter notebooks. Jupyter notebooks allow us to embed text with Python, code, images, videos, and results in real time obtained from the simulation.
You should now open the Jupyter notebook and start writing your unit content.
For the sake of speed, let’s use a notebook file I have previously created for this course. Let’s use this file as if we had already written the notebook content for the students. You can also use this as a way of learning the type of content you can embed in a notebook.
You can get this file from the link of the webinar where we explained all the details of this post (https://youtu.be/Z8d1TY8gJ3Q). Go to the webinar link, and there, look at the notes of the video, and look for the Notebook example for download link. Please download the file on the link and then let’s do the following steps together to set that file as the notebook of the first Unit.
NOTE: In this example we have used an already created notebook for the sake of simplicity and demonstration purposes. However, you can create your own notebook inside the RDS starting from scratch (instead of using the file provided here). For doing that, you only need to open the Jupyter notebook (top menu->Tools->Jupyter Notebook). On the new window that will appear just press the New button, and then the Python 2 option under the Notebooks option. A new and empty notebook will appear that you can populate. Play with all the options there. You can rename the file and add all the content you want. Remember that all the notebooks that you create there are going to be stored in the notebooks_ws, so they will be shipped with the whole project.
When doing your own material for your course, you can write all the content by yourself. Let me show you some of the things you can do with a notebook, by following the content of the file already provided:
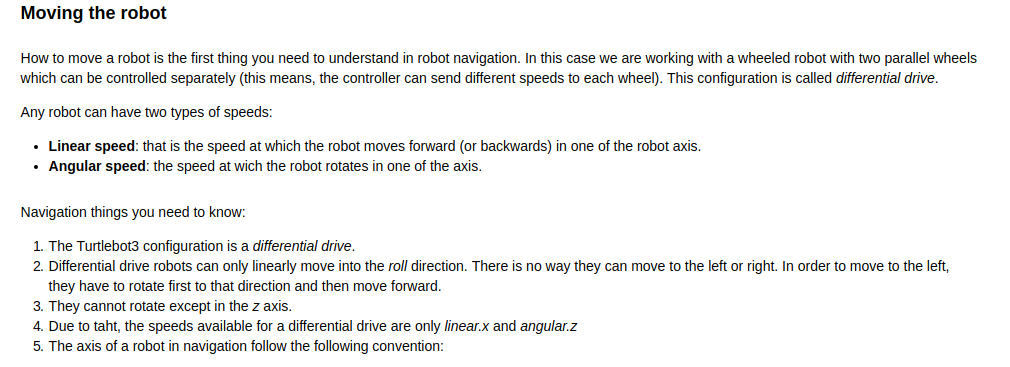
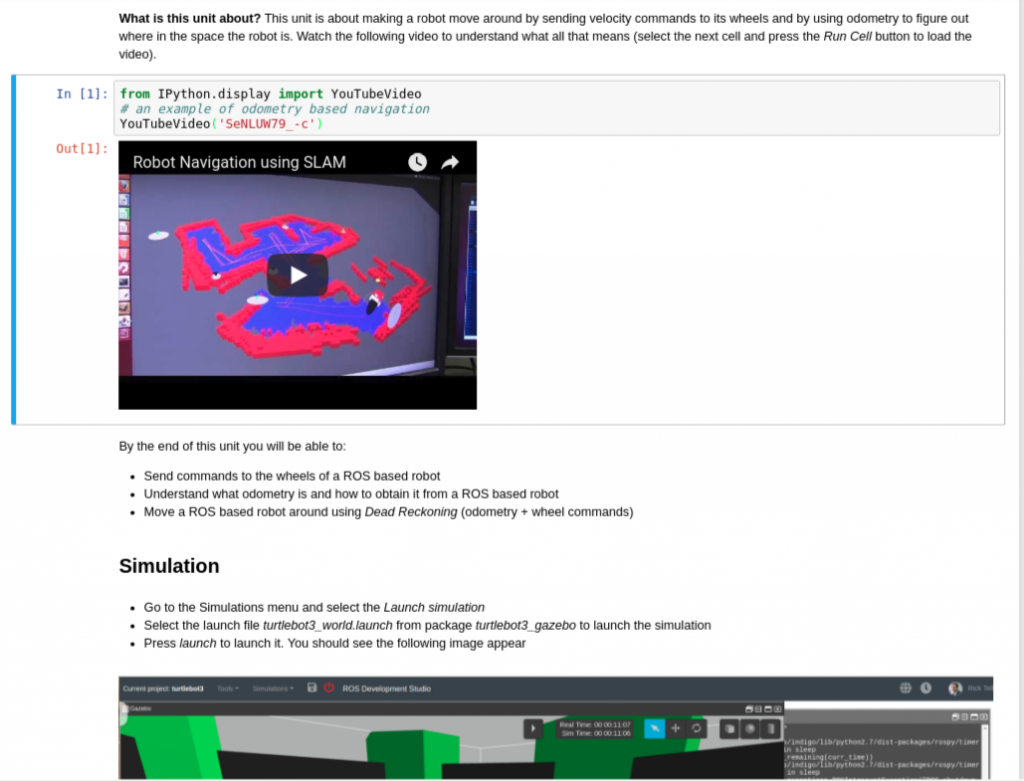

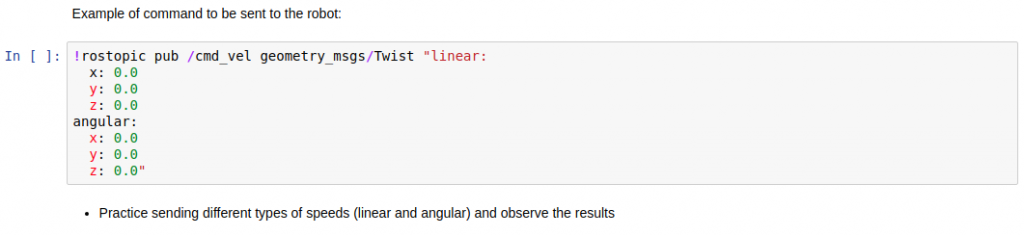
Some important points to take into consideration:
Now let’s save the current status of the whole unit. For that, press the save icon on the top menu. This saves everything from all the workspaces of the project.
We may want to provide some code already done to the students, so they have to modify it or use it as an example for their exercises.
In that case, the code must be put in the catkin_ws, and make reference to it in the notebook.
For the Unit 1 of our MOOC, the student has to do an exercise for moving the robot exactly a square of 1 meter. In order to help him a little, we provide a code example with which the robot reads odometry and moves the robot forward.
Let’s add this example code into the project of Unit 1. In order to get that example code, go to the webinar page again and download the tar.gz file containing the code for the student (look for the link which says Example of package with ROS code for the course). Follow the next steps to include the package in the Unit 1.
Once you have the code done, go and save everything again. The Save icon will save all your changes made in any of your three workspaces: catkin_ws, simulation_ws or notebook_ws.
At this point in time we have the whole information for the Unit 1 done.
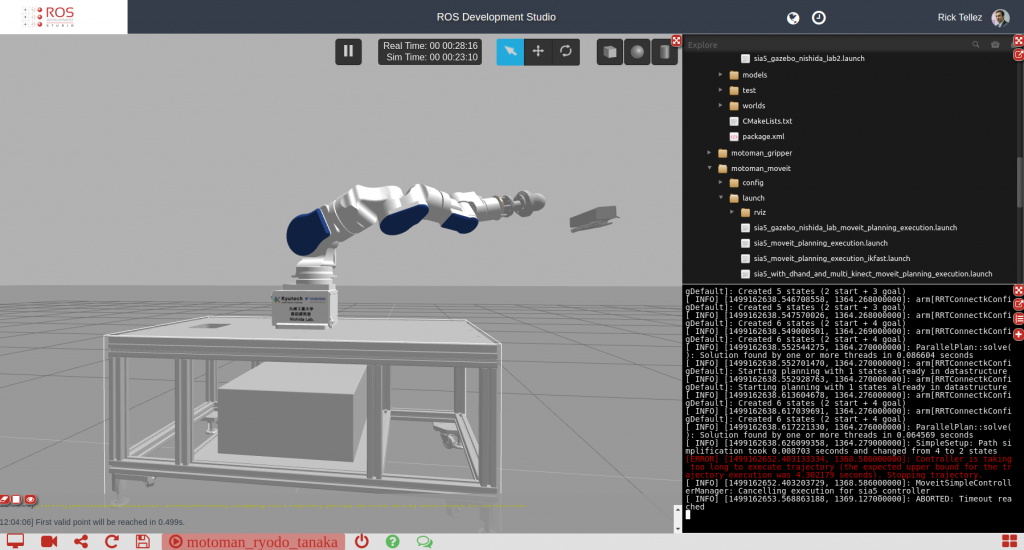
Move to the next Unit until you got all of them done. We recommend that you create a project per each Unit, but it is also possible to have all the Units in a single project. The drawback of putting everything together is that the final file will be too large and confusing, since the code, notebooks and simulations provided for each unit will be mixed all around the project. So not recommended at all. Additionally, by separating in projects each Unit, you can share each Unit separately at different times (for example, you do not get Unit 2 until exercise of Unit 1 is sent).
At this point, you should have the whole MOOC built. You can now share the MOOC with your students. In order to share, you have three options:
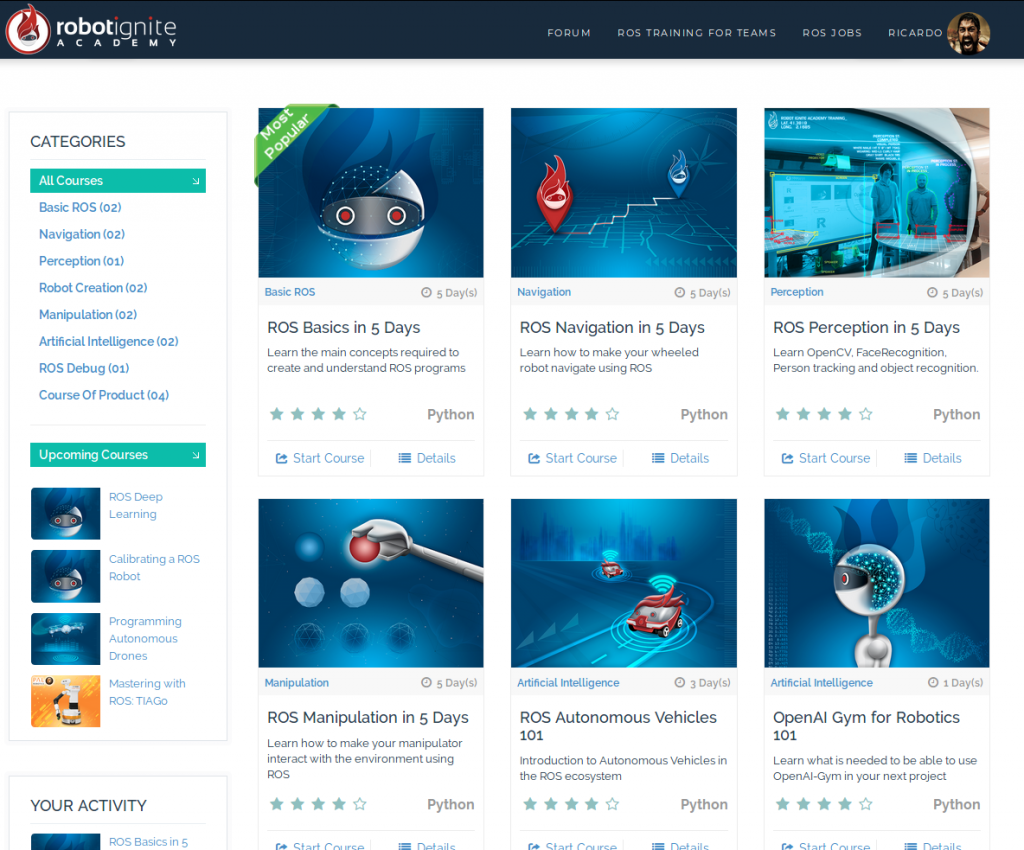
Did you got the instructions clear? Did it work for you? In case you had some trouble with the written instructions, we have created a webinar explaining all those steps. You can watch how the steps are performed by following the video of the webinar, below.
Traditionally, MOOC courses have been based on video tutorials where a person explains the subject, and the student… does what it can to understand. Here we propose a more dynamic and interesting way of creating your MOOC by building interactive elements.
As you can see, working with ROS, Gazebo and Python notebooks is a powerful and fast way of creating an engaging MOOC for the students. All the tools explained here are free, so there is no excuse to not start creating your MOOC right now.
Additionally, if you are still interested on the video path, you can record yourself while explaining through the notebook and simulations. That is the way we have done at Robot Ignite Academy for more than a year already, with a huge success, because the teacher supports his explanation with the notebook, and the students engage in the explanation with the practice while listening the teacher.
As an example, in the video above you can see how I’m teaching Robot Navigation at LaSalle University using Robot Ignite Academy. Every student is practicing at the same time I explain the lesson to them. Additionally, they can do that from any place, with any computer. As you can see on the video, we brought the whole class to the cafeteria where our Barista robot is serving coffees, and they were able to keep practising, programming and testing prior to send their programs to the real robot.
Let us know your thoughts on the comments below!