
![[ROS Q&A] 080 – How to make custom ROS Action](https://www.theconstruct.ai/wp-content/uploads/2017/12/ros_action.png)
[ROS Q&A] 080 – How to make custom ROS Action
About
In this tutorial, we will learn how to create and compile a custom ROS Action from zero by answering a real question from ROS.Answers.
Below are the Steps to create the project as shown in the video
Step 1
- Head to ROS Development Studio and create a new project.
- Provide a suitable project name and some useful description. (We have named the project how_to_make_custom_ros_action)
- Load/Start the project (this will take a few seconds).
- Let’s create a new catkin package in our catkin workspace. Open Tools > Shell and run the following commands
$ cd catkin_ws/src
$ catkin_create_pkg turtlebot3_console_controller actionlib_msgs std_msgs
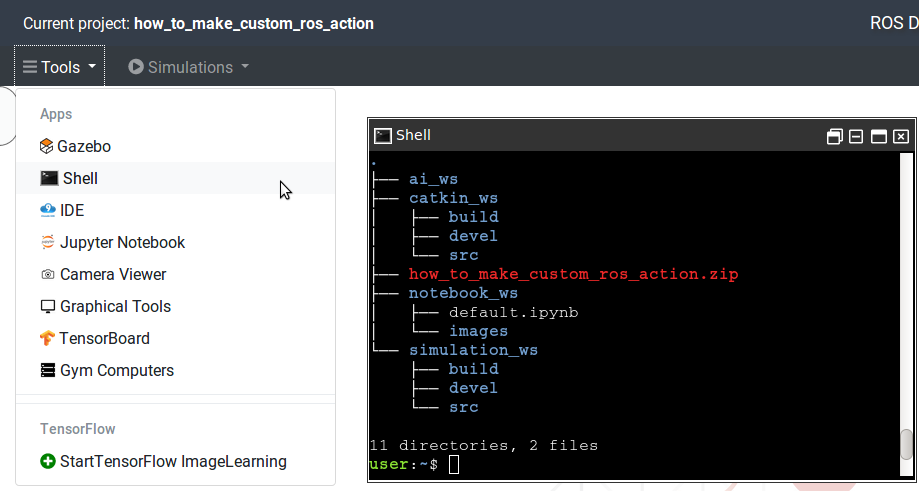
- We’ll create an action directory to put the action file. We will create an action file named Motor.action inside the action directory
$ cd turtlebot3_console_controller
$ mkdir action
$ touch Motor.action
- Use Tools > IDE to browse the directory and file we just created. At this point we should have the following directory structure
.
├── ai_ws
├── catkin_ws
│   ├── build
│   ├── devel
│   └── src
│       ├── CMakeLists.txt
│       └── turtlebot3_console_controller
│           ├── action
│           │   └── Motor.action
│           ├── CMakeLists.txt
│           └── package.xml
├── how_to_make_custom_ros_action.zip
├── notebook_ws
│   ├── default.ipynb
│   └── images
└── simulation_ws
  ├── build
  ├── devel
  └── src
Step 2
- Open the Motor.action file in IDE and write the following content to it.
# This is an action definition file, which has three parts: the goal
# the result, and the feedback.
# Part 1: the goal.
#
# The angle in degree the robot to turn, sent by client main
float64 angle
---
# Part 2: the result, sent by action server unpon completion
#
# How much time used
duration time_elapsed
# How many updates thrown in total
uint32 updates_n
---
# Part 3: the feedback,to be sent periodically by server
#
# The amount of time elapsed from the start
duration time_elapsed
- The contents of Motor.action defines variables of three categories. The categories are separated by — lines. The first category of variables are related to GOAL, second is related to RESULT and third are related to the FEEDBACK. Here we have the following variable in different categories:
anglefor GOAL,time_elapsed,updates_nfor RESULT andtime_elapsedfor FEEDBACK.
- Now we have to add the directive to compile action file in CMakeLists.txt file. This file is inside our package directory i.e. ~/catkin_ws/src/turtlebot3_console_controller. Open the CMakeLists.txt file in IDE
- Add the following code block
add_action_files( FILES Motor.action ) - Also, add this code block
generate_messages( DEPENDENCIES actionlib_msgs ) - Let’s compile the project. Run following commands in the SHELL
$ cd ~/catkin_ws
$ catkin_make
- To test if the action file works we will create a script name node.py inside a new directory within the package. Use the following commands in SHELL
$ cd ~/catkin_ws/src/turtlebot3_console_controller
$ mkdir src
$ touch node.py
- To create the directory and file we can use IDE tool as well. Let’s add the following code to the node.py file
from turtlebot3_console_controller.msg import MotorGoal, MotorResult, MotorFeedback

print("OK, it worked!!!")
Let’s run the above script. Enter the following commands in the SHELL
$ cd ~/catkin_ws/src/turtlebot3_console_controller/src
$ ./node.py
After running the above command you should see the reply OK, it worked!!! in the next line.
And that’s it. We have created a basic action message and verified it works.