Learn ROS with C++  or Python?

Learn ROS with C++ or Python?

This is a question that I get asked all the time:

Do you recommend me to learn ROS with C++  or Python?

As you may know, you can create ROS programs mainly in two programming languages: Python and C++. There are other languages available like Swift, Lisp or others, but those are not fully supported. So for the rest of the article, we will consider that only Python and C++ are the available ones for a newcomer. Mostly, whatever you can do in ROS with C++, you can do it also with Python. Furthermore, you can have C++ ROS programs (ROS programs are called nodes) talking to other Python ROS nodes in the same robot. Since the nodes communicate using standard ROS messages, the actual language implementation of the nodes is not affecting their communication. That is the beauty of ROS.

If that is the way of working of ROS, then, why not to let everybody program in the language they want? Well, because programming in one language or another has its consequences, especially when you are learning ROS. Let’s have a look at them.

Programming ROS with Python

Pros of programming ROS in Python

  • Is faster to build a prototype. You can create a working demo of your node very fast if you use Python, because the language takes care of a lot of things by itself so the programmer doesn’t have to bother.
  • You don’t need to compile, and spend endless hours trying to catch a hidden bug. Even if you can have bugs in Python, the nature of them are a lot easier and faster to catch.
  • You can learn Python very fast.
  • You can make really short programs for complex things
  • The final code of your node is quite easy to read and understand what it does.
  • You can do anything with Python. Python is a very powerful language with libraries for anything you want.
  • It is easier to integrate it with web services based on Django. Since Django is based on Python, you can integrate ROS functions easily in the server calls.
  • It is easier to understand some ROS concepts if you use the Python API, because some complex concepts are hidden for the developer in the ROS Python API. For example, things like the Callback Queue are handled directly by the ROS Python API.

Cons of programming ROS in Python

  • It runs slower. Python is an interpreted language, which means that it is compiled in run time, while the program is being executed. That makes the code slower.
  • Higher chances of crashing in run time, that is, while the program is running on the robot. You can have a very silly mistake in the code that won’t be cached until the program runs that part of the code (in run time).
  • Unless you define very clear procedures, you can end with a messy code in a short time if the project grows. I mean, you need to impose some rules for developing, like indicating every class you import from which library is, force strong types on any definition of a variable, etc.

ROS Python or ROS C++ image 2

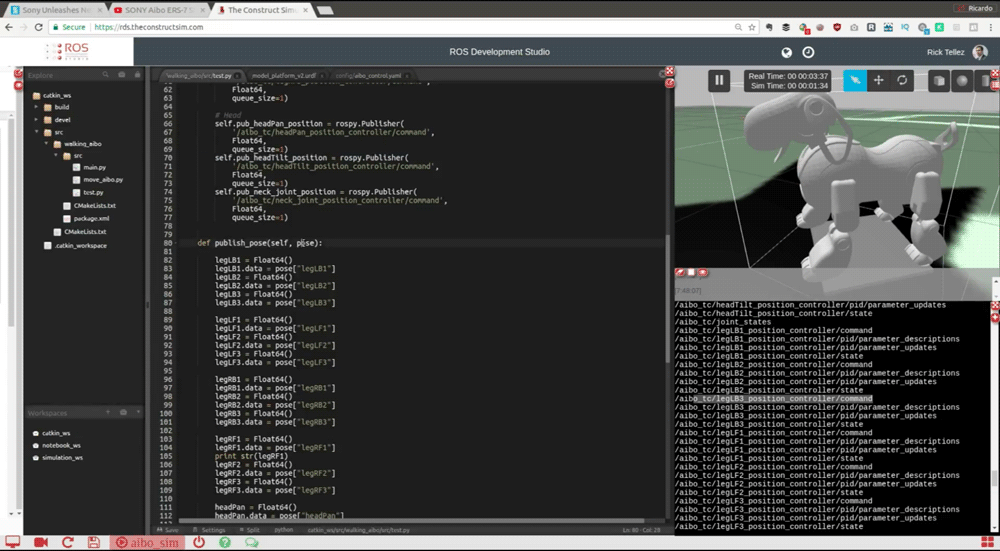
Programming the Aibo robot in ROS Python


Programming ROS with C++

Pros of programming ROS in C++:

  • The code runs really fast. Maybe in your project, you need some fast code.
  • By having to compile, you can catch a lot of errors during compilation time, instead of having them in run time.
  • C++ has an infinite number of libraries that allow you to do whatever you want with C++.
  • It is the language used in the robotics industry, so you need to master it if you want to work there.

Cons of programming ROS in C++:

  • C++ is a lot more complex to learn and master. A LOT
  • Just creating a small demo of something requires creating a lot of code.
  • Understanding what a C++ program does can take you a long time.
  • Debugging errors in C++ is complex and takes time.
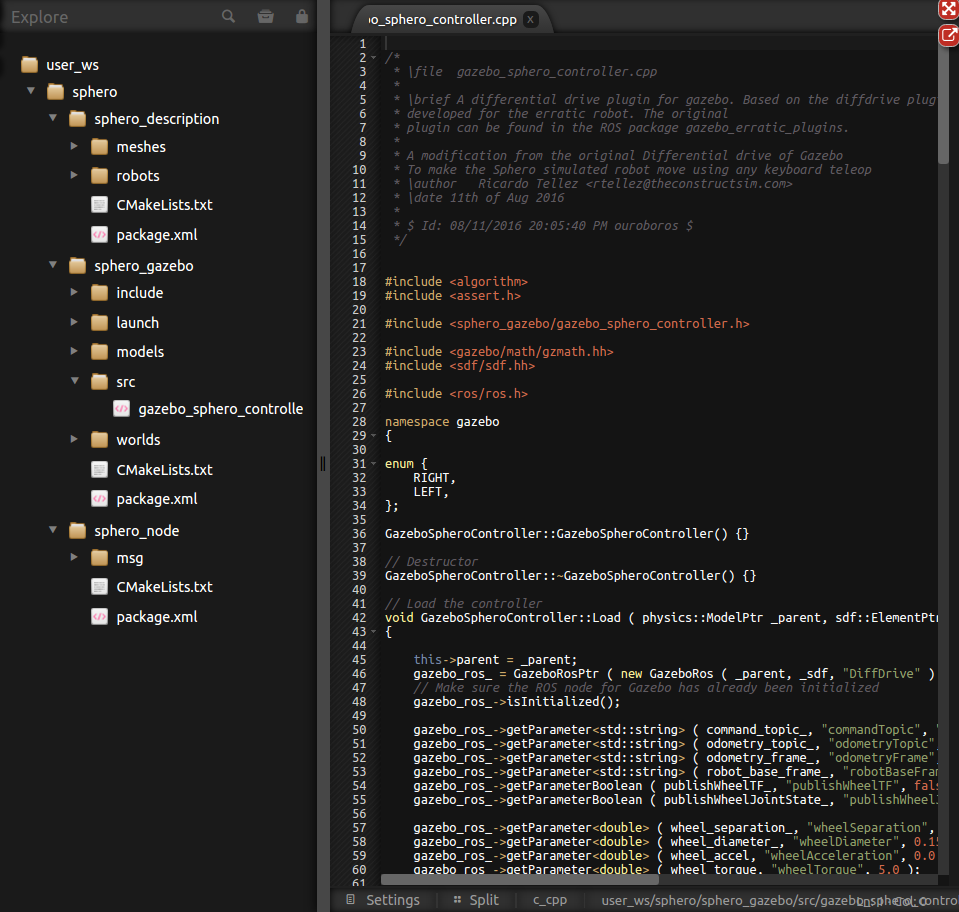
ROS Python or ROS C++ image 1

ROS C++ code


A proposed ROS learning path

You: I do understand your list of pros and cons, but in the end, what should I do? I want to learn ROS… do I have to use Python or C++ for learning ROS?

Me: Well that depends on your situation. Based on your situation, some of the cons may not be a con (if you are a master of C++ the fact that C++ is difficult doesn’t affect you). So it may be convenient for you to start ROS with C++… if your goal is the industry! (because the robotics industry needs the speed of C++ for their robot programs). However, if your goal is research and academia, I would not recommend learning ROS with C++ even if you mastered it, because in academia, speed in testing hypothesis is more important than speed of execution. Hence Python would be your choice.

It all depends on your situation.

You: Yes but I need some clear examples of the learning path for the typical newcomer to ROS.

Me: OK, let me give you the typical situation.

One situation that I get all the time, especially at the University, is that students that come to learn ROS do not know neither C++ nor Python (actually, most of them not even know about Linux shell, but that is another matter). In that case, I strongly recommend start learning ROS using Python. Really, believe me, it is too much to try to learn ROS at the same time that you learn C++. I’ve seen many times. People get frustrated and complain about the difficulty of ROS. Yes, ROS is difficult but the thing is that you tried to swallow too much by learning C++ and ROS at the same time.

You: But I want to go to work for the industry. Does that mean that I’ll have to stay with Python every time that I program with ROS, so I won’t have access to the industry?

Me: No. What I’m proposing here is that you go step by step. I know you want to go fast, but that doesn’t work. Go step by step and you will actually learn faster and master both ROS for Python and for C++ (just if you want to).

You: Ok, so how do I learn step by step ROS if I know neither Python nor C++?

Me: Well, first you need to learn Python. Learn the basics of Python and how to manage classes. That is mostly what you will need from Python. You can learn it in this online free course. Once you know more or less about Python, then start learning ROS in Python. You should learn the following subjects in the following order:

  1. ROS Basic concepts
    1. Topics
    2. Messages
    3. Packages
    4. Services
    5. Actions
  2. How to debug with ROS
    1. Rviz
    2. rqt tools
  3. ROS TF
  4. ROS URDF
  5. ROS Gazebo
  6. ROS Control

(note: you can find all those subjects explained in the ROS wiki, or if you want something more interactive, you can try our ROS online academy).

At this point in time, you will already know the basics of ROS and understand what it is and how it works. Also, you would have practiced a lot writing Python code with classes. Now it is the moment to switch to C++ in case you want to program in that language (if it is not your case and you feel comfortable with Python, jump to the next step). Learn now the basics of C++, including classes and pointers (especially smart pointers, because they are used a lot in ROS). Then, you will have to revisit some basic concepts of ROS, because they are treated differently in C++.

So you need to go back again to learn the basics of ROS, but this time in C++. Study the following subjects:

  1. ROS Basic concepts
    1. Topics
    2. Messages
    3. Packages
    4. Services
    5. Actions
  2. ROS TF
  3. ROS Control

Finally, continue getting more knowledge of ROS, either in C++ or in Python. Learn the following subjects, without any specific order. Just choose the subject based on your own preferences or needs:

  • ROS Navigation
  • ROS Perception
  • ROS Manipulation
  • ROS Machine Learning
  • ROS for Industrial Robots

That’s it!

You: it sounds like a lot of work, but it makes sense.

Me: Yes it is! But nobody said that was going to be easy…

Once you have mastered most of the subjects of ROS and both Python and C++, you can start developing like a pro.

You: What does it mean like a pro?

Me: Well, for me it means that you will create nodes in either C++ or Python, depending on your requirements.

For example, while I was creating the navigation software of a human size humanoid robot, I created the localization algorithm using C++, but I created the recovery behavior when lost using state machines in Python. The localization algorithm is a complex algorithm requiring to run fast and consuming a lot of resources (because of the particles), that is why I did it in C++, but the coordination behavior did not require a fast execution, but instead, required a clear structure and easy reading to understand the logic behind.


Conclusion

Learning ROS with Python or C++ depends on your current situation and the reason why you want to learn ROS. If you are like the typical newcomer (no knowledge of Python nor C++), then definitely, you should start learning ROS with Python and then decide whether it is convenient for you to move to C++.

Let me know about your experiences in the comments below. Did you learn ROS using C++ or using Python? Why? Would you have done differently if you could go back?

Take Away

ROSDS Docs – ROSject workspaces

ROSDS Docs – ROSject workspaces

ROSject workspaces

Every ROSject created in ROSDS contains from the beginning 2 workspaces pre-configured in the user home folder. These 2 workspaces inherit another workspace, which contains all the simulations TheConstruct provides, which is called the Public Simulation Workspace (public_sim_ws). Finally, this simulations workspace inherit only the ROS distribution installed. It may vary depending on the distro you have chosen the given ROSject.

That’s the structure TheConstruct engineers defined to provide all the simulations we have pre-installed and compiled, and also gives to the developer the power to overwrite any of those simulations (you can launch any of those simulations on the fly in ROSDS!). Basically, a ROS workspace that overlays another can have packages with the same name having priority to be executed (It can become quite confusing, but you can check all the rules here: http://wiki.ros.org/catkin/Tutorials/workspace_overlaying).

Finally, our team suggests to the community to develop a ROS project separating the simulations from robotic behaviors packages. What is the difference? Basically, we believe a developer should be able to switch between simulations/robots and robotic algorithms. E.g: You could use the same obstacle avoidance algorithm with any mobile robot, since you configure its parameters properly. That’s why a ROSject have from scratch 2 workspaces in it: simulations_ws and catkin_ws. Of course, the developer can change it to the architecture fits better to his project. The original workspaces overlaying in a ROSject is like shown below:


[ROS Q&A] 176 – Publisher/Subscriber tutorial – avoid losing some messages from the publisher

[ROS Q&A] 176 – Publisher/Subscriber tutorial – avoid losing some messages from the publisher

Learn how to make sure that the Subscriber receives all messages sent by a C++ ROS Publisher to avoid losing any messages from the publisher. This post answers the following question found on the ROS Answers forum: https://answers.ros.org/question/313491/cpp-publishersubscriber-tutorial-loosing-some-messages/. Let’s go!

Related Resources

Step 1: Get your development environment ready

Either of the following will do:

  1. Use the ROS Development Studio (ROSDS), an online platform for developing for ROS within a PC browser. Easy-peasy. I’m using this option for this post
    1. Once you log in, click on the New ROSject button to create a project that will host your code. Then Click on Open ROSject to launch the development/simulation environment.
    2. To open a “terminal” on ROSDSpick the Shell app from the Tools menu.
    3. You can find the IDE app on the Tools menu.
  2. You have ROS installed on a local PC. Okay, skip to Step 2.

Next step!

Step 2: Reproduce the problem – let’s lose some messages from the publisher!

Create the talker and listener nodes as specified in the tutorial: http://wiki.ros.org/ROS/Tutorials/WritingPublisherSubscriber(c%2B%2B)

1. If you are using ROSDS, start by creating a and opening a ROSject as described above.

2. Open a terminal and create a package:

user:~$ cd catkin_ws/src
user:~/catkin_ws/src$ catkin_create_pkg talker_listener roscpp
Created file talker_listener/CMakeLists.txt
Created file talker_listener/package.xml
Created folder talker_listener/include/talker_listener
Created folder talker_listener/src
Successfully created files in /home/user/catkin_ws/src/talker_listener. Please adjust the values in package.xml.
user:~/catkin_ws/src$

3. Create the talker and listener source files

user:~/catkin_ws/src$ cd talker_listener/src
user:~/catkin_ws/src/talker_listener/src$ touch talker.cpp listener.cpp

4. Open the talker.cpp and listener.cpp files in the IDE and paste in the following code

talker.cpp

#include "ros/ros.h"
#include "std_msgs/String.h"

#include <sstream>

/**
 * This tutorial demonstrates simple sending of messages over the ROS system.
 */
int main(int argc, char **argv)
{
  /**
   * The ros::init() function needs to see argc and argv so that it can perform
   * any ROS arguments and name remapping that were provided at the command line.
   * For programmatic remappings you can use a different version of init() which takes
   * remappings directly, but for most command-line programs, passing argc and argv is
   * the easiest way to do it.  The third argument to init() is the name of the node.
   *
   * You must call one of the versions of ros::init() before using any other
   * part of the ROS system.
   */
  ros::init(argc, argv, "talker");

  /**
   * NodeHandle is the main access point to communications with the ROS system.
   * The first NodeHandle constructed will fully initialize this node, and the last
   * NodeHandle destructed will close down the node.
   */
  ros::NodeHandle n;

  /**
   * The advertise() function is how you tell ROS that you want to
   * publish on a given topic name. This invokes a call to the ROS
   * master node, which keeps a registry of who is publishing and who
   * is subscribing. After this advertise() call is made, the master
   * node will notify anyone who is trying to subscribe to this topic name,
   * and they will in turn negotiate a peer-to-peer connection with this
   * node.  advertise() returns a Publisher object which allows you to
   * publish messages on that topic through a call to publish().  Once
   * all copies of the returned Publisher object are destroyed, the topic
   * will be automatically unadvertised.
   *
   * The second parameter to advertise() is the size of the message queue
   * used for publishing messages.  If messages are published more quickly
   * than we can send them, the number here specifies how many messages to
   * buffer up before throwing some away.
   */
  ros::Publisher chatter_pub = n.advertise<std_msgs::String>("chatter", 1000);

  ros::Rate loop_rate(10);

  /**
   * A count of how many messages we have sent. This is used to create
   * a unique string for each message.
   */
  int count = 0;
  while (ros::ok())
  {
    /**
     * This is a message object. You stuff it with data, and then publish it.
     */
    std_msgs::String msg;

    std::stringstream ss;
    ss << "hello world " << count;
    msg.data = ss.str();

    ROS_INFO("%s", msg.data.c_str());

    /**
     * The publish() function is how you send messages. The parameter
     * is the message object. The type of this object must agree with the type
     * given as a template parameter to the advertise<>() call, as was done
     * in the constructor above.
     */
    chatter_pub.publish(msg);

    ros::spinOnce();

    loop_rate.sleep();
    ++count;
  }


  return 0;
}

listener.cpp

#include "ros/ros.h"
#include "std_msgs/String.h"

/**
 * This tutorial demonstrates simple receipt of messages over the ROS system.
 */
void chatterCallback(const std_msgs::String::ConstPtr& msg)
{
  ROS_INFO("I heard: [%s]", msg->data.c_str());
}

int main(int argc, char **argv)
{
  /**
   * The ros::init() function needs to see argc and argv so that it can perform
   * any ROS arguments and name remapping that were provided at the command line.
   * For programmatic remappings you can use a different version of init() which takes
   * remappings directly, but for most command-line programs, passing argc and argv is
   * the easiest way to do it.  The third argument to init() is the name of the node.
   *
   * You must call one of the versions of ros::init() before using any other
   * part of the ROS system.
   */
  ros::init(argc, argv, "listener");

  /**
   * NodeHandle is the main access point to communications with the ROS system.
   * The first NodeHandle constructed will fully initialize this node, and the last
   * NodeHandle destructed will close down the node.
   */
  ros::NodeHandle n;

  /**
   * The subscribe() call is how you tell ROS that you want to receive messages
   * on a given topic.  This invokes a call to the ROS
   * master node, which keeps a registry of who is publishing and who
   * is subscribing.  Messages are passed to a callback function, here
   * called chatterCallback.  subscribe() returns a Subscriber object that you
   * must hold on to until you want to unsubscribe.  When all copies of the Subscriber
   * object go out of scope, this callback will automatically be unsubscribed from
   * this topic.
   *
   * The second parameter to the subscribe() function is the size of the message
   * queue.  If messages are arriving faster than they are being processed, this
   * is the number of messages that will be buffered up before beginning to throw
   * away the oldest ones.
   */
  ros::Subscriber sub = n.subscribe("chatter", 1000, chatterCallback);

  /**
   * ros::spin() will enter a loop, pumping callbacks.  With this version, all
   * callbacks will be called from within this thread (the main one).  ros::spin()
   * will exit when Ctrl-C is pressed, or the node is shutdown by the master.
   */
  ros::spin();

  return 0;
}

5. Add the following lines to the build section of the CMakeList.txt file, so the files can build:

add_executable(talker src/talker.cpp)
target_link_libraries(talker ${catkin_LIBRARIES})
add_dependencies(talker talker_listener_generate_messages_cpp)

add_executable(listener src/listener.cpp)
target_link_libraries(listener ${catkin_LIBRARIES})
add_dependencies(listener talker_listener_generate_messages_cpp)

6. Build the package and source the workspace:

user:~/catkin_ws$ catkin_make
user:~/catkin_ws$ source devel/setup.bash

7. Start the listener node first in the current terminal and then start the talker node in another terminal.

Start the listener first. You should not see any message yet.

user:~/catkin_ws$ rosrun talker_listener listener

(PS: If you get an error that master cannot be reached, run nohup roscore & in the current terminal to start the ROS master)

Start the talker in a new terminal.

user:~$ cd catkin_ws
user:~/catkin_ws$ source devel/setup.bash
user:~/catkin_ws$ rosrun talker_listener talker

You would notice that even though the talker publishes the messages starting from zero, the listener only gets the messages starting from 3 (or even 4):

# Talker

user:~/catkin_ws$ rosrun talker_listener talker
[ INFO] [1586183868.773366254]: hello world 0
[ INFO] [1586183868.873393538]: hello world 1
[ INFO] [1586183868.973385317]: hello world 2
[ INFO] [1586183869.073401909]: hello world 3
[ INFO] [1586183869.173393278]: hello world 4
[ INFO] [1586183869.273392714]: hello world 5

#### Listener

user:~/catkin_ws$ rosrun talker_listener listener
[ INFO] [1586183869.073691834]: I heard: [hello world 3]
[ INFO] [1586183869.173605854]: I heard: [hello world 4]
[ INFO] [1586183869.273767103]: I heard: [hello world 5]

So the problem is real! Let’s fix it in the next section!

Step 2: Fix the problem: avoid losing messages from the publisher

What’s the point of talking when no one is listening? We need to make the talker wait for the listener before publishing the message by adding the following lines to the talker.cpp file, before the publish command:

while(chatter_pub.getNumSubscribers() == 0)
    loop_rate.sleep();

So your talker.cpp should now be:

#include "ros/ros.h"
#include "std_msgs/String.h"

#include <sstream>

/**
 * This tutorial demonstrates simple sending of messages over the ROS system.
 */
int main(int argc, char **argv) {
  /**
   * The ros::init() function needs to see argc and argv so that it can perform
   * any ROS arguments and name remapping that were provided at the command
   * line. For programmatic remappings you can use a different version of init()
   * which takes remappings directly, but for most command-line programs,
   * passing argc and argv is the easiest way to do it.  The third argument to
   * init() is the name of the node.
   *
   * You must call one of the versions of ros::init() before using any other
   * part of the ROS system.
   */
  ros::init(argc, argv, "talker");

  /**
   * NodeHandle is the main access point to communications with the ROS system.
   * The first NodeHandle constructed will fully initialize this node, and the
   * last NodeHandle destructed will close down the node.
   */
  ros::NodeHandle n;

  /**
   * The advertise() function is how you tell ROS that you want to
   * publish on a given topic name. This invokes a call to the ROS
   * master node, which keeps a registry of who is publishing and who
   * is subscribing. After this advertise() call is made, the master
   * node will notify anyone who is trying to subscribe to this topic name,
   * and they will in turn negotiate a peer-to-peer connection with this
   * node.  advertise() returns a Publisher object which allows you to
   * publish messages on that topic through a call to publish().  Once
   * all copies of the returned Publisher object are destroyed, the topic
   * will be automatically unadvertised.
   *
   * The second parameter to advertise() is the size of the message queue
   * used for publishing messages.  If messages are published more quickly
   * than we can send them, the number here specifies how many messages to
   * buffer up before throwing some away.
   */
  ros::Publisher chatter_pub = n.advertise<std_msgs::String>("chatter", 1000);

  ros::Rate loop_rate(10);

  /**
   * A count of how many messages we have sent. This is used to create
   * a unique string for each message.
   */
  int count = 0;
  while (ros::ok()) {
    /**
     * This is a message object. You stuff it with data, and then publish it.
     */
    std_msgs::String msg;

    std::stringstream ss;
    ss << "hello world " << count;
    msg.data = ss.str();

    ROS_INFO("%s", msg.data.c_str());

    /**
     * The publish() function is how you send messages. The parameter
     * is the message object. The type of this object must agree with the type
     * given as a template parameter to the advertise<>() call, as was done
     * in the constructor above.
     */
    while (chatter_pub.getNumSubscribers() == 0)
      loop_rate.sleep();

    chatter_pub.publish(msg);

    ros::spinOnce();

    loop_rate.sleep();
    ++count;
  }

  return 0;
}

Build the package again, from the first terminal:

user:~/catkin_ws$ catkin_make

Start the listener:

user:~/catkin_ws$ source devel/setup.bash
user:~/catkin_ws$ rosrun talker_listener listener

Then start the talker:

user:~/catkin_ws$ source devel/setup.bash
user:~/catkin_ws$ rosrun talker_listener talker

Now you should see that the messages are in sync:

# Talker

user:~/catkin_ws$ rosrun talker_listener talker
[ INFO] [1586183868.773366254]: hello world 0
[ INFO] [1586183868.873393538]: hello world 1
[ INFO] [1586183868.973385317]: hello world 2

#### Listener

user:~/catkin_ws$ rosrun talker_listener listener
[ INFO] [1586183869.073691834]: I heard: [hello world 0]
[ INFO] [1586183869.173605854]: I heard: [hello world 1]
[ INFO] [1586183869.273767103]: I heard: [hello world 2]

Yes, we did it! See you next time.

Extra: Video of the post

Here below you have a “sights and sounds” version of this post, just in case you prefer it that way. Enjoy!

Feedback

Did you like this post? Do you have any questions about the explanations? Whatever the case, please leave a comment on the comments section below, so we can interact and learn from each other.

If you want to learn about other ROS or ROS2 topics, please let us know in the comments area and we will do a video or post about it.


Edited by Bayode Aderinola

[ROS Q&A] 175 – Sending Goals to the Navigation Stack using Waypoints

[ROS Q&A] 175 – Sending Goals to the Navigation Stack using Waypoints

About:
In this video we’re going to show you how to send successive goals to the Navigation Stack using Waypoints.

RELATED ROS RESOURCES&LINKS:

ROS Development Studio (ROSDS) —▸ http://bit.ly/2QTy0wr
Robot Ignite Academy –▸ http://bit.ly/2QRTZE9


Feedback

Did you like this video? Do you have questions about what is explained? Whatever the case, please leave a comment on the comments section below, so we can interact and learn from each other.

If you want to learn about other ROS topics, please let us know on the comments area and we will do a video about it 🙂

[ROS Q&A] 174 –  How to extract the middle data from LaserScan ranges

[ROS Q&A] 174 – How to extract the middle data from LaserScan ranges

In this video we’re going to show you how to extract the middle data from a LaserScan message ranges value, using a very simple Python example.

RELATED ROS RESOURCES&LINKS:


Feedback

Did you like this video? Do you have questions about what is explained? Whatever the case, please leave a comment on the comments section below, so we can interact and learn from each other.

If you want to learn about other ROS topics, please let us know on the comments area and we will do a video about it 🙂

[ROS Q&A] 173 – How to create Launch Files in ROS2

[ROS Q&A] 173 – How to create Launch Files in ROS2

In this video we’re going to show you how to create launch files in ROS2, compared with how we did for ROS1.

RELATED ROS RESOURCES&LINKS:
ROS Development Studio (ROSDS) —▸ http://rosds.online
Robot Ignite Academy –▸ https://www.robotigniteacademy.com

Enjoy ROS2! 🙂


Feedback

Did you like this video? Do you have questions about what is explained? Whatever the case, please leave a comment on the comments section below, so we can interact and learn from each other.

If you want to learn about other ROS topics, please let us know on the comments area and we will do a video about it 🙂

Pin It on Pinterest