In this post, we will see what Rviz is all about and how to use it.
We are going to use a ROS1 installation for this, but you don’t need to install ROS, as we will use the ROS Development Studio (ROSDS), an online platform that provides access to ROS1 or ROS2 computers and other powerful ROS tools within a browser!
Let’s go!
Step 1: Create a Project (ROSject) on ROSDS
Action first before the theory! Grab a copy of the project used for this post here. If you don’t have an account on the ROSDS, you will be asked to create one.
Once you have cloned the project, open it up and give it a moment to finish loading.
Step 2: Bring up a TurtleBot2 simulation
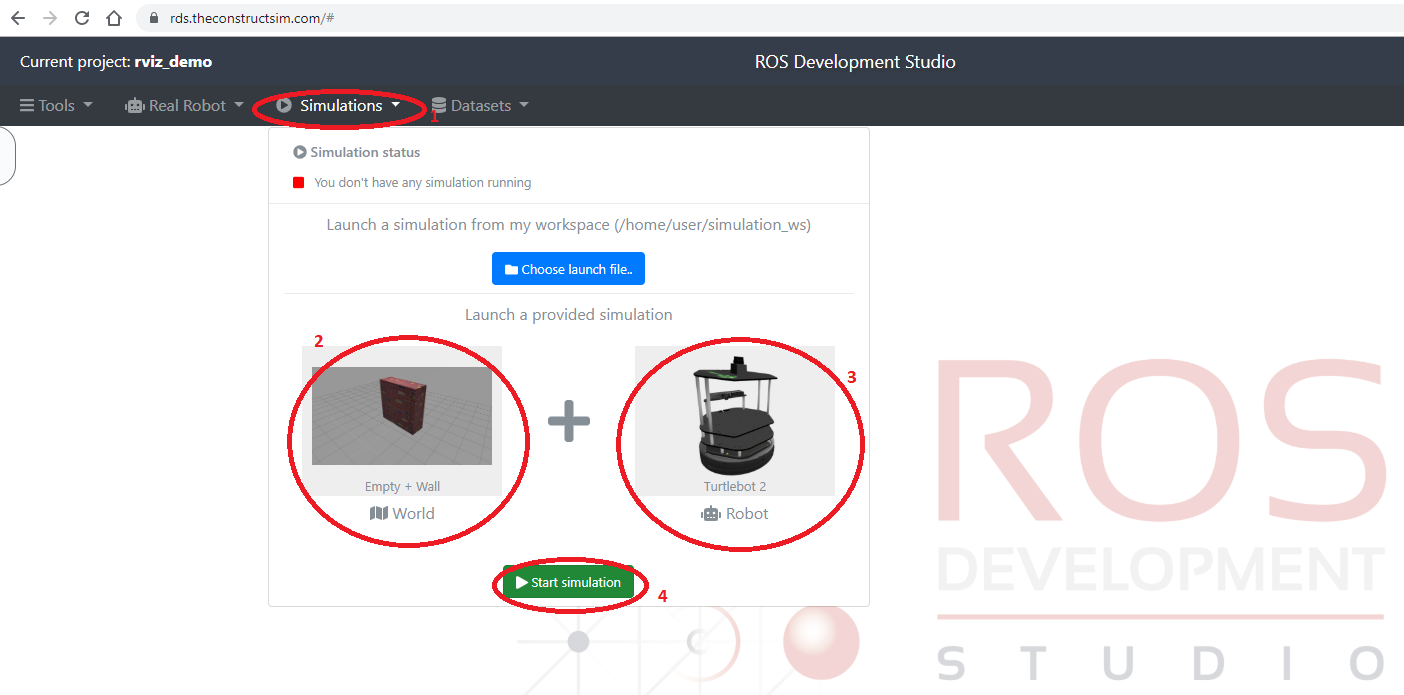
Head to the Simulations menu and launch one of the pre-configured simulations:
- Select “Simulations from the main menu”.
- Under “World”, select “Empty to World”.
- Under “Robot”, select TurtleBot2.
- Click “Start Simulation”.
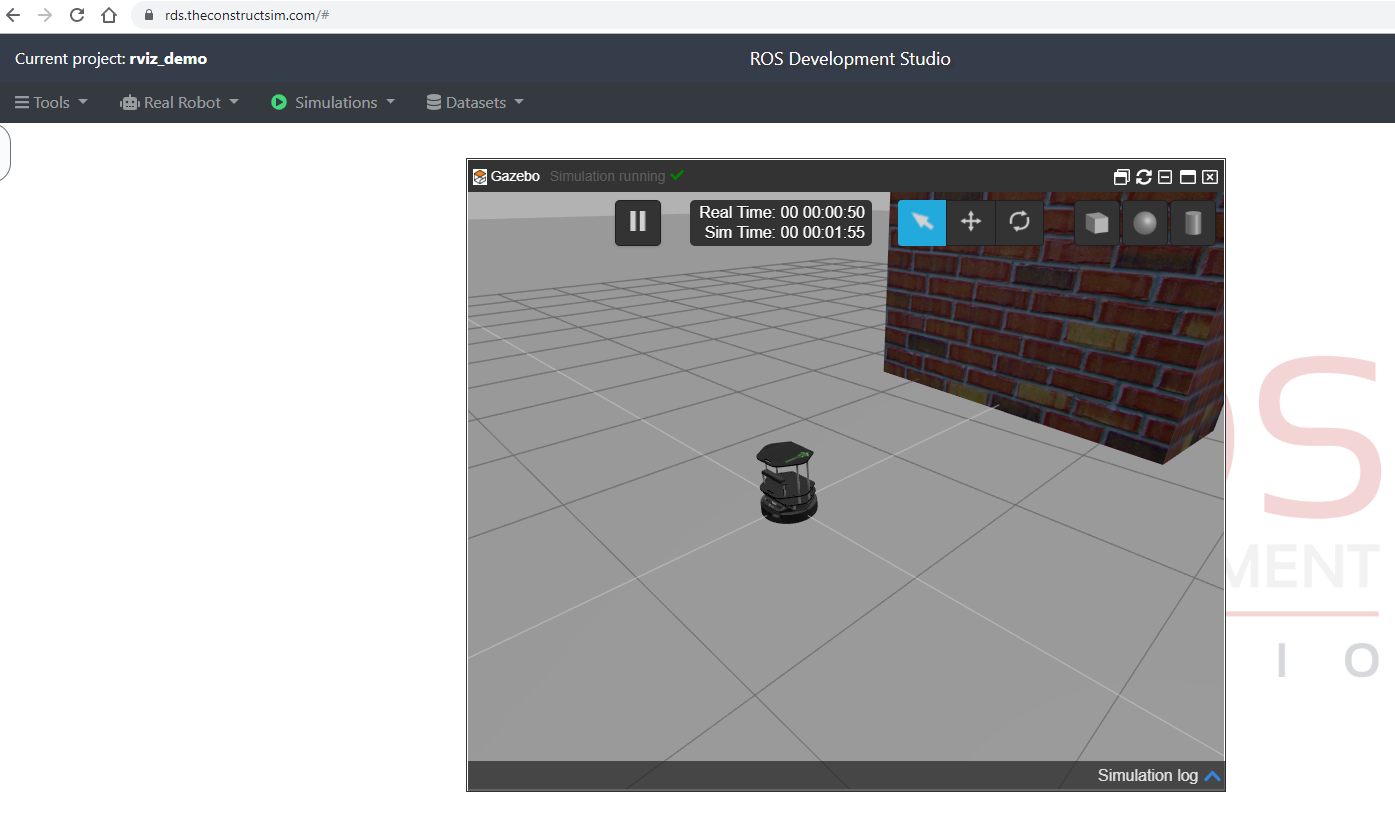
You should now have something like this:
That’s a TutleBot2 facing a wall.
Step 3: Launch the rviz program and use it to “spy” on the TurtleBot
We need two more tools here.
- Minimize the Gazebo window.
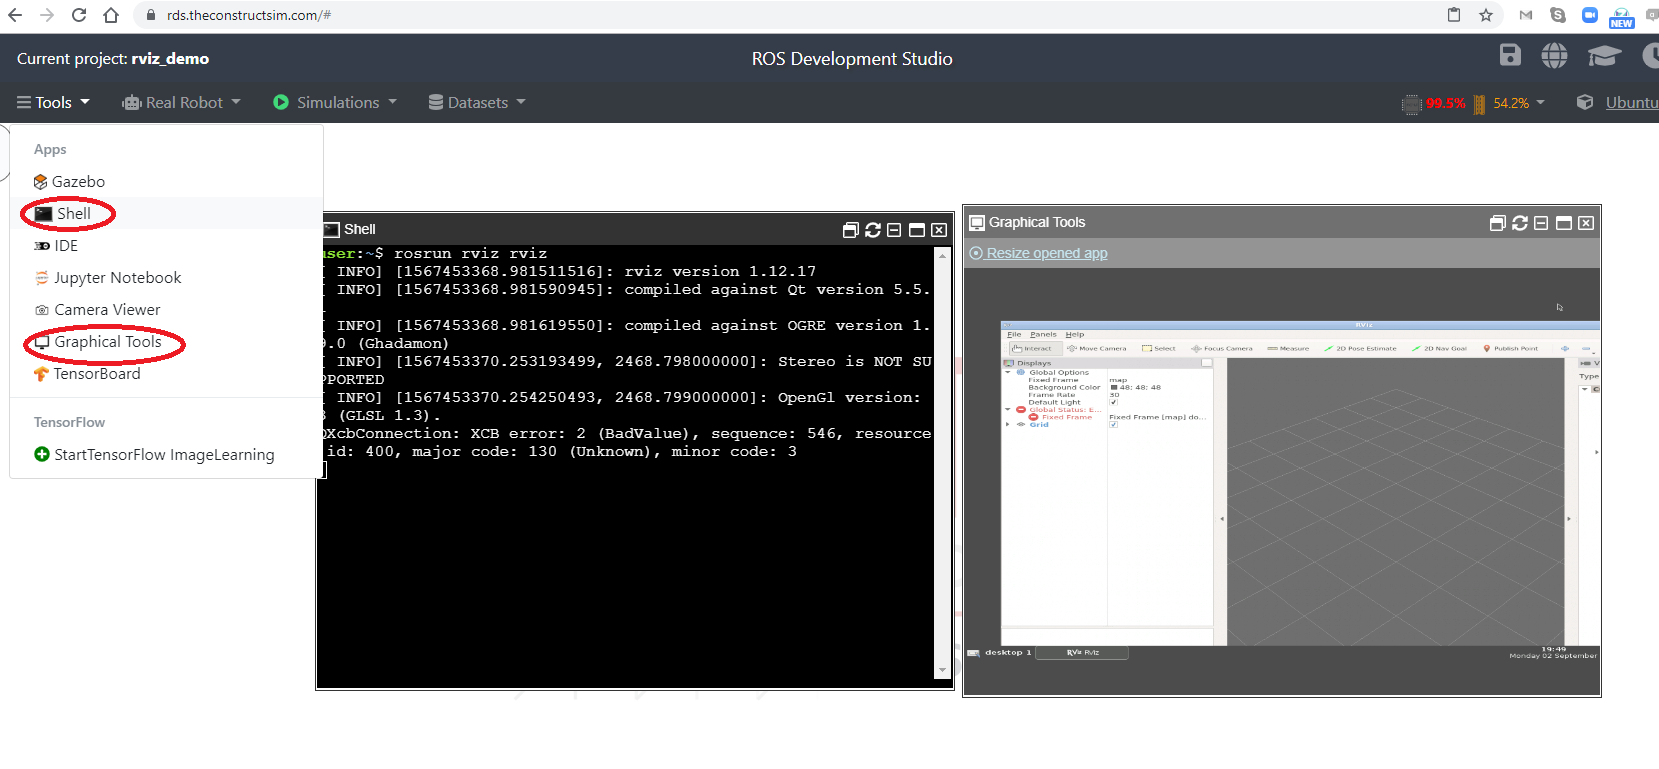
- From the Tools menu, pick “Shell” and “Graphical Tools”. Arrange them side-by-side for better visibility.
On the Shell tool, run the following command:
rosrun rviz rviz
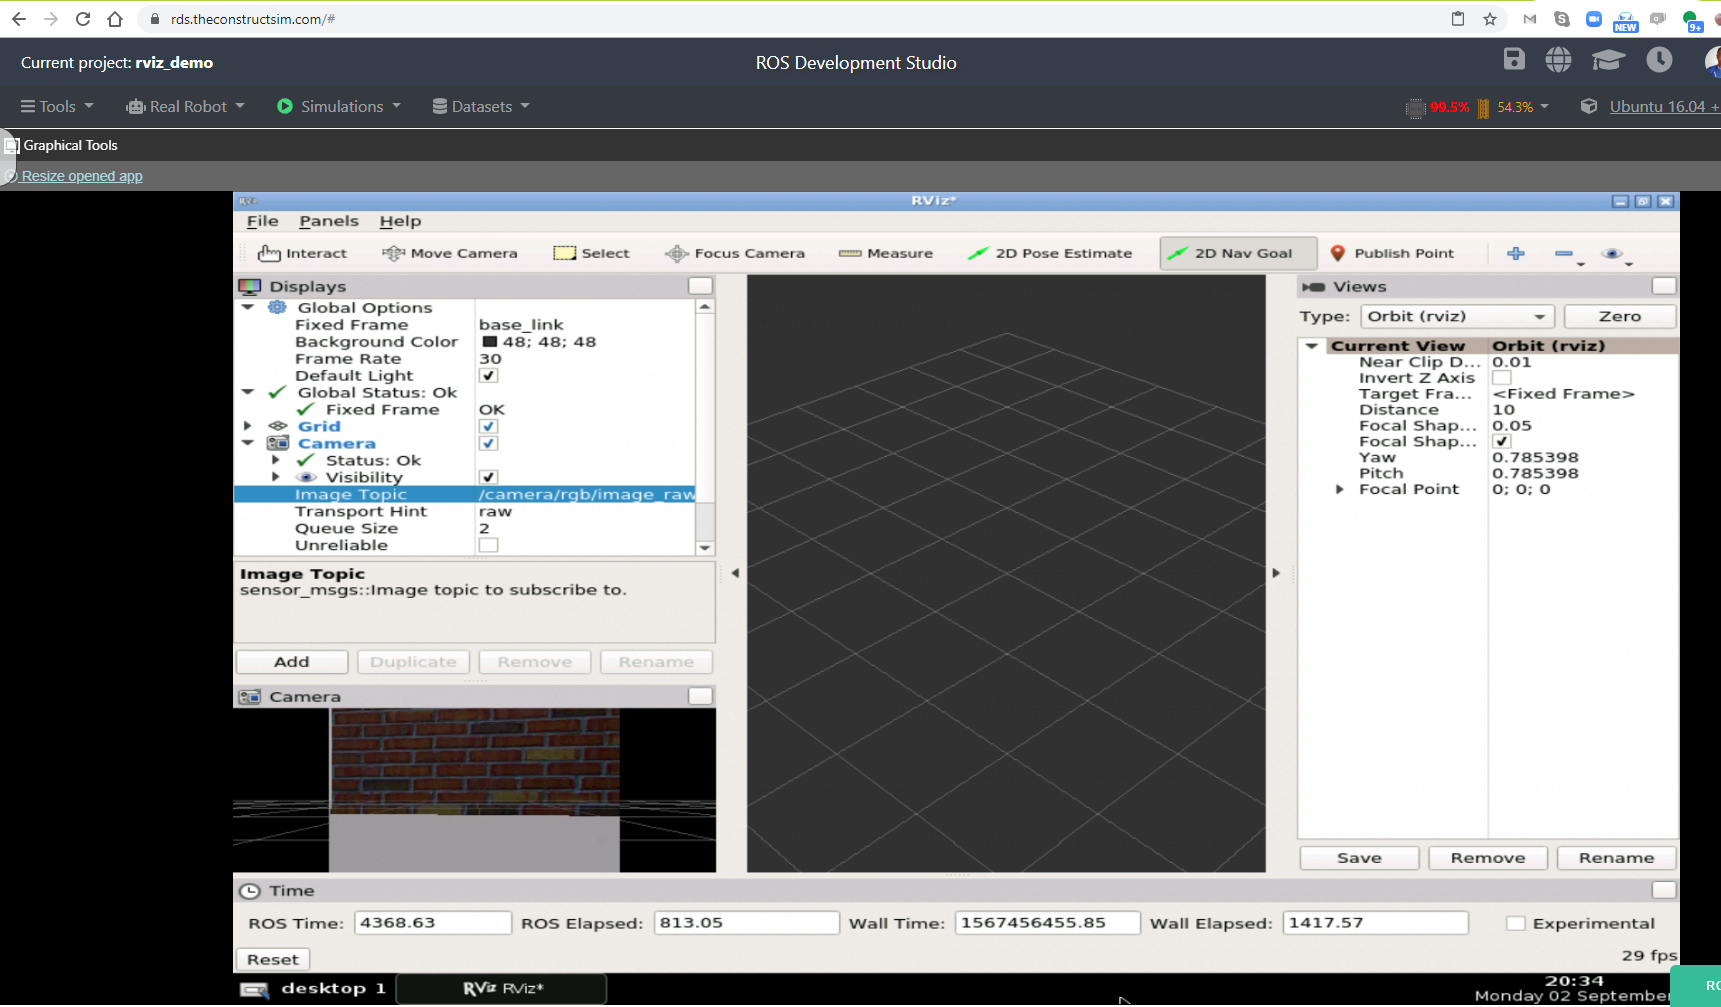
You should now have something like this:
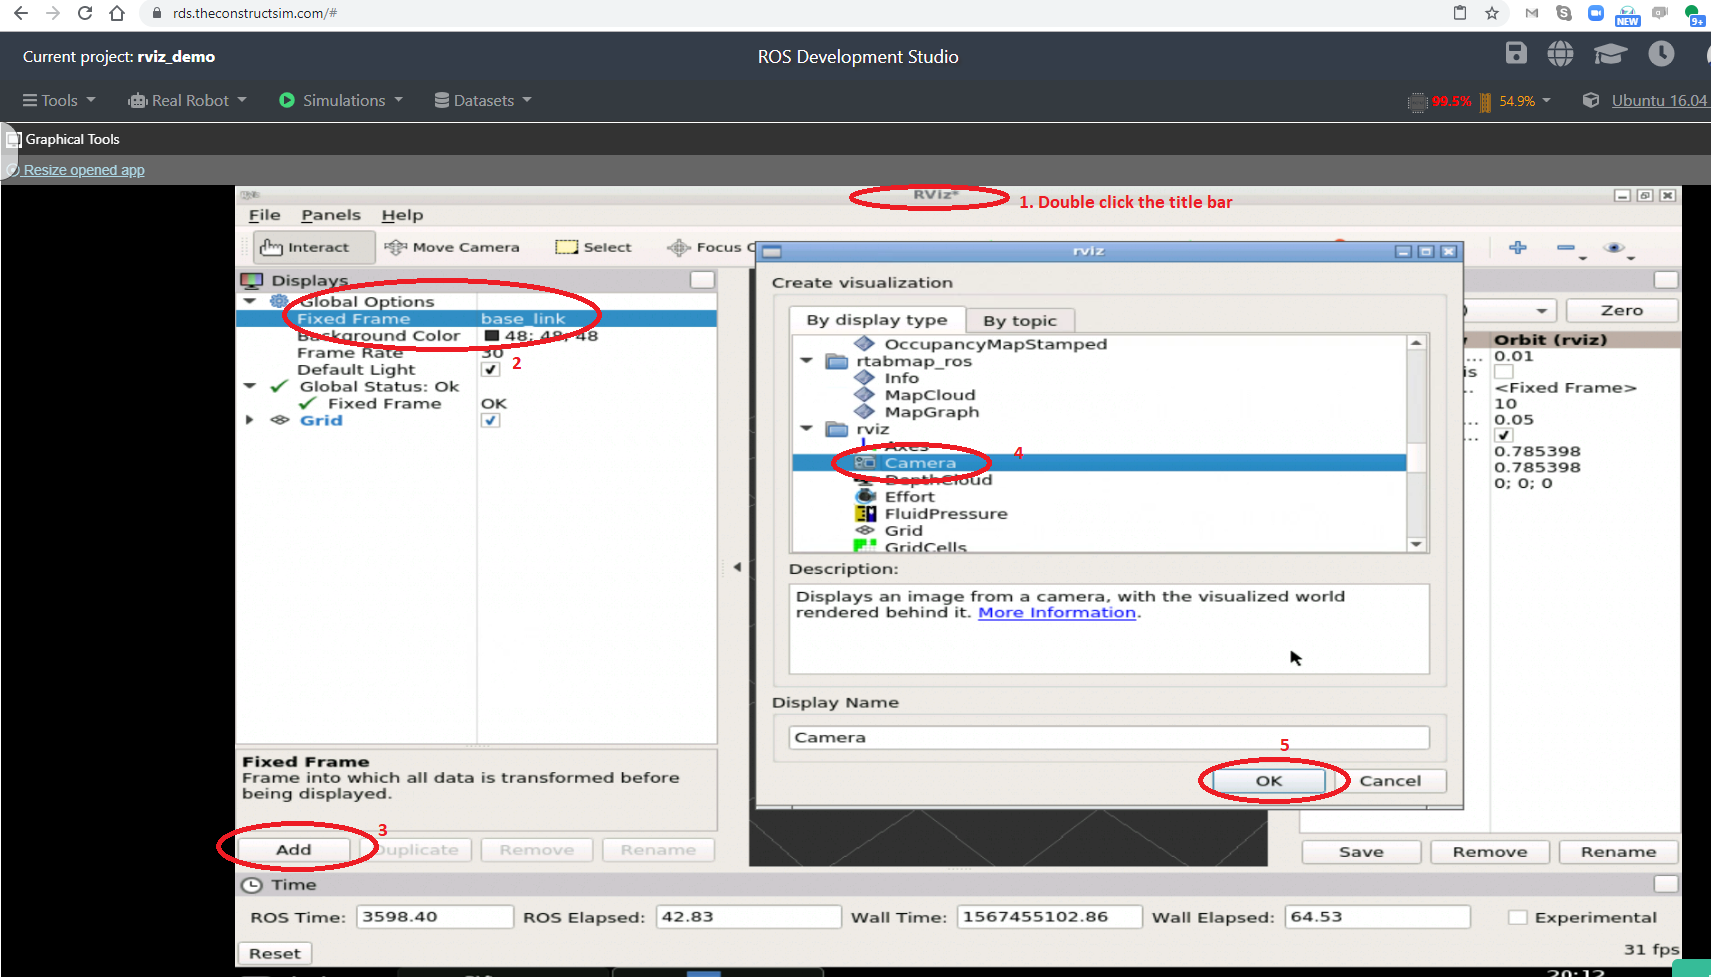
Maximize the Rviz window and:
- Double-click the Title bar to bring the window into full focus. Ensure you can clearly see the “Add” button lablled 3 below.
- Change the “Fixed frame” to “base_link”.
- Click “Add” to add a visualization.
- Select “Camera”
- Click okay.
Semi-finally, select a topic for the Camera visualization. You should see the brick wall in full color now!
Finally, pick another Shell from the Tools menu and run the following command to cause the robot to rotate. You should see the wall in the Camera disappear and appear again as the front camera position changes.
# Just type rostopic pub /cmd_vel and then press TAB-TAB to complete message structure.
# Then change angular.z to 1.0
user:~$ rostopic pub /cmd_vel geometry_msgs/Twist "linear:
  x: 0.0
  y: 0.0
  z: 0.0
angular:
  x: 0.0
  y: 0.0
  z: 1.0"
Interesting, isn’t it? You can try and play with other visualization tools and see how they work.
Now’s let review the theory briefly.
Step 4: So, what’s Rviz?
We have just seen Rviz in action. So what exactly is this amazing tool?
- Short for ROS Visualization. It’s a 3-dimensional visualization tool for ROS.
- It helps to visualize what the robot seeing and doing.
And that’s it. It’s more practical than theory 🙂 .
Extra: Video
Prefer to watch a video demonstrating the steps above? We have one for you below!
Related Resources and Further Learning
If you are a ROS beginner and want to learn ROS basics fast, we recommend you take any of the following courses on Robot Ignite Academy:
Feedback
Did you like this post? Do you have questions about what is explained? Whatever the case, please leave a comment on the comments section below, so we can interact and learn from each other.
If you want to learn about other ROS topics, please let us know in the comments area and we will do a video or post about it




0 Comments