

What we are going to learn
- How to install ROS2 Iron on Ubuntu 22 on your own computer
- How to use ROS without having to install anything
List of resources used in this post
- Your own computer with Ubuntu 22 installed
- The Construct: https://app.theconstructsim.com/
- https://docs.ros.org/en/iron/Installation/Ubuntu-Install-Debians.html
- https://man7.org/linux/man-pages/man7/locale.7.html
- https://help.ubuntu.com/community/Repositories/Ubuntu
- ROS2 Courses –▸
- ROS2 Basics in 5 Days Humble (Python): https://app.theconstructsim.com/Course/132
- ROS2 Basics in 5 Days Humble (C++): https://app.theconstructsim.com/Course/133
Overview
ROS2 is a “framework” for developing robotics applications. Its real-time capabilities, cross-platform support, security features, language flexibility, improved communication, modularity, community support, and industry adoption make it a valuable framework for robotic development.
In this tutorial, we are going to learn how to install it on our own computers.
ROS Inside!

ROS Inside
Before anything else, if you want to use the logo above on your own robot or computer, feel free to download it and attach it to your robot. It is really free. Find it in the link below:
Setting up locales
According to ROS documentation, we need to have support for UTF-8, in order for ROS2 to work properly.
To set up locales for UTF-8 support, we can run the following commands on Ubuntu 22. Let’s start by installing the locales command:
sudo apt update && sudo apt install locales -y
According to locale docs:
A locale is a set of language and cultural rules.  These cover
aspects such as language for messages, different character sets,
lexicographic conventions, and so on.  A program needs to be able
to determine its locale and act accordingly to be portable to
different cultures.
Once the locales package is installed, let’s configure UTF-8 in our system:
sudo locale-gen en_US en_US.UTF-8
sudo update-locale LC_ALL=en_US.UTF-8 LANG=en_US.UTF-8
export LANG=en_US.UTF-8
Now, if we run the locale command we should be able to see UTF-8:
locale
In the output, you should see UTF-8 in all variables that have a value. Something similar to the following:
LANG=en_US.UTF-8
LANGUAGE=
LC_CTYPE=pt_BR.UTF-8
LC_NUMERIC=pt_BR.UTF-8
LC_TIME=pt_BR.UTF-8
LC_COLLATE="en_US.UTF-8"
LC_MONETARY=pt_BR.UTF-8
LC_MESSAGES="en_US.UTF-8"
LC_PAPER=pt_BR.UTF-8
LC_NAME=pt_BR.UTF-8
LC_ADDRESS=pt_BR.UTF-8
LC_TELEPHONE=pt_BR.UTF-8
LC_MEASUREMENT=pt_BR.UTF-8
LC_IDENTIFICATION=pt_BR.UTF-8
LC_ALL=
Setting up repositories
Now that the locale is ready for UTF-8, let’s enable the repositories we need for installing ROS.
Let’s start enabling the Universe Repository (which contains community-maintained free and open-source software),
sudo apt install software-properties-common -y
sudo add-apt-repository universe
Now that the repository has been added, let’s get the ROS2 GPG key, necessary when downloading the ROS2 packages:
sudo apt update && sudo apt install curl -y
sudo curl -sSL https://raw.githubusercontent.com/ros/rosdistro/master/ros.key -o /usr/share/keyrings/ros-archive-keyring.gpg
Now we need to add the ROS2 repository to the list of enabled repositories from where we can download packages. The repository is added to the /etc/apt/sources.list.d/ros2.list file using the following command:
echo "deb [arch=$(dpkg --print-architecture) signed-by=/usr/share/keyrings/ros-archive-keyring.gpg] http://packages.ros.org/ros2/ubuntu $(. /etc/os-release && echo $UBUNTU_CODENAME) main" | sudo tee /etc/apt/sources.list.d/ros2.list
Installing ROS 2 development tools
If you are interested in installing ROS, you are probably going to create some packages, build the workspace, etc. For that, it is recommended to install the development tools.
These tools can be installed using the following command:
sudo apt update && sudo apt install ros-dev-tools -y
Upgrading packages, and Installing ROS 2 Iron
Now that we have all the requirements in place, we can install ROS2 Iron, but before we do that, since ROS leverages existing tools, let’s upgrade the packages installed on our system in order to have the most recent changes on the programs that are already installed.
sudo apt update

sudo apt-get upgrade -y
Now that we have all base packages upgraded, we can install ROS, the Desktop version using the next command:
sudo apt install ros-iron-desktop -y
Testing the ROS 2 installation
Now that ROS is installed, let’s run an example of a node named talker that publishes a message to a topic called /chatter.
Before running a node, we need to “enable” the ROS installation. We do that using the source command:
source /opt/ros/iron/setup.bash
Now that the current terminal is aware of ROS, we can run the talker with the command below:
source /opt/ros/iron/setup.bash
ros2 run demo_nodes_py talker
If everything went ok, you should see an output similar to the following:
[INFO] [1696342010.719351116] [talker]: Publishing: "Hello World: 0"
[INFO] [1696342011.707609990] [talker]: Publishing: "Hello World: 1"
[INFO] [1696342012.707533232] [talker]: Publishing: "Hello World: 2"
[INFO] [1696342013.707451283] [talker]: Publishing: "Hello World: 3"
[INFO] [1696342014.707842625] [talker]: Publishing: "Hello World: 4"
[INFO] [1696342015.706340664] [talker]: Publishing: "Hello World: 5"
[INFO] [1696342016.707204262] [talker]: Publishing: "Hello World: 6"
[INFO] [1696342017.707310619] [talker]: Publishing: "Hello World: 7"
[INFO] [1696342018.707408333] [talker]: Publishing: "Hello World: 8"
[INFO] [1696342019.707478561] [talker]: Publishing: "Hello World: 9"
[INFO] [1696342020.706401798] [talker]: Publishing: "Hello World: 10"
[INFO] [1696342021.707534531] [talker]: Publishing: "Hello World: 11"
[INFO] [1696342022.706507971] [talker]: Publishing: "Hello World: 12"
[INFO] [1696342023.706325651] [talker]: Publishing: "Hello World: 13"
[INFO] [1696342024.706483290] [talker]: Publishing: "Hello World: 14"
...
In another terminal, you can also run the listener node, which subscribers to the /chatter topic and prints to the screen what the talker node “said”:
source /opt/ros/iron/setup.bash
ros2 run demo_nodes_py listener
The output should be similar to this:
...
[INFO] [1696342081.719585297] [listener]: I heard: [Hello World: 71]
[INFO] [1696342082.709465778] [listener]: I heard: [Hello World: 72]
[INFO] [1696342083.709447192] [listener]: I heard: [Hello World: 73]
[INFO] [1696342084.709592572] [listener]: I heard: [Hello World: 74]
[INFO] [1696342085.708058493] [listener]: I heard: [Hello World: 75]
[INFO] [1696342086.708537524] [listener]: I heard: [Hello World: 76]
[INFO] [1696342087.708396171] [listener]: I heard: [Hello World: 77]
...
Using ROS on The Construct (not having to install ROS on your own computer)
Alright, we learned how to install ROS on Ubuntu 22. Turns out that some people may not have a computer with Linux Ubuntu 22 installed, and do not want all the hassle of installing ROS locally.
Thank God we have The Construct, a platform that allows us to use ROS 2 online without having to install anything.
In order to use ROS, you just have to first create an account, create a rosject, and then “run” the rosject. Below we have the step-by-step process.
- First, create your account at https://app.theconstructsim.com/
- After authenticated, you go to the My Rosjects page and click the “Create a new rosject” button: https://app.theconstructsim.com/rosjects/my_rosjects
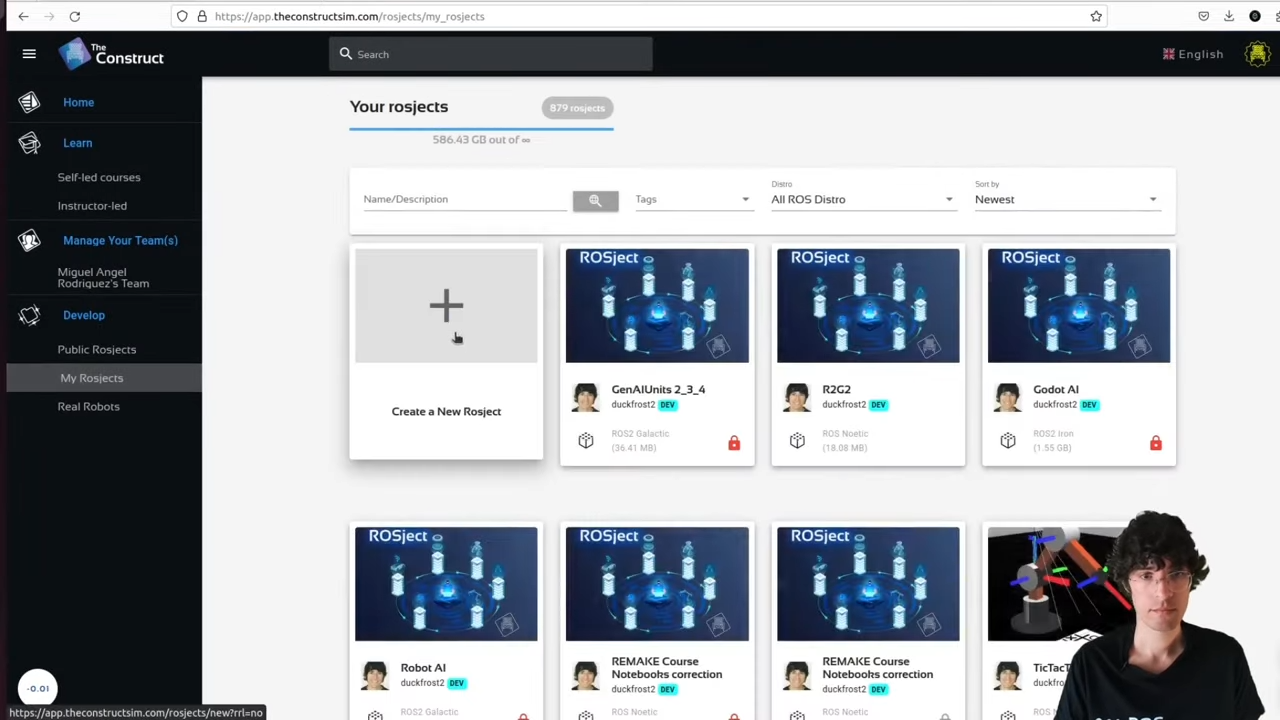
Create a new rosject
- On the Create rosject form, you select the ROS Distribution that you want to use (you can choose ROS Humble, ROS Iron, etc)
- Once the rosject is created, you can just press RUN to start the ROS environment. Something similar to what we can see in the image below:
 RUN rosject

After the environment is running, you can just open a terminal and start creating and running your ros programs:
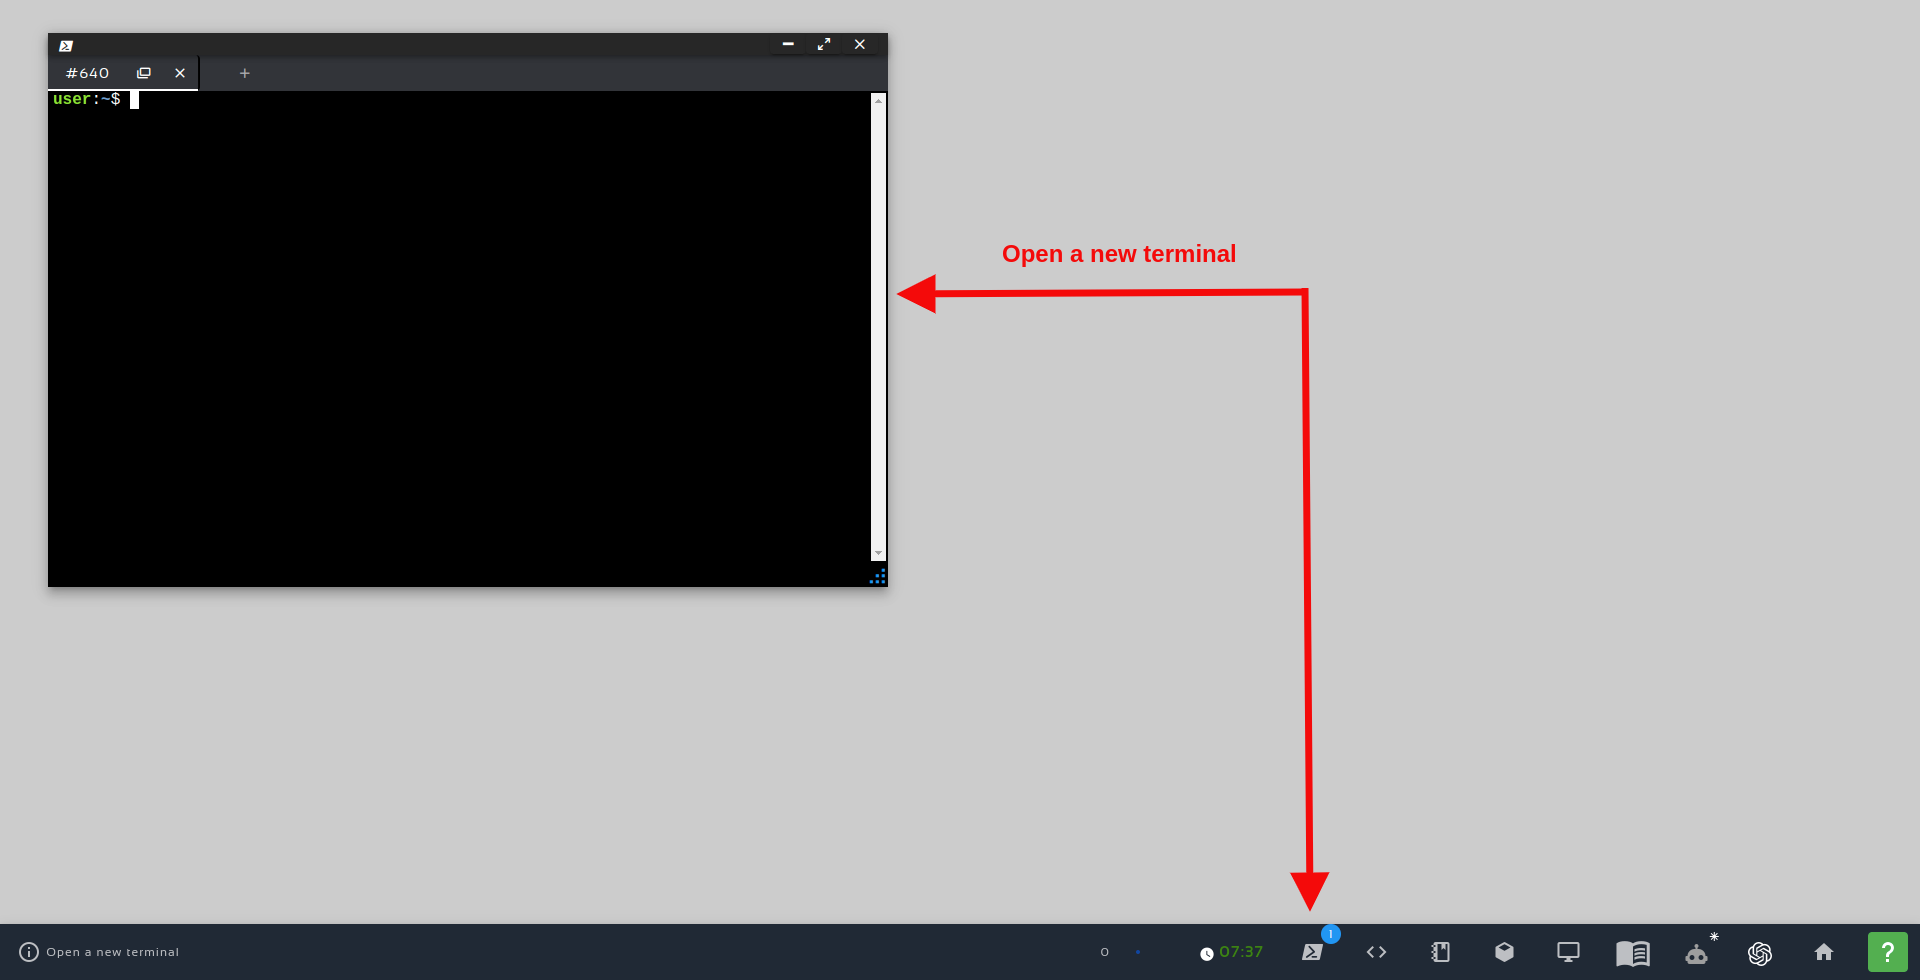
Open a new Terminal
And that is basically it
Congratulations. Now you know how to install ROS2 on your own computer, and also know The Construct, a platform where you can program our ROS projects with ease.
We hope this post was really helpful to you. If you want a live version of this post with more details, please check the video in the next section.
Youtube video
So this is the post for today. Remember that we have the live version of this post on YouTube. If you liked the content, please consider subscribing to our YouTube channel. We are publishing new content ~every day.
Keep pushing your ROS Learning.
Related Courses & Training
If you want to learn more about ROS and ROS2, we recommend the following courses:
-
- ROS2 Basics in 5 Days Humble (Python): https://app.theconstructsim.com/Course/132
- ROS2 Basics in 5 Days Humble (C++): https://app.theconstructsim.com/Course/133
- Open-RMF / Fleet Management Training: https://www.theconstruct.ai/robot-fleet-management-ros2-open-rmf-training/

Get ROS2 Industrial Ready- Hands-On Training by The Construct cover.png
 2026 Brochure Header - 1")


0 Comments